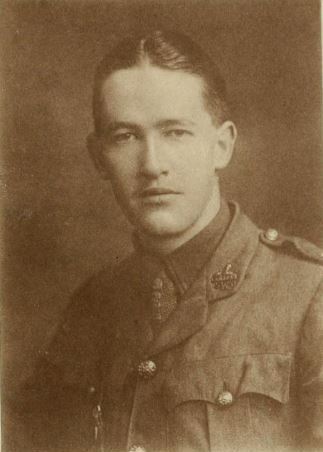
Lieutenant John Henry Harford. In: Harrow Memorials of the Great War, Vol. 4 (1919), Source: Internet Archive.
Lieutenant John Henry Harford of the 3rd (Special Reserve) Battalion, South Wales Borderers was killed-in-action leading a raid on the Somme front near Gueudecourt on the 26th October 1916, aged 20, while attached to the 2nd Battalion of the the regiment.
While I have no connection with the family of Lieutenant Harford, I first came across his name while researching those named on the Durnford School war memorial plaques in the Church of St George, Langton Matravers (Dorset). I immediately recognised the Harford family name from the three years that I’d spent as an undergraduate at St David’s University College, Lampeter (now the Lampeter campus of the University of Wales Trinity Saint David).
The Harford name was quite prominent at Lampeter: the college had two halls of residence carrying the name and there was also a Harford Square in the town centre. Falcondale (the old family home) had become a hotel that I would frequently pass while out walking (I even organised a society dinner there once).

Lampeter: St David’s University College, ca. 1986 (Ceredigion)
In fact, the college itself owed its existence at Lampeter to the Harford family. In 1820, when the Rt. Rev. Thomas Burgess, the Bishop of St Davids, was still searching for a suitable site for his proposed new college, John Scandrett Harford, junr. offered him the Castle Field at Lampeter, part of an estate that had recently come into his and two of his brothers’ hands. The Bishop was only too pleased to accept. D. T. W. Price has noted that the College had gained in Harford “a generous patron, who kept the project in motion, became a Sub-Visitor, and began an abiding family interest in its work” [1].
John Henry Harford, the subject of this post, was the great-grandson of Abraham Gray Harford-Battersby, the younger brother of John Scandrett Harford, junr. [2].
This (fairly lengthy) post will provide accounts of the life and military service of Lieutenant Harford and the units in which he served, specifically the 2nd Royal Fusiliers at Cape Helles on the Gallipoli peninsula in 1915, and the 2nd South Wales Borderers at Beaumont Hamel and Gueudecourt on the Somme in 1916. The final sections will explore Lieutenant Harford’s life and family background in more detail.
School memorial books:
Short accounts of Lieutenant J. H. Harford’s life and death appeared in the memorial books published by his two schools. The shorter of the two was published by Harrow School as part of Harrow Memorials of the Great War. As well as providing information on his school house and sporting achievements, this also provided a succinct account of his service career and an account of the trench raid in which he died [3]:
LIEUTENANT J. H. HARFORD
South Wales Borderers
Moretons 10′-14′
Aged 20
October 26th, 1916
Eldest son of John Charles Harford, of Blaise Castle, Henbury, and Falcondale, Lampeter, and of Blanche Amabel, second daughter of the Right Hon. St. John Raikes, late Postmaster-General.
Was Captain of his House at Cricket and House Racket-player, and won the Cross Country Race in 1914.
Lieutenant Harford had matriculated at Magdalen College, Oxford, but never went into residence, joining instead the 3rd Battalion, South Wales Borderers, in September, 1914. In May, 1915, he was sent to Mudros, being attached to the 2nd Royal Fusiliers, and was severely wounded in Gallipoli by shrapnel, on June 30th, 1915. After being in hospital at Alexandria he was sent home and rejoined the South Wales Borderers in December, 1915. In March, 1916, he was sent with a draft to Egypt, and was transhipped to France the following month, being attached to the 2nd Battalion.
He was killed during a night patrol on October 26th, 1916. He was lying in a shell-hole close to the German trench attempting to locate the wire, when the enemy sent up Very lights and, in trying to confirm his work, he showed himself and was shot dead by a German sniper.
His Colonel wrote:– “He always stuck it and always carried out whatever orders were given him with the utmost cheerfulness.”
The Chaplain wrote:– “He went to his death like a gallant gentleman,” and all his brother-officers wrote in the same strain of his pluck, and of his cheerful discharge of duty.
A fuller account of Lieutenant Harford’s life was published in the memorial book of his preparatory school, The Durnford Memorial Book of the Great War, 1914-1918 [4]:
JOHN HENRY HARFORD, born 7th February 1896 was the elder son of Major J. C. Harford, of Falcondale, Lampeter. He was at Durnford for the four years 1906-1910, where he was followed by his younger brother Arthur, and then went on to Harrow. There he distinguished himself alike as an athlete and a scholar. He was in the Sixth Form, Captain of the House Cricket XI, gained his House Racquets colours, and won both the Junior and Senior Steeplechases. Had not the War intervened, he would have gone on from Harrow to Oxford, where he had already matriculated, having entered for Magdalen in the autumn of 1914. Immediately, however, that the War broke out, all idea of Oxford was set aside, and he had the happiness of finding himself gazetted early in September to the 3rd (Special Reserve) Battalion of the South Wales Borderers. After eight months’ home service he was attached to the 2nd Royal Fusiliers [part of 86th Infantry Brigade, in the 29th Division], whom he joined at Mudros. With them he served in Gallipoli until he was severely wounded by shrapnel at the end of June 1915. After treatment in hospital at Alexandria, he was evacuated to England, where he rejoined his own Battalion. He remained with them, however, but a short time, for in March 1916 he was once more drafted out to Egypt, this time to be attached to the 2nd Battalion of his own Regiment [part of 87th Brigade, 29th Division], which a few months later was transferred to France. Here on 26th October 1916 he was killed near Gaedecourt [i.e. Gueudecourt] while on night patrol in front of our line. His body was never recovered.
The manner of Johnny Harford’s death throws much light on his character. It was important to know the condition of the wire in front of the enemy trenches, and a patrol of three, with John in command, was sent out to reconnoitre it. To crawl up to the enemy line at night tests a man as do few other tasks. The darkness, the period of absolute silence, broken by the sudden rattle of a machine gun and the swish of bullets in the long grass, are themselves sufficiently trying, but far worse is the constant firing of Verey lights, which, bursting high in the air, drift slowly to earth, illuminating each ridge and hollow with a cold, vivid, penetrating light. When a light is in the air, the only hope of avoiding detection consists in lying motionless on the ground. Since, however, the illumination enables one to see as well as to be seen, John took the risk, a risk which he must have fully appreciated, of standing up so as to get the best possible view of the wire which it was his duty to reconnoitre. The little party were seen and fired on. John and one of his men were shot instantly, but the other succeeded in getting back to our lines to make his report.
Fear John did not know. His eyes, set rather far apart beneath a splendid forehead, told their own story. Frank and unflinching, they had at the same time the interrogative note which indicates power of reflection as well as of action, while his strong mobile mouth and wide jaw contributed not a little to a face which showed that he had both charm and depth of character.
“I am sure that I shall be killed, but I am quite ready to die for my country” he wrote in a letter found after his death; yet he was only twenty when he died. The full measure of England’s loss through the War has not even yet been taken, for it is in the future years that she will feel most of all the absence from her midst of those who like John had been trained for leadership, had proved their mettle, and yet are no longer here to take their share in the work that lies ahead.
Service history:
Please note that one of the pieces of evidence that I have not been able to consult while compiling this post has been Lieutenant Harford’s service records, which are part of the WO 339 series (War Office: Officers’ Services, First World War) now held by The National Archives (WO 339/25521) [5]. It is possible that they may be able to clarify certain points in the following narrative, and I will try to call them up on my next visit to Kew.
The school memorial book entries note that John Henry Harford was just about to commence studying at Magdalen College, Oxford when the First World War broke out. Instead of taking up his place, therefore, he enlisted, and was gazetted early in September 1914 to the 3rd (Special Reserve) Battalion of the South Wales Borderers (SWB). As their name suggests, reserve battalions of the British Army were not active service units in their own right, but provided a pool of reinforcements that could be posted or attached to front-line battalions. Lieutenant Harford himself served with two regular battalions of the 29th Division: the 2nd Battalion, Royal Fusiliers (86th Brigade), and then the 2nd Battalion of his own regiment (87th Brigade).
The 2nd Battalion, Royal Fusiliers at Gallipoli:
For most of the First World War, the 2nd Battalion, Royal Fusiliers (City of London Regiment) formed part of 86th Infantry Brigade in the 29th Division [6]. The 29th had been formed in January 1915 from Regular Army battalions that had recently returned from garrisons based all over the world. The 2nd Royal Fusiliers had been based at Calcutta, but returned to the UK in December 1914.
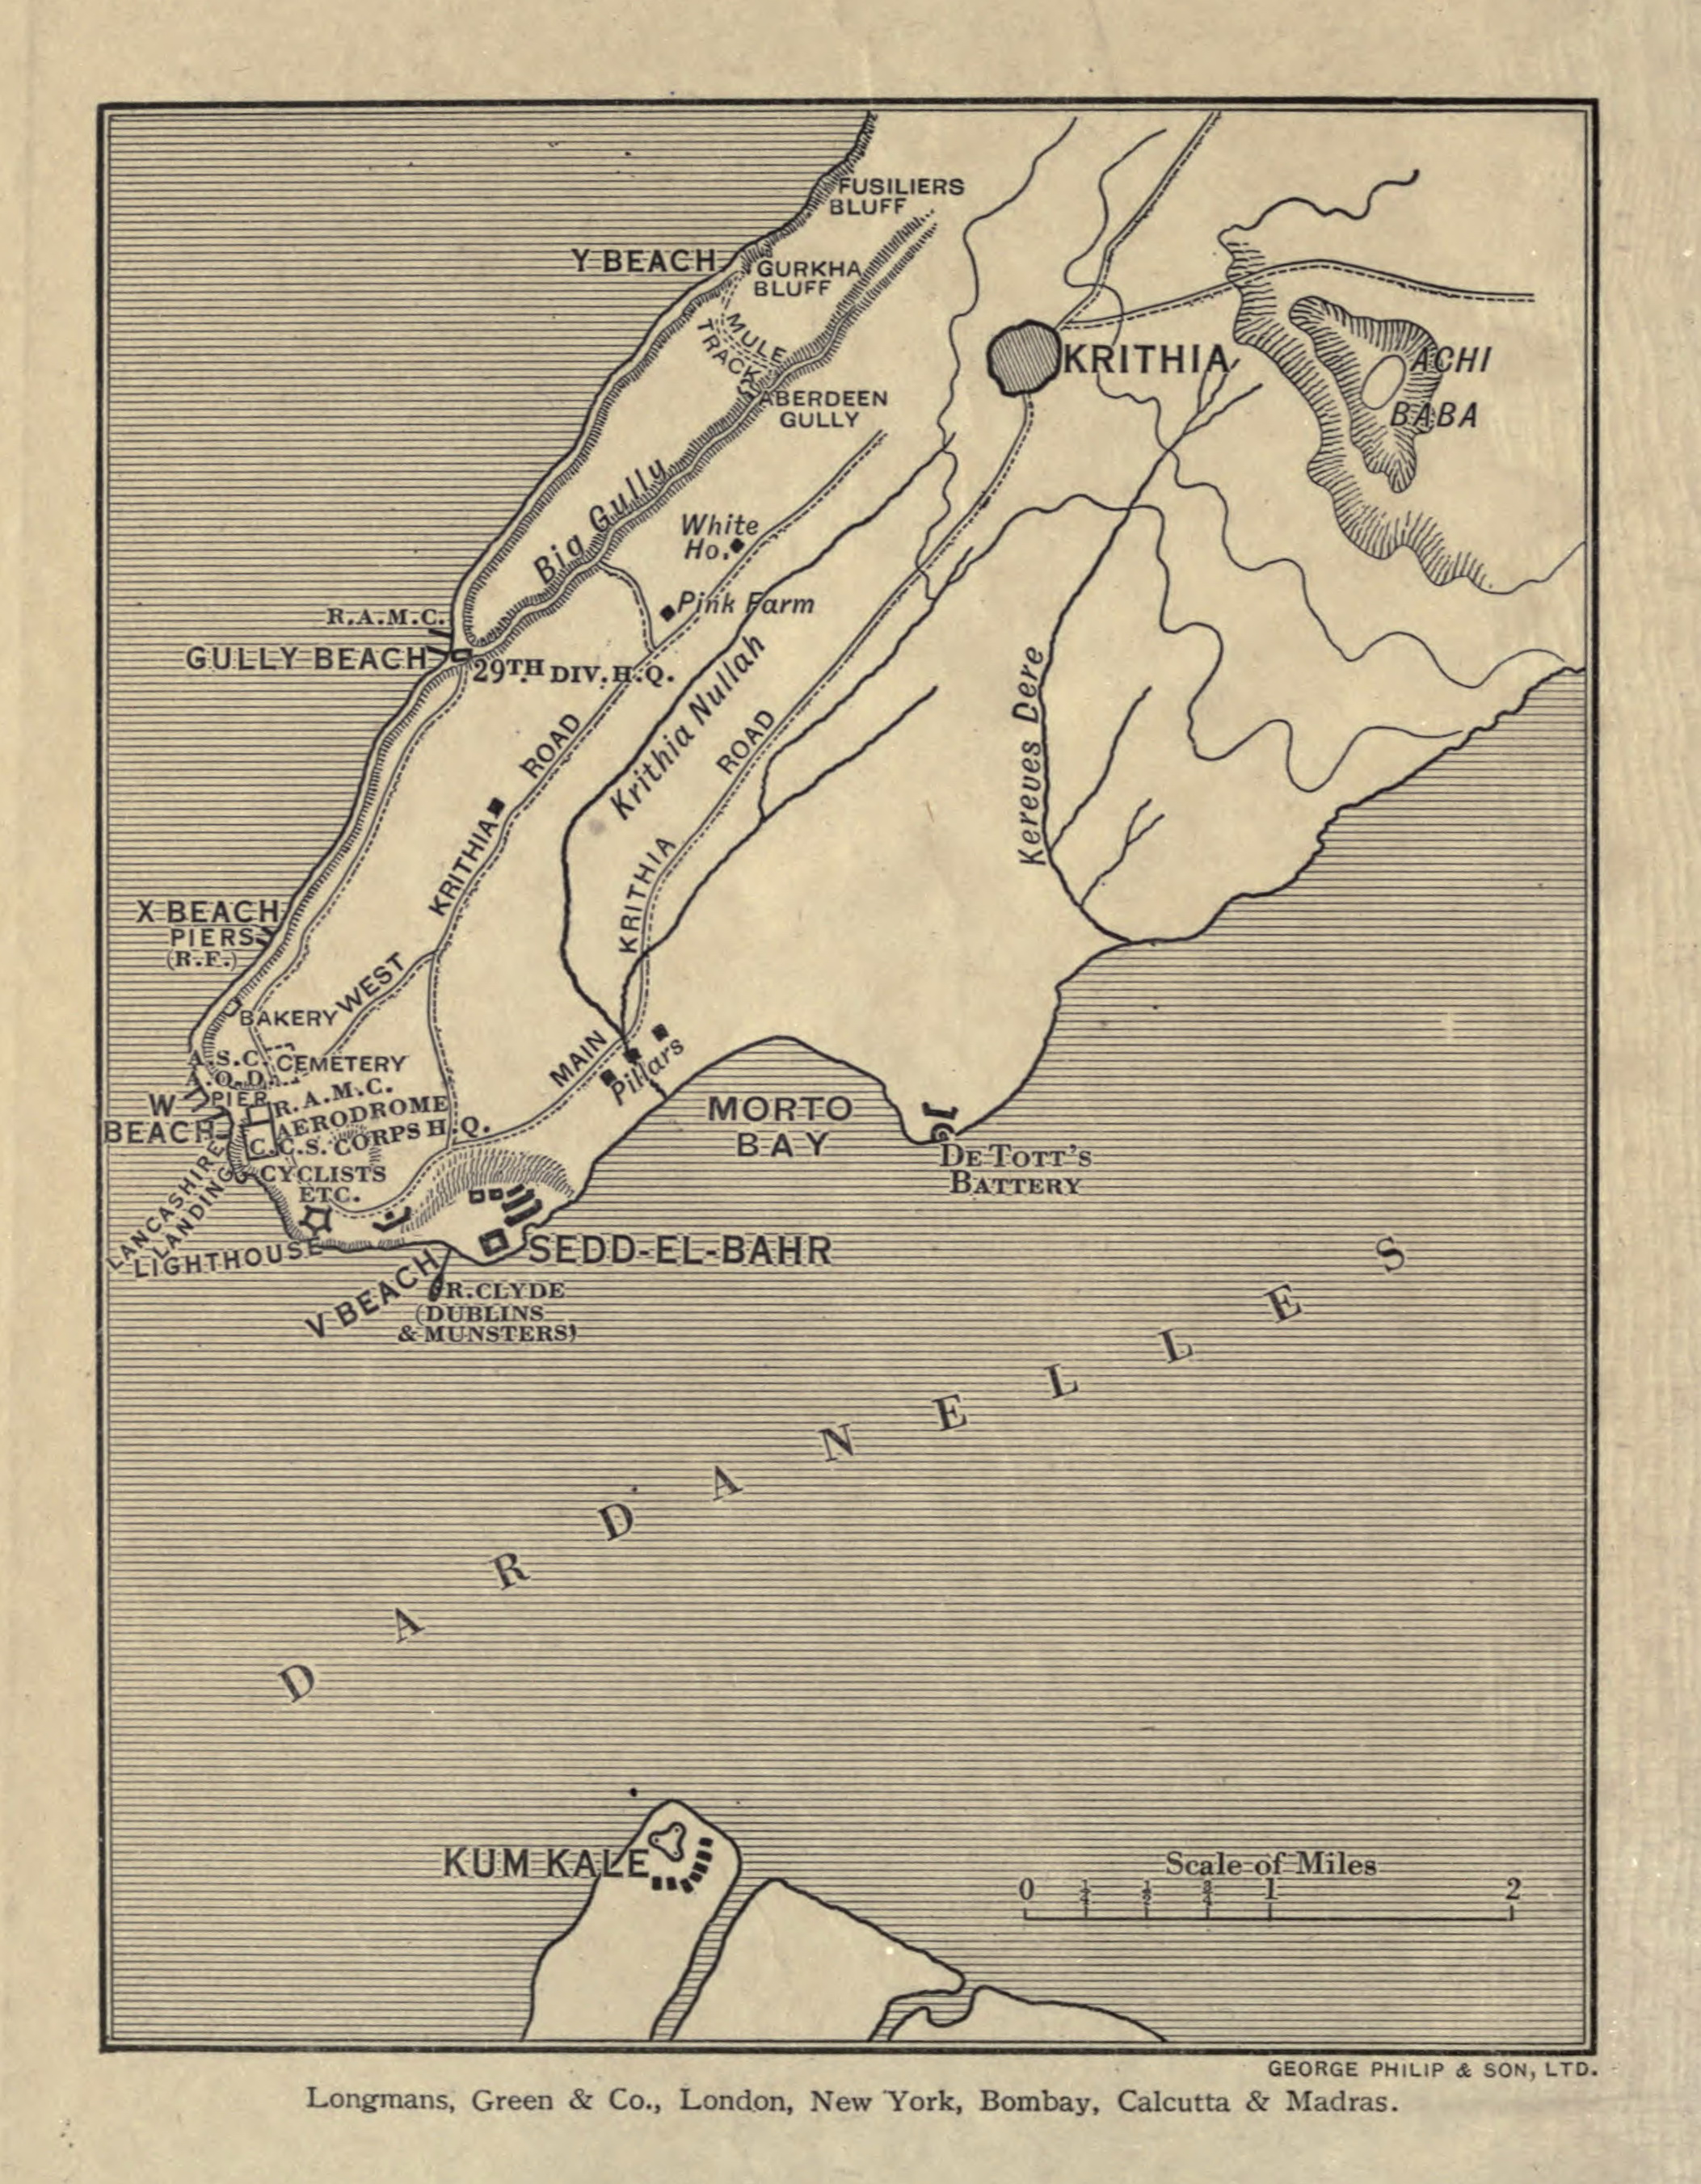
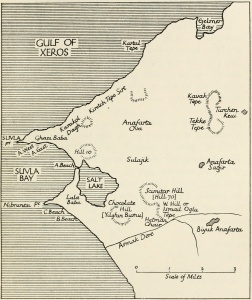
The Helles Peninsula. From: Oswin Creighton, With The Twenty-Ninth Division In Gallipoli (1916). Source: Internet Archive.
The 29th Division landed on the Gallipoli peninsula on the 25th April 1915. They had left Avonmouth in March 1915, reforming at Alexandria in preparation for the landings. They then sailed on to Mudros, on the Greek island of Lemnos.
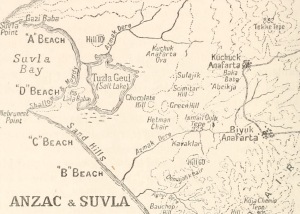
The invasion plan for Gallipoli was ambitious. There were to be two main amphibious landings. Troops of the Australian and New Zealand Army Corps (ANZAC) would land near Gaba Tepe (Anzac Cove) on the west coast of the Gallipoli peninsula. Simultaneously, the 29th Division was to land at five separate points around Cape Helles, from where they would attempt to combine and capture the higher ground around Achi Baba. The main landings of the 29th Division were to be made at the tip of the peninsula, at points designated as V and W beaches, with additional landings on each flank at S and X beaches. A separate landing further up the west coast at Y beach was designed to act as a diversion [7].
The very first landings on the 25th April 1915 were made at Y beach, with the 1st Kings Own Scottish Borderers (87th Brigade) first on shore, followed by two Companies from the 2nd South Wales Borderers (also 87th Brigade) and the Plymouth Battalion of the Royal Naval Division.
On the southern flank, the two remaining Companies from the 2nd South Wales Borderers (87th Brigade) landed almost unopposed at S beach on the southern flank, capturing De Tott’s Battery on the east side of Morto Bay.
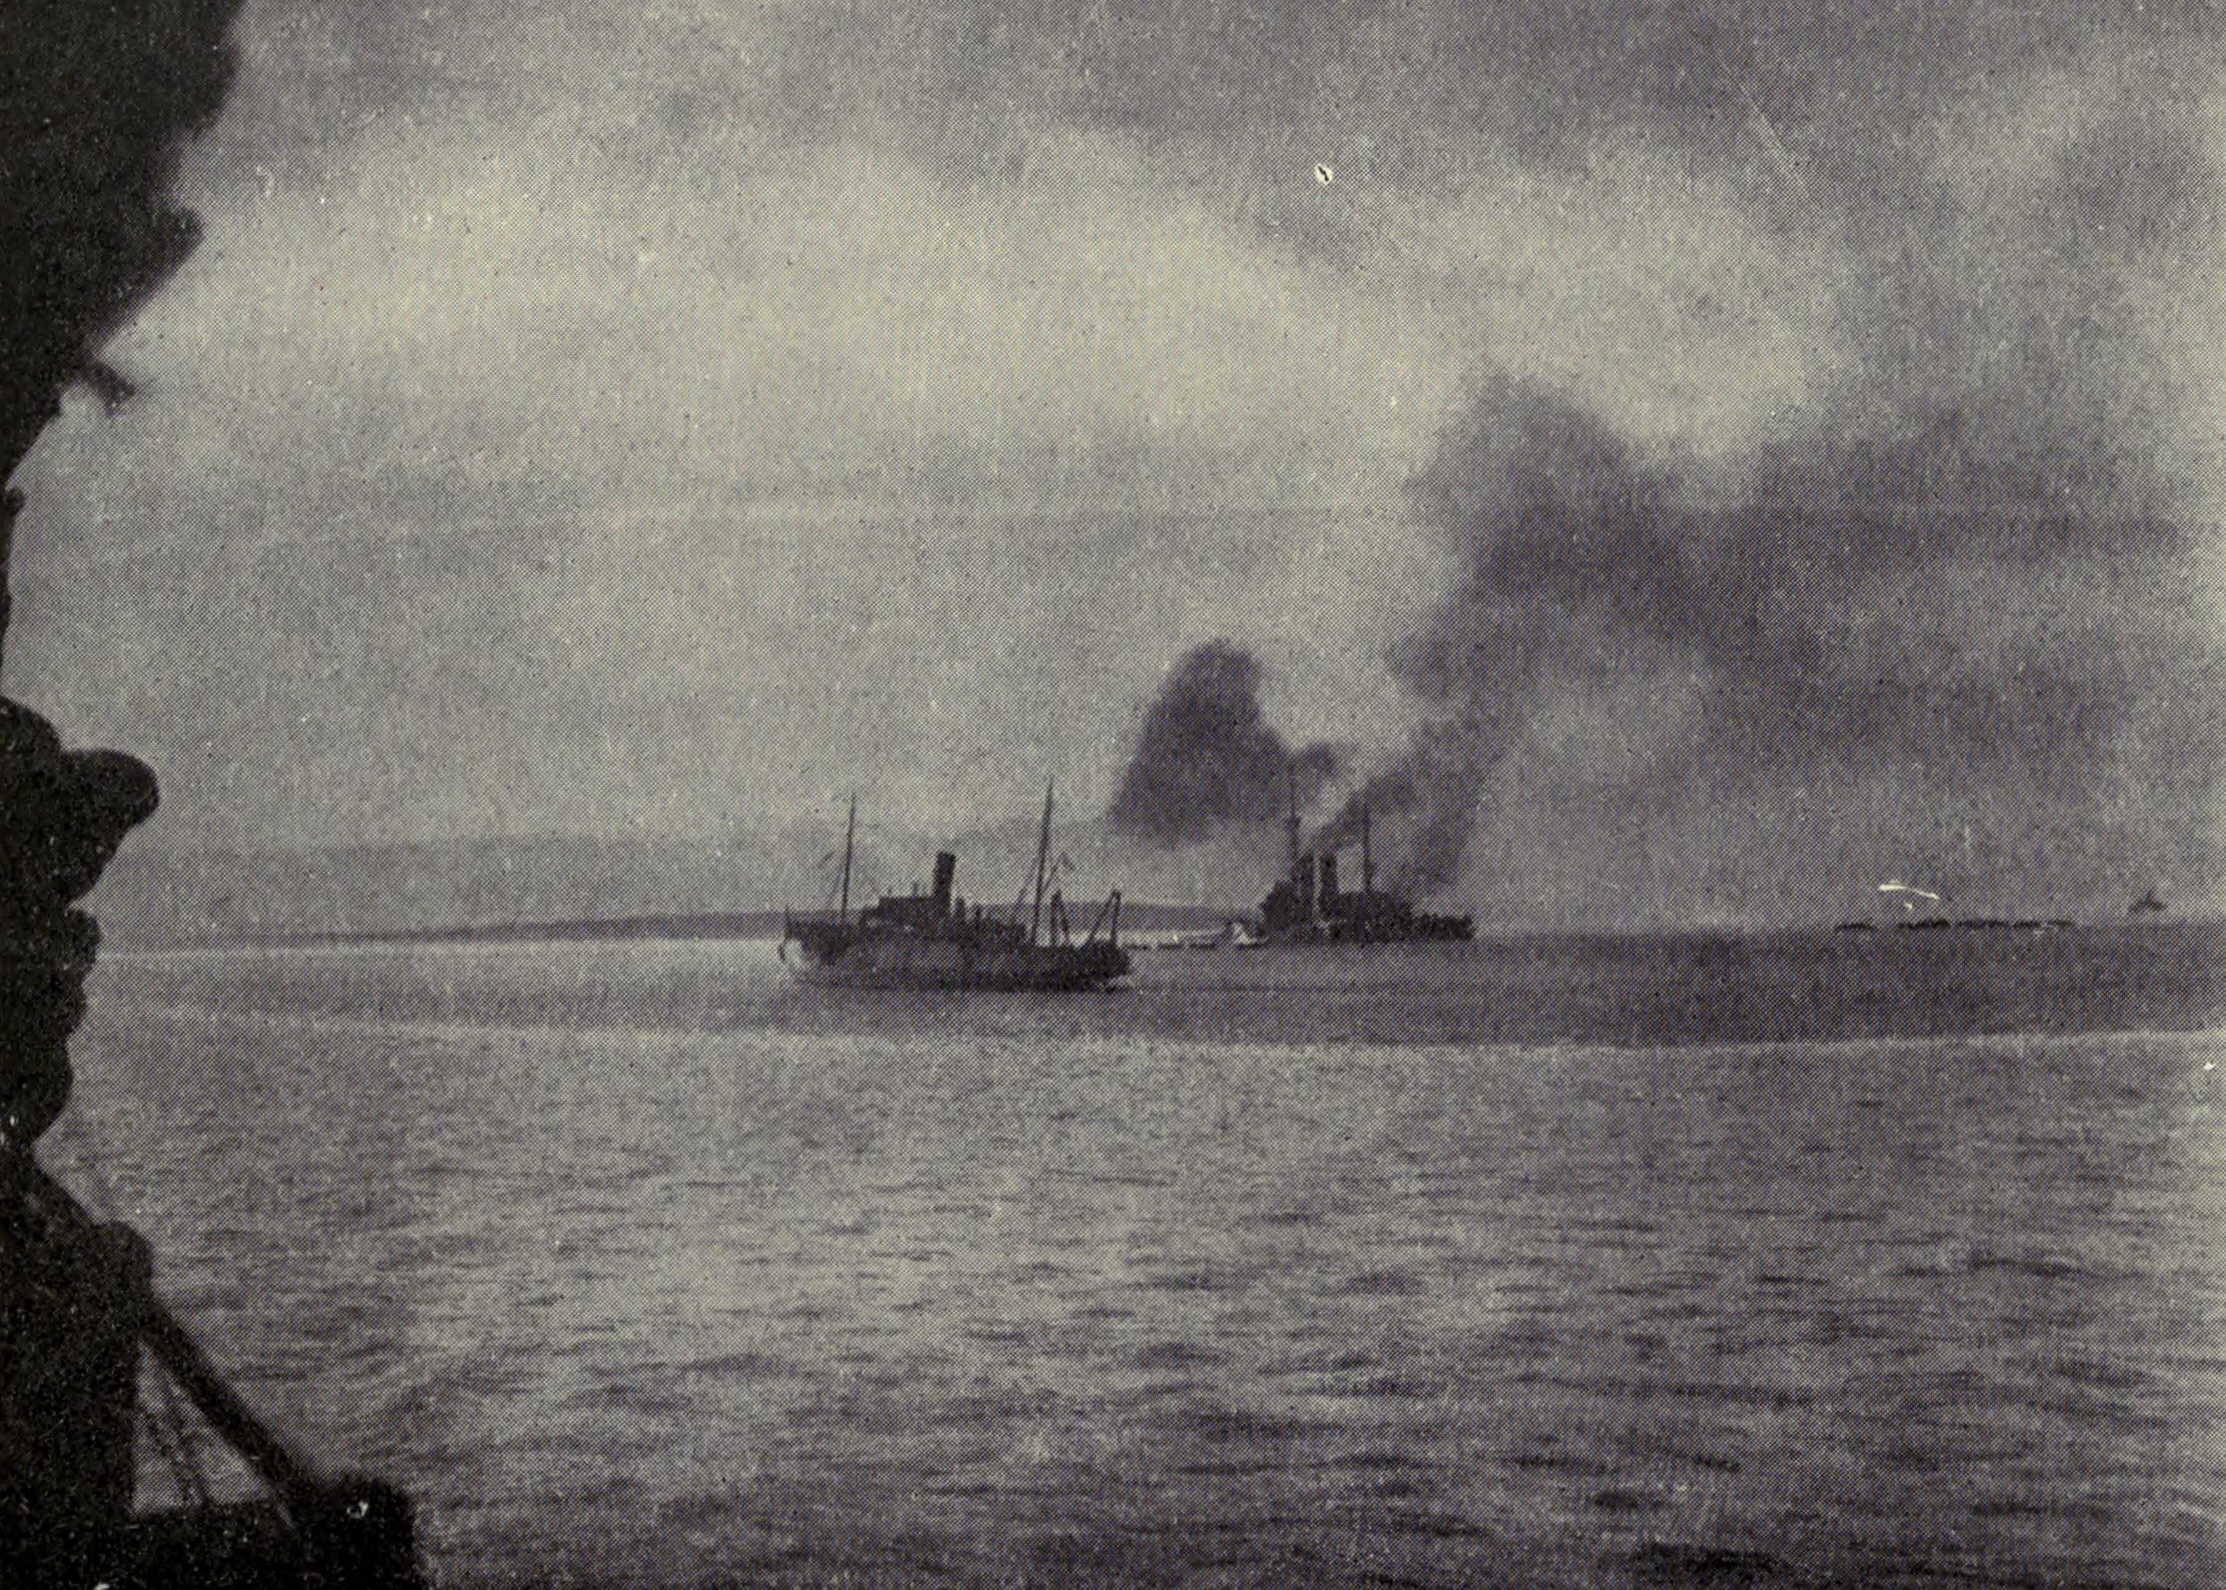
HMS Implacable heading for X beach, 25 April 1915. From: Oswin Creighton, With the Twenty-Ninth Division in Gallipoli (1916). Source: Internet Archive.
On the northern flank, the 2nd Royal Fusiliers landed at X Beach (Ikiz Koyu) followed by the 1st Battalions of the Royal Inniskilling Fusiliers and the 1st Border Regiment (87th Brigade), the landing being supported by the guns of HMS Implacable. The 2nd Royal Fusiliers were the first ashore [8]:
At 6 a.m. the 2nd Royal Fusiliers landed half their strength under cover of a withering bombardment by the guns of the Implacable (Captain H.C. Lockyear, R.N.). The remainder followed with all speed, the whole battalion being landed in two successive tows of six boats each.
[…]
Their immediate objective was Hill 114, the capture of which was essential to the support of the Lancashire Fusiliers at W [beach]. This important tactical movement was executed with great determination, and by 11 a.m. Hill 114 was ours.
The main landings at W and V beaches, however, were much more strongly opposed. At W beach, the 1st Lancashire Fusiliers (86th Brigade) were the first ashore, landing in open boats, finding the beach well-defended by machine guns and barbed wire [9]. There were many casualties, and members of the battalion were afterwards awarded six Victoria Crosses for their actions at what became known as Lancashire Landing [10]. The Lancashires were followed onto the beach by the 1st Essex Regiment and two Companies of the 1st Battalion, Hampshire Regiment (88th Brigade).

Chepstow: Gun from submarine SM UB-91 (Monmouthshire), presented to the town in honour of Able Seaman William Charles Williams, RN, who was awarded the VC for his actions at V beach. Source: Flickr.
At V Beach, to the south of Cape Helles and close to the old fort at Sedd el Bahr, the 1st Royal Dublin Fusiliers (86th Brigade) landed from boats, while the 1st Royal Munster Fusiliers (also 86th Brigade) and the two remaining Companies of the 2nd Hampshires (88th Brigade) attempted to follow, landing via an old collier, the River Clyde, which was deliberately run aground as a ‘wreck ship,’ a kind of modern-day Trojan Horse. V beach, just like W beach, was very-well defended, and the Dublins struggled to get ashore. Liddell Hart’s History of the First World War grimly noted that, “the invaders ran, like gladiators, into a gently sloping arena designed by nature and arranged by the Turks — themselves ensconced in surrounding seats — for a butchery” [11]:
The tows, checked by the current, were caught up by the River Clyde, and as it grounded hell yawned. In the incoming boats oars dropped like the wings of scorched moths, while the boats drifted helplessly with their dead and wounded.
Those landing from the River Clyde were no more fortunate. [By the time darkness fell, the small number of those that had managed to land were still trapped on the beach.] Victoria Crosses were afterwards awarded to six members of the Royal Navy, Royal Naval Reserve, and Royal Naval Division who had worked hard under fire to keep the landing going and to help withdraw casualties [12]. Three more VCs were awarded for the eventual capture of the fort at Sedd el Bahr the following day [13].
The result was that, while the 29th Division had managed to get ashore (at considerable cost) and secure a foothold on the Gallipoli peninsula, the delays caused by the intensity of the fighting at V and W beaches, combined with a general lack of co-ordination, meant that the opportunity to capture Achi Baba (and to link up with the ANZAC force) was lost. Liddell Hart was particularly scathing about the commanding officer of 29th Division, Hunter-Weston, who, in the hours following the landing, continued to focus his attention on the beaches where Turkish opposition had been strongest, while ignoring the opportunities provided by those forces that had managed to successfully get ashore elsewhere (especially at Y beach) [14].
Without access to Lieutenant Harford’s service records, it is not possible for this post to state with certainty the exact dates that he arrived at Mudros or Helles. The Durnford School memorial book merely states that he joined his new battalion at Mudros and served with them on the Gallipoli peninsula until he was severely wounded by shrapnel on the 30th June 1915 [15]. The Carmarthen Journal and South Wales Weekly Advertiser of the 14th May 1915 reported briefly on Second Lieutenant Harford’s departure, suggesting that he left the UK in mid-May, some weeks after the initial landings [16]:
WAR JOTTINGS. On Monday, Lieutenant Harford, eldest son of Major J. C. Harford, Falcondale, Lampeter, left for the front, and we wish him every success.
We know, therefore, that Second Lieutenant Harford was not with the 2nd Royal Fusiliers at the time that they made their landing at X beach. The attrition rate of officers and men in all 29th Division units at Helles in the weeks following the landing was very high, and by early May only a handful of the original 2nd Royal Fusilier officers remained. For example, the regimental history of the Royal Fusiliers states that by the 2nd May, only six officers and 425 other ranks were still serving with the 2nd Battalion [17]. The list of six were Captain H. M. Hope-Johnson, the commanding officer, and Mundey (adjutant), Huggett, O’Connell, Hewitt and Cooper.
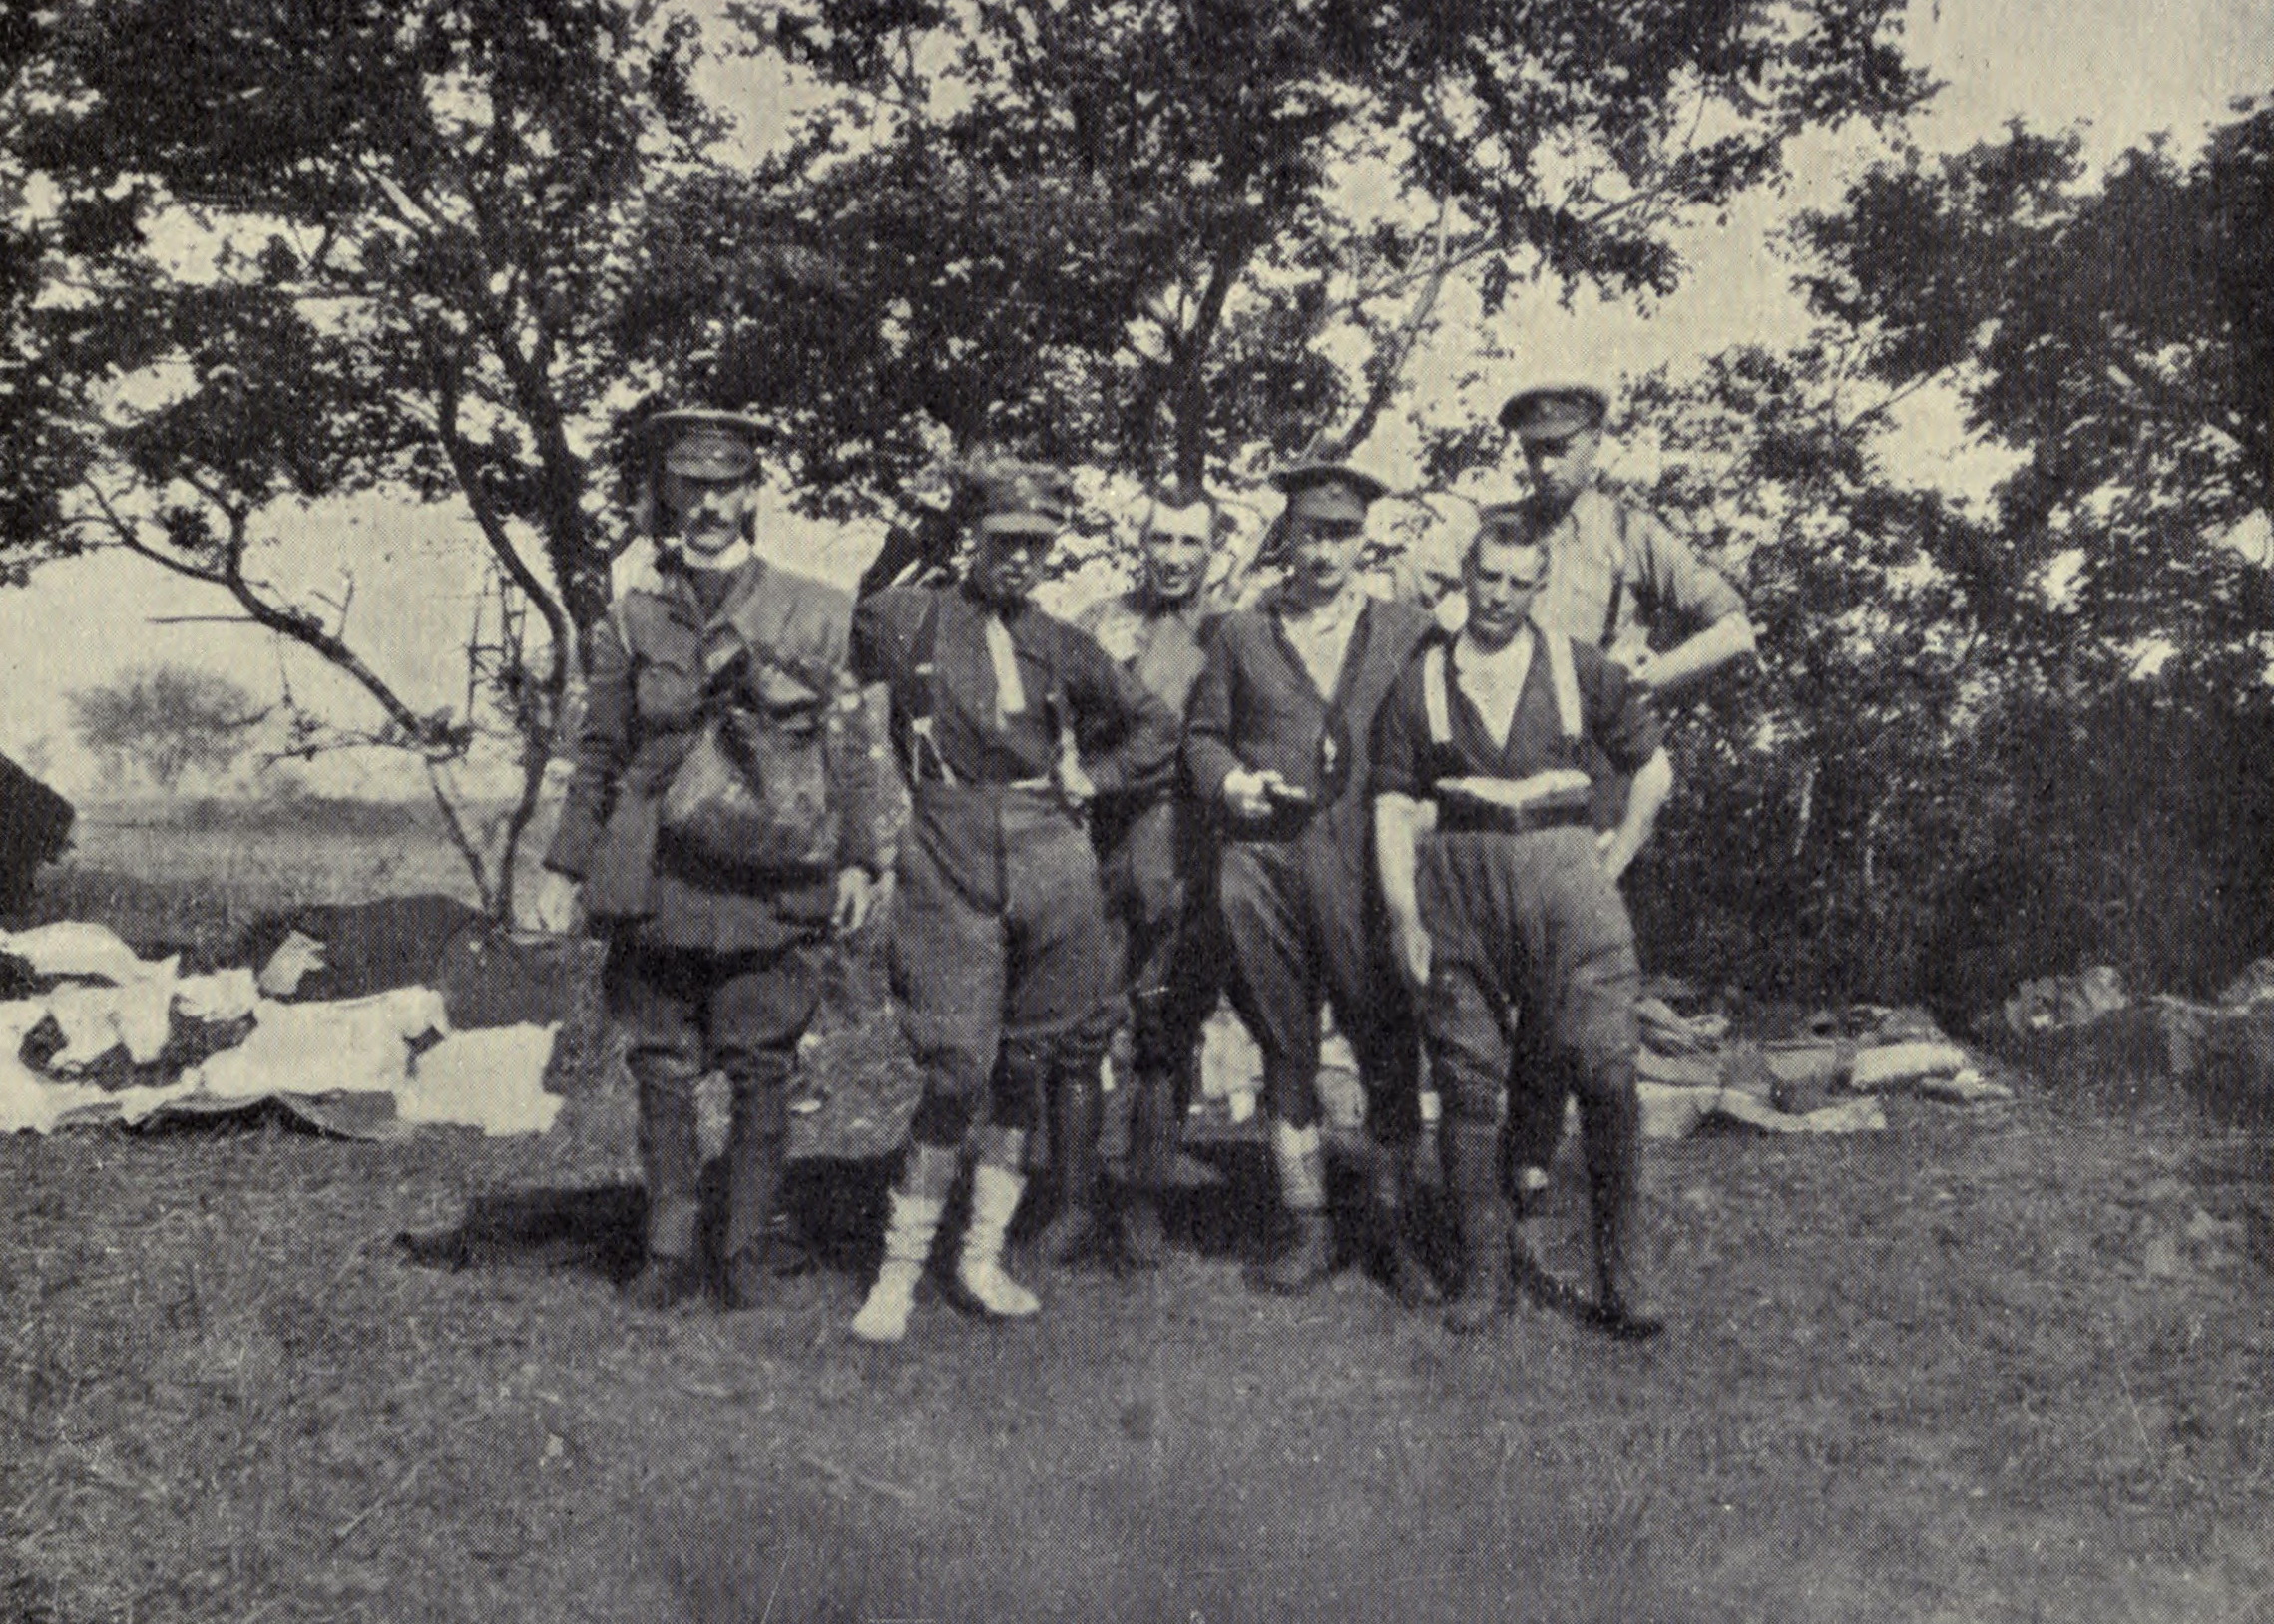
The Rev. Oswin Creighton (left), with officers of 2nd Royal Fusiliers, at Helles, May 1915. From: Oswin Creighton, With the Twenty-Ninth Division in Gallipoli (1916). Source: Internet Archive.
Evidence in the high-attrition rate for officers at Helles can be found in an interesting account of the Gallipoli campaign written by the Rev. Oswin Creighton, who had served as a Anglican chaplain with the 86th Brigade at Gallipoli [18]. Creighton spent a considerable amount of time at Helles with the units of 86th Brigade, and in particular the officers of the 2nd Royal Fusiliers and the 1st Lancashire Fusiliers. His book didn’t print the actual names of surviving officers, but his account does show how drafts from the Territorial Force and Kitchener’s New Army (K1) began to reinforce the survivors of the early fighting from at least the middle of May onwards.
For example, Creighton visited the officers of the 2nd Royal Fusiliers on the 19 May, after they had been in trenches for three days. A draft of 46 men with an officer had recently arrived, while 25 of their wounded had also returned [19]. One of the new arrivals, Lieutenant William Ernest Hall, attached from the 5th Royal Fusiliers, died of wounds on the 23rd May.
On the 26th May, Creighton visited the 2nd Royal Fusiliers again. While he was lunching with them, eight new officers arrived [20]:
They had just come from England. It appears K. I. is to be turned into a reserve army, and these men were from it. They seemed good fellows, though rather inexperienced. Later on a draft of 150 men arrived with some very senior sergeants in it.
On the 2nd June, Creighton met a newly arrived officer named Romanes, whom he noted had come from Oxford, a city which Creighton would have known very well. Lieutenant Edmund Giles Radcliffe Romanes, attached from the 12th Worcestershire Regiment, died of wounds on the 7th June, having been wounded during the Third Battle of Krithia on the 4th June. Other newly-arrived officers that died as a result of that action included Captains Edward Baylie Amphlett and John Wilfred Jenkinson, both of whom had also been attached from the 12th Worcestershires. Creighton lamented not having had the time to get to know the new batch of officers before their deaths [21]:
Several officers were killed on June 4, but I had been unable to get to know them all. They had recently arrived from England, and were the first of the new officers to join the R.F.’s. They certainly were a splendid sample of what the new armies could produce.
After Krithia, the attrition rate for officers (and men) at Helles remained high. On the 8th June, Creighton wrote [22]:
The regiment [2nd Royal Fusiliers] had dug incessantly for five days, and then fought incessantly for three days. They had lost five out of the six remaining officers, all the ten officers who had recently joined them, and somewhere about 200 of the remaining men.
More replacements would continue to arrive over following days . On the 9th June, Creighton wrote [23]:
I stayed on Gully Beach with the R.F.’s. I wanted to look after the mess, and to keep them going if possible. A Captain Taylor, of the Dublins [Captain Adrian Aubrey Charles Taylor of the Royal Dublin Fusiliers], arrived to take command. He was followed by a number of officers from different regiments. A draft also arrived in driblets – altogether about 200 men, making the grand total up to nearly 500. The new officers were all strange to each other and the regiment. I believe there are about fifteen of them now. I find it difficult to get to know them. There was none of the old regimental feeling left.
Further entries would reveal an unconscious alienation from the new arrivals, e.g. on the 11th June [24]:
The feeling of strangeness in the R.F.’s did not wear off, and of course the new arrivals were feeling a little gloomy. In fact it has been exceedingly difficult recovering from the effects of the last battle. The Division now is practically unrecognisable, despite the drafts.
And on the 18th [25]:
The R.F.’s seem such a strange regiment now that I have seen very little of them lately. I don’t find the officers so friendly, of course they hardly know each other, and it is impossible for them to have any corporate feeling. C.D. —- , who came out with the last draft is now C.O. W — [i.e. Captain P. N. Wilson] of the cyclists has also joined them. The other officers are just a scratch lot got together anyhow.
Taking all of this into account, it seems most likely that Second Lieutenant Harford joined the 2nd Royal Fusiliers in the field at some point after the Third Battle of Krithia on the 4th June. The regimental history notes the arrival of a draft of new soldiers between that action and the attack on the 28th June that later became known as the Battle of Gully Ravine [26]:
Four company organisation was dropped [after the 6th June] and the two companies fell under the command of Captain A. A. C. Taylor, of the Dublins [Royal Dublin Fusiliers]. While in reserve they were joined by Major Julian Fisher, D.S.O., who brought with him a draft of 10 officers and 400 other ranks from England. Captain P. N. Wilson, who was commanding the divisional cyclists, was allowed to rejoin the battalion, and the unit was given ten days to reorganise. The new draft consisted of very young men who had not received much training. None of the officers were Regulars, but men who had gathered from the ends of the earth to take their part in the war. When the battalion went back to the line once more, on June 23rd, they mustered 13 officers and 667 other ranks. Lieutenant Eustace commanded Y company, Captain [Frank Frederick Joseph] Ayrton X and Captain [Frederick Gustavus] Gudgeon Z. About three days later Captain [Augustus Arthur Cornwallis] FitzClarence [the cousin of the late Brigadier-General FitzClarence, VC] arrived from England and took over the duties of the second in command.
On the 28th [June] the battalion again attacked, leading the [86th] brigade with three companies; and their advance, though successful, was dearly bought. They advanced about 1,000 yards, “a magnificent sight, the men never losing their formation under a heavy artillery and rifle fire.” [the quotation from Ashmead Bartlett, The Times, 9th July 1915] The ground had been carefully ranged and the bulk of the casualties were due to well-placed shrapnel. There were few from rifle fire; but in attempting to round off their achievement in the night the battalion became involved in hand-to-hand fighting. Few details of these encounters have been preserved; but when the Fusiliers were relieved they were in the last stage of exhaustion. A twenty-four hours’ struggle in oppressive heat with hardly any water has its unforgettable terrors. The actual losses included nine officers: FitzClarence, Ayrton, Andrews killed; Bulbeck, Freer and Harford wounded; Gudgeon, Eustace and Willett missing. Of other ranks, 27 were killed, 175 wounded, and 57 missing. Not one of these officers had been with the battalion when it landed in Gallipoli, and the continuity was preserved by an ever-thinning thread.
This account shows that Second Lieutenant Harford was wounded during the Battle of Gully Ravine, which was probably less than a month after his arrival at Helles.

Gully Ravine. From: Oswin Creighton, With The Twenty-Ninth Division in Gallipoli (1916). Source: Internet Archive.
By that point of the Gallipoli the campaign, there was little expectation of a breakthrough at Helles, so the battles of May and June 1915 were primarily attritional affairs, with limited objectives.
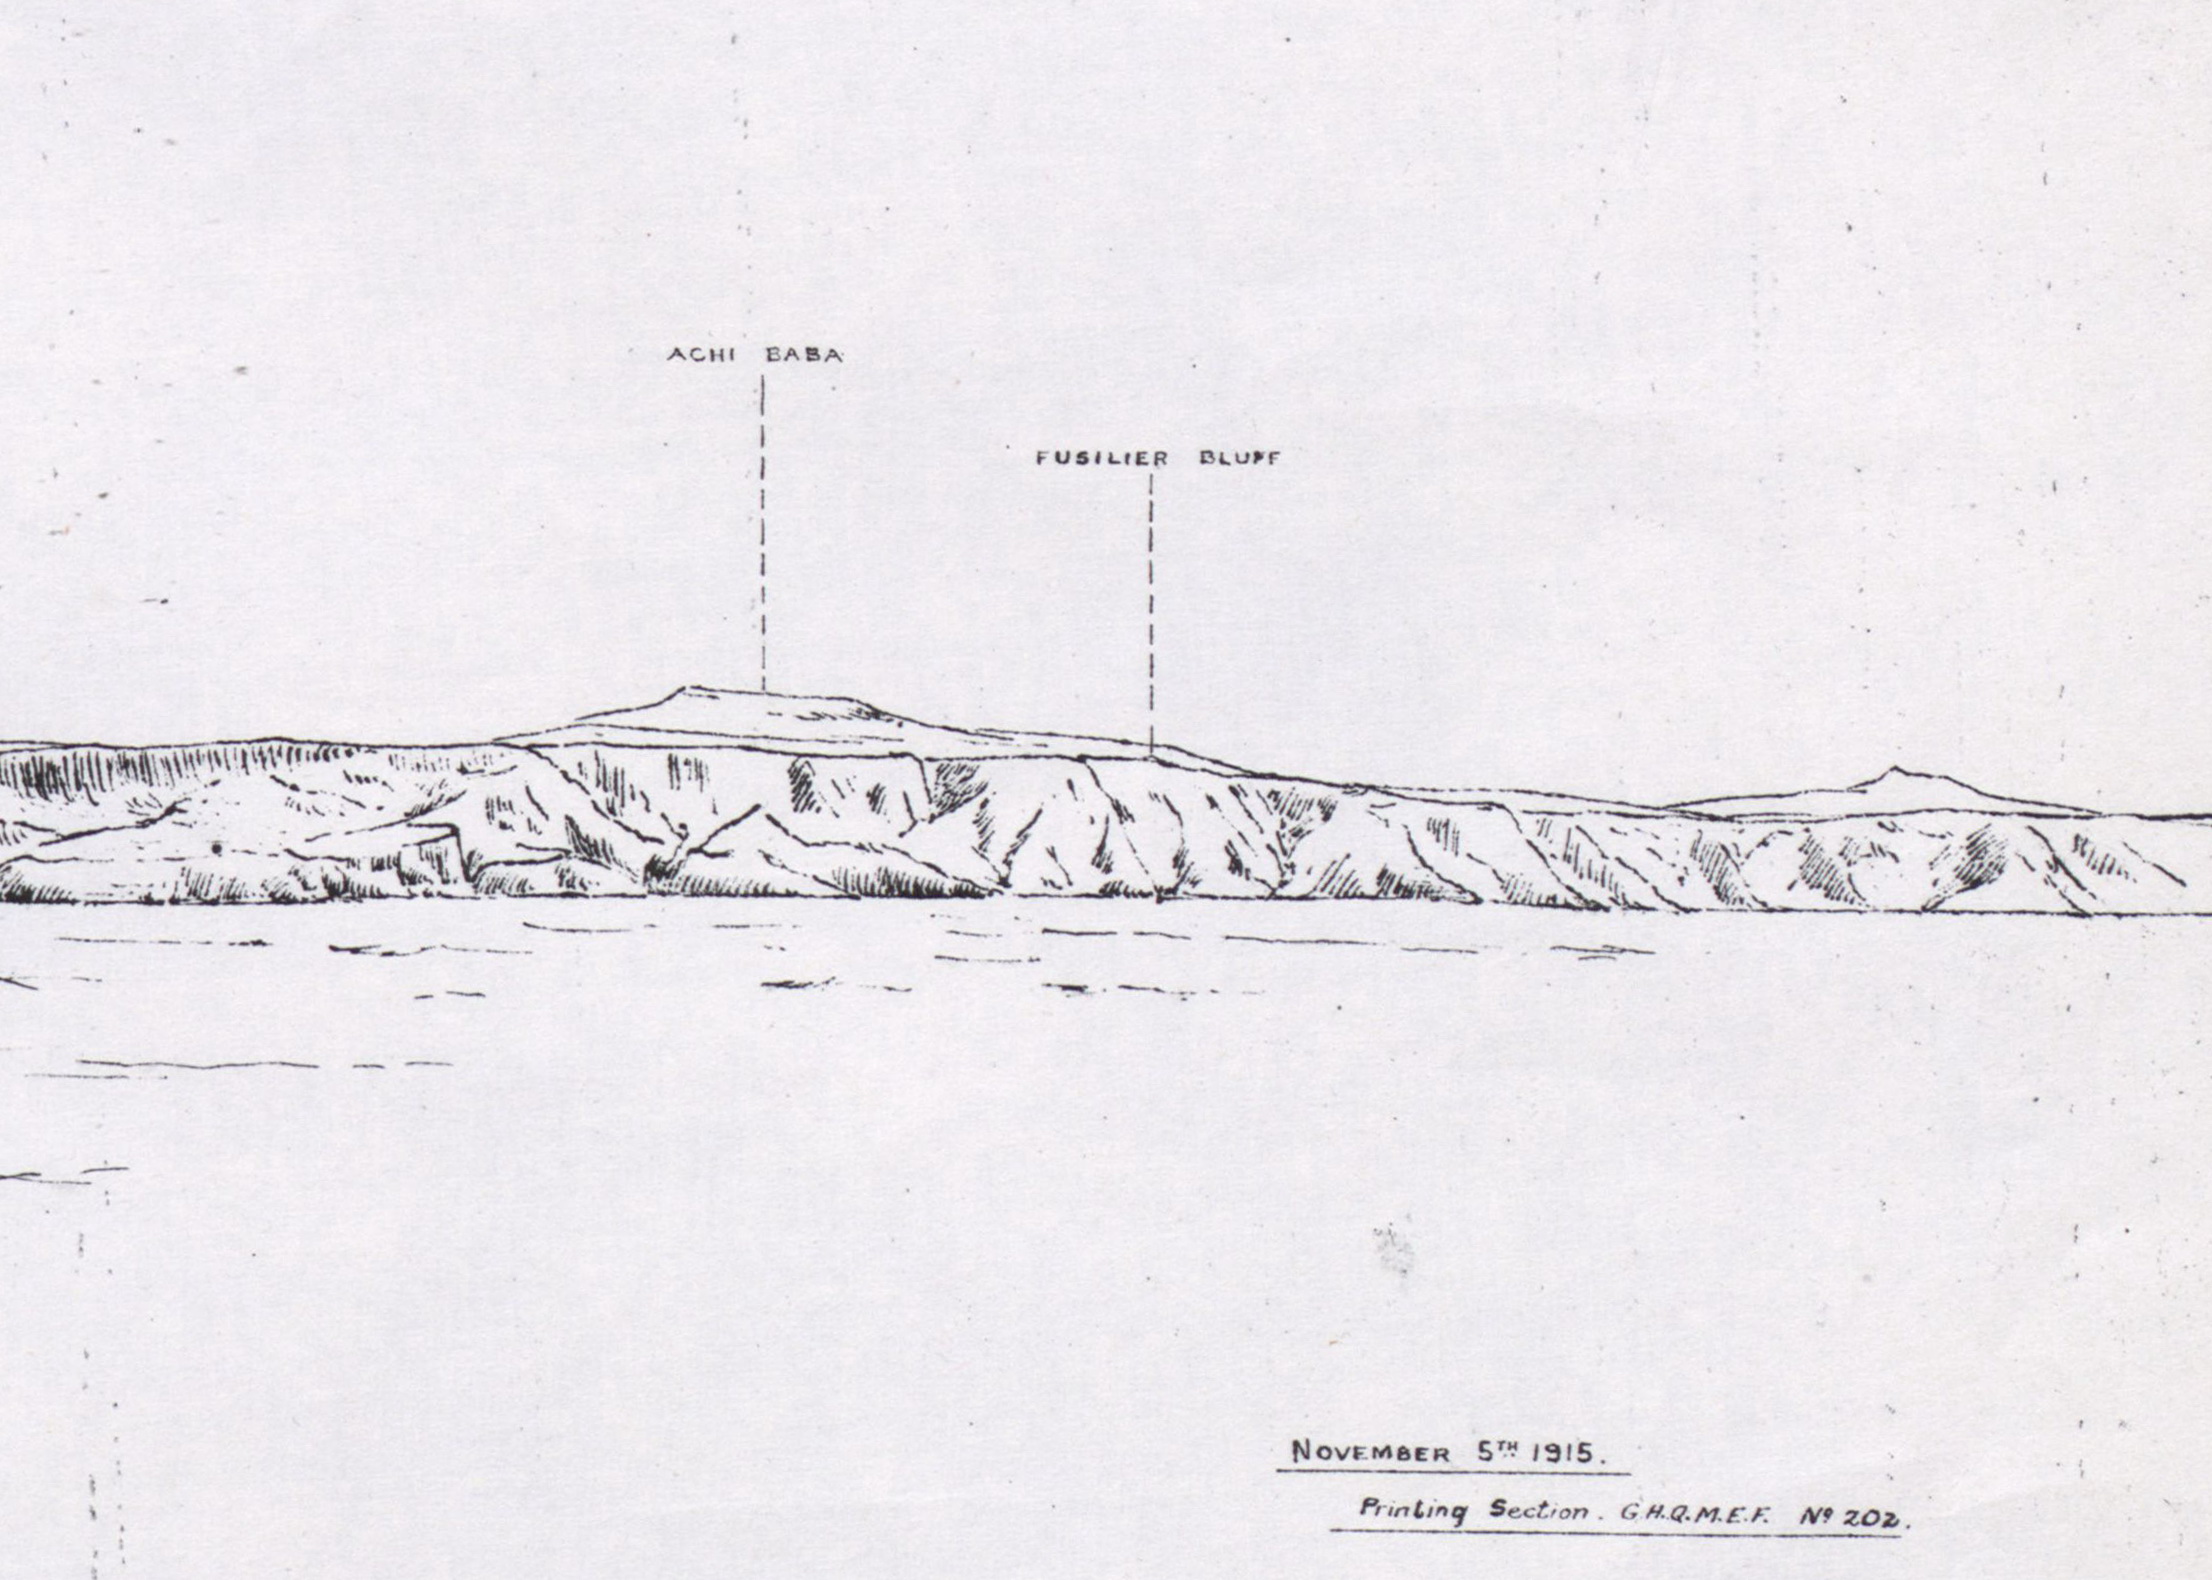
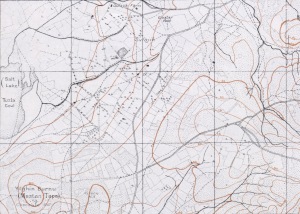
Fusilier Bluff and Achi Baba. Detail from Panorama of the Gallipoli Peninsula from a point 3 miles east of Kum Tepe. Source: A collection of military maps of the Gallipoli Peninsula, G.H.Q. M.E.F, 1915; British Library, Digital Store Maps 43336.(21.); Crown Copyright, contains public sector information licensed under the Open Government Licence v3.0.
The Battle of Gully Ravine began in the morning of the 28th June. After an artillery bombardment, the 29th Division were to attack on the left [27]:
On the left the 87th Brigade, with the Borders on the right of Gully ravine and the S.W.B. on the left or west of it (the latter battalion being supported by the K.O.S.B. on the right and the R.I.F. on the left), took the whole of the first system – i.e., three lines of trenches. Through them passed the 86th Brigade to the second line, which was stormed, and the Royal Fusiliers advanced to the high ground above the sea known ever afterwards as Fusilier Bluff.
[…]
Naturally enough the enemy made furious counter-attacks – not, as it happened, straight off and by day as heretofore, when successful – but at night and on successive nights.
[…]
Fusilier Bluff, especially, was the scene of vigorous Turkish attacks, the only result of which was to cover the ground in front of our trenches with six or seven lines of piled corpses.
In his diary, General Sir Ian Hamilton, the commander-in-chef, was elated [28]
The Turks are beat. Five lines of their best trenches carried (or, at least, four regular lines plus a bit extra); the Boomerang Redoubt rushed, and in two successive attacks we have advanced 1,000 yards. Our losses are said to be moderate. The dreaded Boomerang collapsed and was stormed with hardly a casualty. This was owing partly to the two trench mortars lent us by the French and partly to the extraordinary fine shooting of our own battery of 4.5 howitzers, The whole show went like clockwork – like a Field Day. First the 87th Brigade took three lines of trenches; then our guns lengthened their range and fuses and the 86th Brigade, with the gallant Royal Fusiliers at their head, scrambled over the trenches already taken by the 87th, and took the last two lines in splendid style. We could have gone right on but we had nothing to go on with. How I wish the while world and his wife could have been here to see our lines advancing under fire quite steadily with intervals and dressing as on parade. A wonderful show!
On the 29th June, the Rev. Creighton volunteered to go with a stretcher party up to some recently captured trenches. His diary noted that the 29th Division had suffered badly, the 2nd Royal Fusiliers coming out “with three officers out of the ten and 250 out of the 500 men.” He recorded that other units had also lost heavily [29]:
The [52nd] Lowland Division, just arrived, lost very heavily in the left centre, their Brigadier being killed and three Colonels laid out. The Indian Brigade and the other brigades of the 89th Division also lost a good deal. The total casualties must have been at least 3000 with the usual enormous numbers of officers.
[…]
The amount of unnecessary lives simply thrown away is appalling.
After their relief, Creighton worked his way around the 86th Brigade’s units [30]:
Later I went lower down the gully where the R.F.’s were. Fortunately their three survivors included C.D. —- , the C.O, and W —- , the adjutant, C.D. —- is doing exceedingly well. He was pretty upset by the battle. Fitz-Clarence was one of his chief friends. Eustace, Willet, and Ayreton’s bodies had not been recovered. The difference, as far as I am personally concerned, is that I now hardly know the officers who are killed.
The depleted 2nd Royal Fusiliers would embark a few days afterwards at V beach for Lemnos, where they would reform in preparation for their return to the peninsula at Suvla in August.

Fusilier Bluff. Detail from Diagram Showing Advanced Turkish Trenches and Communications, 27 September 1915. Source: A collection of military maps of the Gallipoli Peninsula, G.H.Q. M.E.F, 1915; British Library, Digital Store Maps 43336.(21.); Crown Copyright, contains public sector information licensed under the Open Government Licence v3.0.
After being wounded, Second Lieutenant Harford would be evacuated first to a hospital in Alexandria, and then back to the UK. Harford’s wounding was reported by several newspapers in July:
Western Mail, 13 July 1915 [31]:
The names of 57 officers and 1,1143 men are given in the casualty lists issued on Monday night.
[…]
Among the officers reported wounded is Second-Lieutenant J. H. Harford, who was only gazetted to a commission in the 3rd Battalion South Wales Borderers on August 15 last.
Western Mail, 16 July 1915 [32]:
LAMPETER OFFICER WOUNDED.
Lieutenant J. H. Harford of the South Wales Borderers, eldest son of Major J. C. Harford, Falcondale, Lampeter, has been wounded in the Dardanelles. Lieutenant Harford, who is the heir to the Peterwell Estate, joined the Borderers a few months ago.
The Carmarthen Journal and South Wales Weekly Advertiser, 16 July 1915 [33]:
Official news has been received at Lampeter that Lieut. J. H. Harford, of the South Wales Borderers, has been wounded at the Dardanelles. Lieut. Harford, who is the heir to the Falcondale Estate, is the eldest son of Major Harford (Falcondale), of the Pembrokeshire Imperial Yeomanry, and grandson of the late Postmaster-General Raikes. He joined the Army soon after the outbreak of war, and proceeded to the Dardanelles in May. The nature of his wounds are not described.
After treatment in hospital at Alexandria, Harford was evacuated to the UK, where he would recuperate at Falcondale.
The Carmarthen Journal and South Wales Weekly Advertiser, 10th September 1915 [34]:
SOCIETY AND PERSONAL
Dr A. T. Lawrence and Lady Lawrence have arrived at Peterwell, Lampeter.
Lieutenant Harford, eldest son and heir of Captain Harford, Falcondale, who was wounded in the Dardanelles, has come home to recuperate, and we trust he will soon be able to return to his duties.
The 2nd Battalion, South Wales Borderers on the Western Front:
After his recuperation, Lieutenant Harford was attached in March 1916 to the 2nd Battalion of the South Wales Borderers (SWB), which was also in the 29th Division, part of 87th Infantry Brigade.
The 2nd SWB had seen action at Tsingtao at the very beginning of the war, but sailed from Hong Kong in December 1914, arriving at Plymouth on the 12th January 1915 [35]. Soon afterwards they joined the 29th Division. In March 1915, the battalion (just like the 2nd Royal Fusiliers) had embarked at Avonmouth for the Dardanelles, landing at S and Y beaches on the 25th April. After the evacuation of the Gallipoli peninsula, the battalion had moved to Alexandria in January 1916, being based for a time at Suez.
The account of Lieutenant Harford provided in the Durnford School memorial book suggests that he was sent with a draft to Egypt in March 1916. By that point, however, the 2nd SWB were already preparing at that point to move to the Western Front. On the 10th March, the battalion embarked at Alexandria on the SS “Karoa” and SS “Kingstonian,” arriving at Marseilles on the 15th March.
In France, the 29th Division became part of the British Fourth Army, commanded by General Sir Henry Rawlinson. Together with the 4th and 31st Divisions, they formed part of the British VIII Corps commanded by the 29th’s old divisional commander at Gallipoli, now Lieutenant-General Sir Aylmer Hunter-Weston. In April, the Division would move to the Somme front in preparation for the forthcoming “Big Push” [36]:
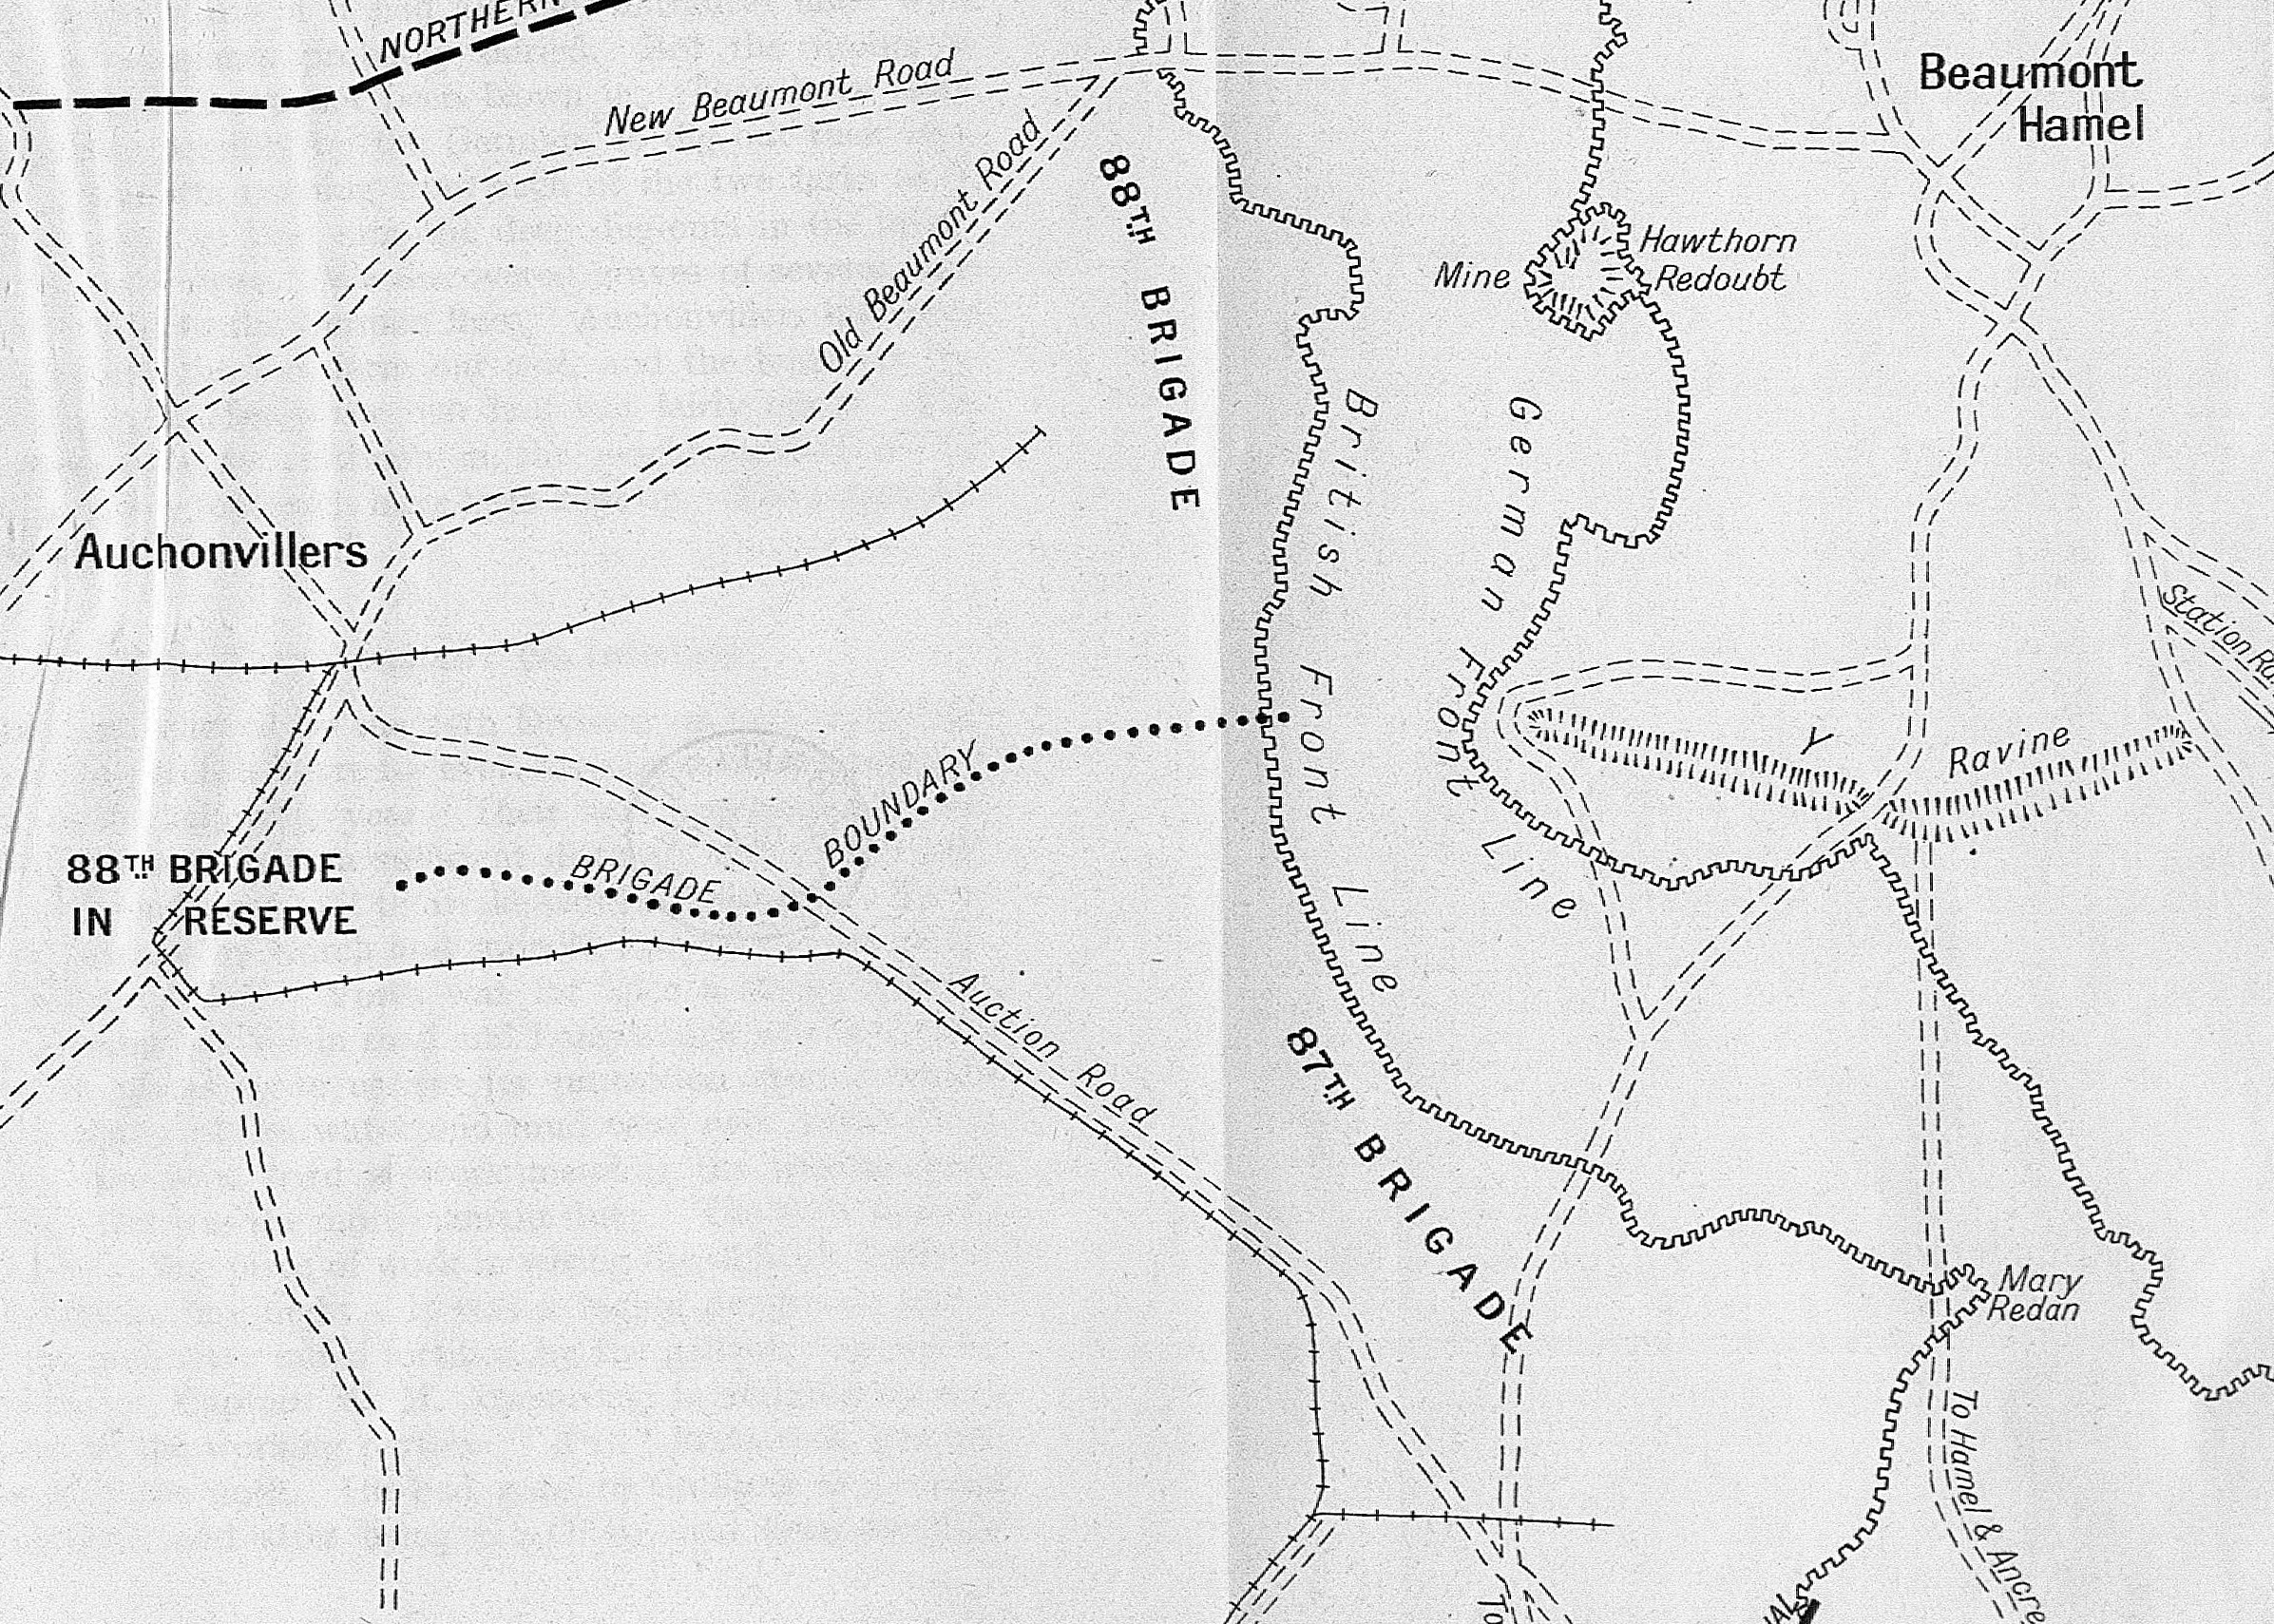
The sector taken over extended south from a little north of the sunk road between Auchonvillers and Beaumont-Hamel […] to a point about half a mile from the village of Hamel. Hawthorn redoubt and Y salient and ravine were formidable strongholds confronting them.
Divisional headquarters was at Acheux, with the reserve brigade based at Louvencourt. The front line Brigades alternated between the trenches and billets at Mailly-Maillet and Englebelmer.
After their arrival in France, the 2nd SWB initially stayed for a few weeks at Domart, before moving to billets at Englebelmer on the 2nd April 1916. The following day, they took over front-line trenches north of the River Ancre, around the salient known as Mary Redan, trenches that the battalion War Diary (WO 95/2304/2) described as having been badly knocked about [37]:
4th [April 1916]. Fairly heavily bombarded by two Trench Mortars, which have badly damaged the tip of the salient held by the Battn. at the MARY REDAN — this tip is mined, with long listening galleries running out towards the enemy trenches — one entrance has been blocked and part of the galleries damaged by the trench mortars.
The area had been for a long time a relatively quiet sector. There had been fighting in 1914 around Beaumont-Hamel, but the Divisional history of the 29th noted that, “since then the Germans had converted a naturally strong position into what they believed to be, and what seemed to the whole world at one time to be, an impregnable fortress” [38].
After just a few days in the trenches, the 2nd SWB were the target of a well-planned German raid. At 21:00 on the 6th April, a party of Germans entered the front line held by the battalion under cover of a bombardment by minenwerfer, high-explosive and shrapnel. While most of the front line company moved into a support trench, others remained in dugouts or were trapped under fallen timbers. A survivor reported that he had been in a dugout with 14 others, when the Germans, “threw a bomb into the dugout which killed one man and broke the narrator’s leg” [39]:
The rest were then taken prisoner & taken out of the trench. As they were retiring they came under our shell fire & the narrator, who was being carried in a blanket, was left behind & managed to crawl back.
The War Diary of the 2nd SWB concluded that the raid had been pre-arranged, “very carefully planned and very well executed.” The battalion reported 83 casualties: 5 officers wounded, 26 other ranks killed, 3 died of wounds, 18 missing, and 31 wounded (there is also a account of the raid from the German perspective in Jack Sheldon’s book on The Germans at Beaumont Hamel [40]).
On the 25th April, the first anniversary of the battalion’s landing at Helles, the 2nd SWB were visited at Louvencourt by the Corps commander, General Hunter-Weston.
We know that Lieutenant J. H. Harford joined the 2nd SWB in the field on the 13th May 1916, as the battalion War Diary recorded his arrival and that of three Second Lieutenants, on a day when the battalion was moving back from the front line to billets in Englebelmer [41]. From the 19th to the 28th May, the battalion were in Corps reserve at Acheux Wood, providing men for divisional working parties as well as attending a range of training courses.
On the 28th May, the battalion moved back into the front line, relieving the 1st Battalion, Newfoundland Regiment. Ominously, given what was to transpire on the 1st July, the battalion War Diary recorded that much work was going on on the other side of no man’s land [42]:
30th [May 1916].
[…]
There appears to be a lot of work going on in the enemy’s salient. We dispersed a wiring party in front of the [illegible] at 1 am this morning with Lewis Gun fire, steam & smoke are constantly seen, & sounds of timber & material being dropped — also a large amount of digging.
The Battle of the Somme — the 1st July:
29th Division positions at Beaumont Hamel, 1st July 1916. Source: Stair Gillon, The Story of the 29th Division (London: Nelson, 1925); via British Libary.
For the opening of the Somme offensive on the 1st July 1916, the 86th and 87th Brigades were to lead the attack in the 19th Division sector, with the 88th Brigade in reserve. The 87th were on the right hand side, facing Y Ravine, with the 2nd SWB in the front line on the left, and the 1st Royal Inniskilling Fusiliers on their right, attacking near Mary Redan. Behind them, the 1st Border Regiment and the 1st King’s Own Scottish Borderers were detailed to follow up the attack of the assault battalions.
To the 87th Brigade’s north, the 86th faced the Hawthorn redoubt. In preparation for the attack, tunnels had been dug and a large mine placed under the redoubt. The plan was for the mine to be exploded, following which the 2nd Royal Fusiliers and the Lancashire Fusiliers would move forward to capture it. The 88th Brigade were held a little further back, in Divisional reserve.
The war diary of the 2nd SWB contains eleven handwritten pages of appendices containing orders and detailed planning for the battalion’s attack on the 1st July. The front line companies were to be A and D Coys., with C Coy. in support, “occupying the deep bombardment dug outs in Reserve trench & St. John’s Road.” B Coy. were to start further back, at Englebelmer.
The scheme of attack was very detailed and, with the benefit of hindsight, included very little flexibility if things didn’t go to plan:
A, C & D Coys in the first line. B Coy in Reserve.
A Coy to attack between Points Q.10.d. 65/75 & Q.10.d. 75/45
C Coy [to attack between Points] Q.10.d. 75/45 & Q.11.c. 30/30
D Coy [to attack between Points] Q.11.c. 50/40 & Q.11.c. 60/10
A Coy to push through till right flank reaches Y Ravine then swing half right & advance astride by 2nd trench to Pt Q.11.c. 80/60 where they consolidate.
B Coy as soon as they reach Ey [Enemy] first trench swing half right & move between Y Ravine & Eys 1st Trench, then right & bomb squad on 1st trench to junction of two branches of Y Ravine. They Coy then pushes through A Coy & moves forward as covering party to E side of STATION ROAD covering Battn front. Two H.Q. Bomb Squads will be attached to C Coy to assist in clearing dug outs, Cemetery & Quarry.
D Coy advance straight through to Eys 3rd trench & consolidate Pt Q.11.c. 85/40
H.Q. Grenadiers 2 Squads attached to C Coy as above
1 Squad to A Coy to clear Eys 2nd Trench
2 Squads to B Coy to assist in clearing Trenches after leading Coys have moved through
1 Squad in Reserve.
B Coy, in Reserve will follow 50 yds in Rear & as leading Coys pass over Eys trenches. Will send off 1 Platoon with 1 Coy & 1 HQ Bomb Squad to clear dug outs etc in 1st trench & 1 Platoon with Coy & HQ Bomb Squads to clear 2nd trench.
The Battn will form up outside our trenches & 100x from German trenches as follows:
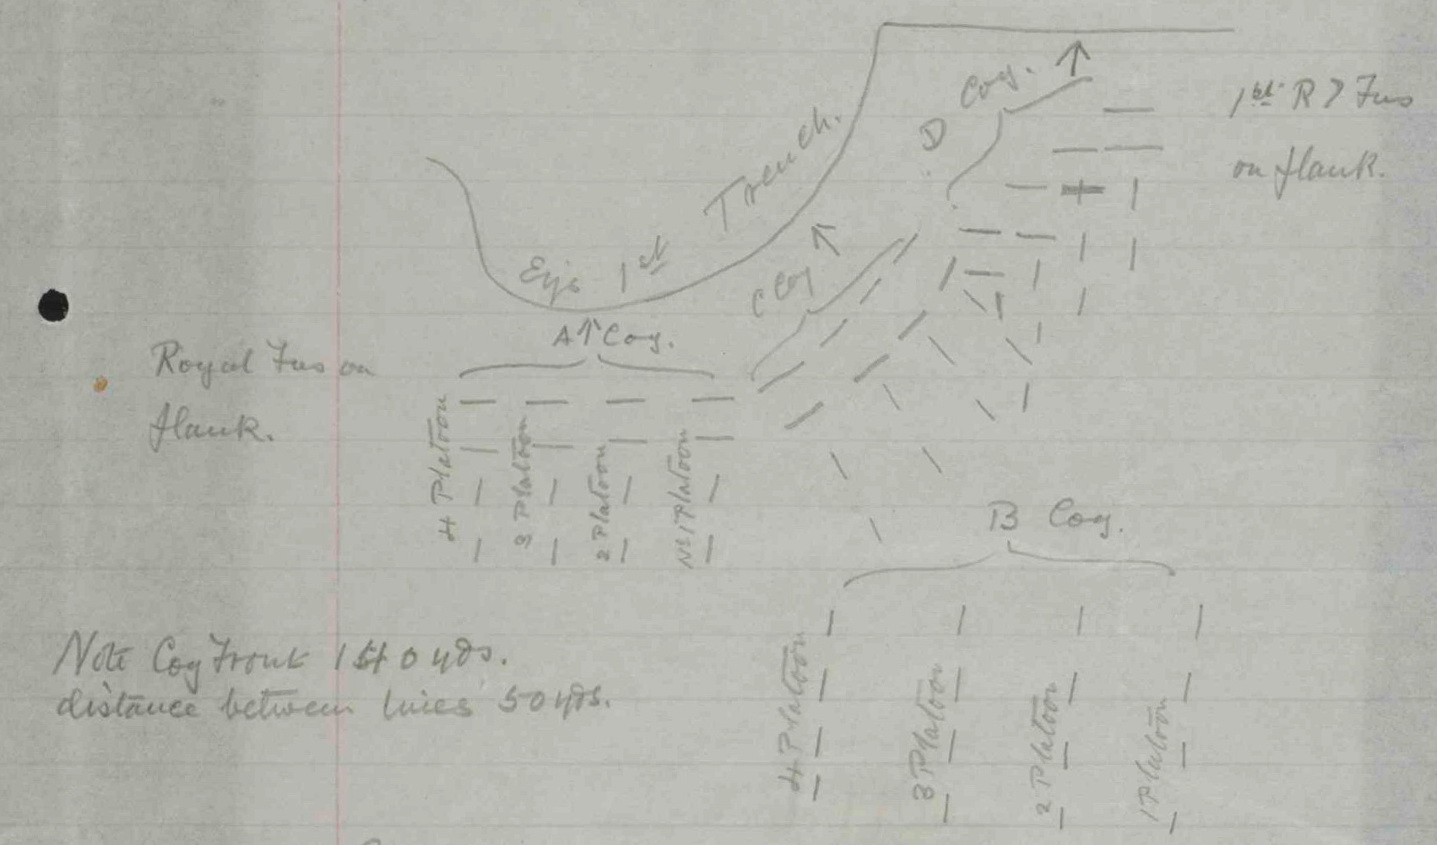
Scheme of Attack, 1 July 1916. 2nd Bn, South Wales Borderers War Diary (WO 95/2304/2) © Crown Copyright
Each Coy will have a bomb Squad with leading & 2nd line, on approaching Eys’s Trench Bomb squad moves forward & bombs trench, trench bridge is then brought forward & leading [illegible] 2nd line, cross & move straight on to final objective. One bomb Squad remaining at each trench to prevent Ey coming out of his dugouts till Platoon detached from B Coy comes up to clear the trench.
The Orders for the attack covered many different topics, including: the reconnoitring of wire on the nights leading up to the assault, the SOS signal (“5 red rockets in quick succession”), the use of flags, the one-way-system in use in communication trenches, and details on what to do with prisoners taken during the attack. The orders also included plans for reorganisation “after Eys first 3 Trenches have been captured & while Coys are consolidating the points allotted.”
O.C. Coys must reorganise their platoons as opportunity occurs, bombs should be collected from the men & placed in some convenient dump.
One hour after the assault commences the Bn will take over the Inniskilling’s area as well as our own Points to be consolidated will be allotted to Coys as follows.
Q.17.b. 55/80 B Coy
Q.11.d. 10/00 C Coy
Q.11.c. 90/40 D Coy
Q.11.c. 80/60 A Coy
A look at a trench map confirms that these positions would have been within the German trench system on both sides of Y Ravine, covering the whole of the 37th Brigade’s sector. Battalion headquarters would also move up as the attack progressed:
Bn H.Q. will be first at Q.11.c 5.5/25 & after taking over the Inniskilling’s area at Q.17.a 95/95.
The orders also made provision for the discharge of gas if the wind had been favourable, and a detailed schedule for this was attached.
Other documents attached to the War Diary provided details of the bombardment schedule as well as information on movement of units prior to the assault, the storage of kit and officers’ mess boxes, and the supply of ammunition and meals.
The final section of the final document, signed on the 30th June by the Adjutant, Captain D.H.S. Somerville, read:
8. Zero
Zero will be at 7.30 am. Each coy will send an officer to HQ at 5.55 am to synchronise watches.
The account of the attack in the War Diary commences a few pages further on. The difference between that and the plan of attack is very striking [43]:
“FIRING LINE. 1st July. 05.00. During the night Coys moved up to their positions ready for assault in Firing & Support line. Our artillery was active all night. Morning fine but misty. Men were given hot tea at 11.0pm last night and again at 6.0am.
06.30. Our artillery commenced steady bombardment of Eys front line trenches increasing to heavy bombardment & at 07.00 Field Artillery commenced a barrage on Eys front line.
07.20. Mine under HAWTHORN REDOUBT fired & Coys immediately commenced getting out of the trenches & through our wire. (Bn. H.Q. moved to Bomb [?] T in B St at 07.10). As the leading Companies reached the outer edge of our wire machine gun fire was opened on them which rapidly increased in intensity. Enemy also opened percussion shrapnel on the advancing lines. By about 07.30 the leading companies had lost nearly all officers and about 70% of the men. ‘A’ Coy reached a point about 20 yards from Eys front line just south of the nose of the salient where they were held up by M.G. fire from their right flank. ‘D’ Coy reached a point about 300 yds from our wire. Position of Coys was roughly as follows:

2nd Bn, South Wales Borderers War Diary (WO 95/2304/2) © Crown Copyright
Reserve Coy ‘B’ Coy left support trench at 07.30 moving over the top & across the fire trench by bridges. This coy came under Ey machine-gun fire while passing through our wire. They advanced steadily across the open till practically all men were hit. Capt Hughes [A. A. Hughes] was last seen about 6-8 yards from the Ey wire leading 6 or 7 men forward all these men were knocked out a few yds further on. H.Q. moved forward with ‘B’ Coy.
According to original arrangements our Art barrage lifted off Eys front line at 07.30. Ey at once lined his parapet and M.G. fired unmolested [?].
08.15. 1/Border Regt advanced from our support trenches (FETHARD ST) to support the Bn but were caught by Ey Machine Guns before reaching our front line, this Bn lost very heavily & only a few men got up near our forward line & none actually reached the forward line.
Later the Newfoundland Regt [88th Brigade] advanced but were similarly held up by M.G. fire, a few men only managed to get along the sunken & joined up with the right of ‘C’ Coy.
During the remainder of the day no further attempt to advance was made, the Enemy fired heavy shrapnel over the wounded & men lying out in the open, also intermittent M.G. fire. Prior to the attack it had been arranged that Coys on reaching Eys trenches should fire Very’s lights to let the Brigade know, but shortly after we advanced the Ey put up lights & for some time it was though that we had taken the front line & also pushed on, consequently our barrage was not put back on the Eys front line.
09.30. The 10% officers & men left behind at ENGLEBELMER moved up to the front line & afterwards went to ST. JOHNS ROAD.
The actual strength of the Battn as it moved forward to the attack was:
Officers: 21
O.R.: 578
Casualties were as follows:
Officers: Killed 2, Wounded 4, Missing 5, Missing believed killed, 4; Total 15
Other Ranks: [Killed] 21, [Wounded] 160, [Missing] 203; [Total] 384
None reached the Enemy’s trench & it was impossible to bring the bodies in, practically all those reported missing were probably killed.
A few wounded & others managed to get back to our trenches during the day and several returned after dark.
The names of officer casualties were listed, many of whom had been attached from other units, including various battalions of the SWB, the 13th Sherwood Foresters, the 14th Cheshire Regiment, and the 15th King’s Liverpool Regiment.
The failure of the 2nd SWB attack on the 1st July soon became clear to the battalions following up. For example, the War Diary of the 1st Battalion, Newfoundland Regiment recorded [44]:
07.30. 86th & 87th Brigades attacked 1st system of enemy trenches, 88th Brigade under pre-arranged orders were to move forward at 0840 to attack 3rd line system of trenches. About 0820 received orders not to move until further orders. Presumably the first attack not having been successful.
By the end of the morning of the 1st July, there had been no progress at all on the 29th Division front. In the 86th Brigade area some of the 2nd Royal Fusiliers did manage to reach the Hawthorn Ridge mine crater, but found that the Germans were already in possession of the other side. The RF and Lancashire Fusiliers found themselves pinned down by machine gun fire and withdrew to the British front line trenches later that day.
As the 2nd SWB War Diary had noted, the 87th Brigade attack further south was no more successful. Gillon describes what happened in the history of the Division [45]:
The 87th had no better permanent success [than the 86th Brigade]. The R.I.F. [1st Royal Inniskilling Fusiliers] did succeed in penetrating the first line. Their steadiness in crossing No Man’s Land was that of troops on parade. But though on the night the trenches were crossed by portable bridges, in the main the wire proved a complete obstacle. The same applies to the S.W.B. The effort of the first line of assault was in vain. The reserves meanwhile suffered from the enemy’s gun fire sans coup férir, and it was a damaged mass of troops who at 7.35 clambered over the trenches of the K.O.S.B. [1st King’s Own Scottish Borderers] and Borders [1st Border Regiment]. With the exception of a few of the leading sections of the latter, the second wave did not reach the first. The 87th Brigade was practically knocked out.
The attack in the 37th Brigade sector was effectively over within minutes of the start. Even worse was to come. Based on over-optimistic reports, General de Lisle, G.O.C. 29th Division, ordered fresh attacks to be carried out by the 1st Essex Regiment and the 1st Newfoundland Regiment. The Newfoundlanders got into position first, and launched their attack at around 9.15 am. The communication trenches were congested in the aftermath of previous attacks, so the Newfoundlanders attacked in the open and were destroyed in minutes, many before they had even reached the British front line [46].
The latter [the Newfoundlanders] were ready first, and launched a determined attack at 9.15 a.m. Many eye-witnesses have testified to the superb steadiness of that astonishing infantry. Undaunted by a hail of machine-gun fire, they went forward till out of 700 men a mere handful remained.
The Divisional History of the 29th [47] notes that Newfoundlanders “lost more than 90 per cent. of those in the actual assault and 84 per cent. of their available strength.” The Essex took longer to prepare for their attack, but it also failed. Another battalion in the 88th Brigade, the 4th Worcestershire Regiment, were readied for an attack with troops of the 4th Division, but this was eventually cancelled.
In total, the 29th Division suffered around 5,000 casualties on the 1st July. The Divisional History noted that the 87th Brigade had suffered the most, losing over 60% of its available strength [48].
Despite that, the 2nd SWB were back in the front line the following day, in trench positions north of the Ancre in what had been the 36th Division sector at the start of the offensive [49]:
“2nd July. Battn was collected and spent last night in St JOHNS ROAD. 10% officers & men having joined up.
10.00. Battn moved off via CONSTITUTION HILL & occupied the front line trenches about Q.23.b. 30/90, left flank at LUVERCY St & right flank at St JEANS St a front of about 300 yards. The Bn was reorganised into two Coys, A & B Coys under Lieut ROSS & C & D Coys under Lieut. B J Davies.
The 1/ Border Regt on Bn left flank and 1/ KOSB on right flank.”
These positions would have been in the old British line in front of the village of Hamel.
It is difficult to say what Lieutenant Harford’s experience of the 1st July might have been. The 2nd SWB War Diary does not mention him at all in its documentation of the 1st July attack — although it only really records the names of officer casualties, plus the names of a few cooks and servants in the notes prepared before the attack. It is possible that he was part of the battalion reserve that had been held back at Englebelmer, although all that we can say with clarity is that he did not seem to have become a casualty on the day itself.
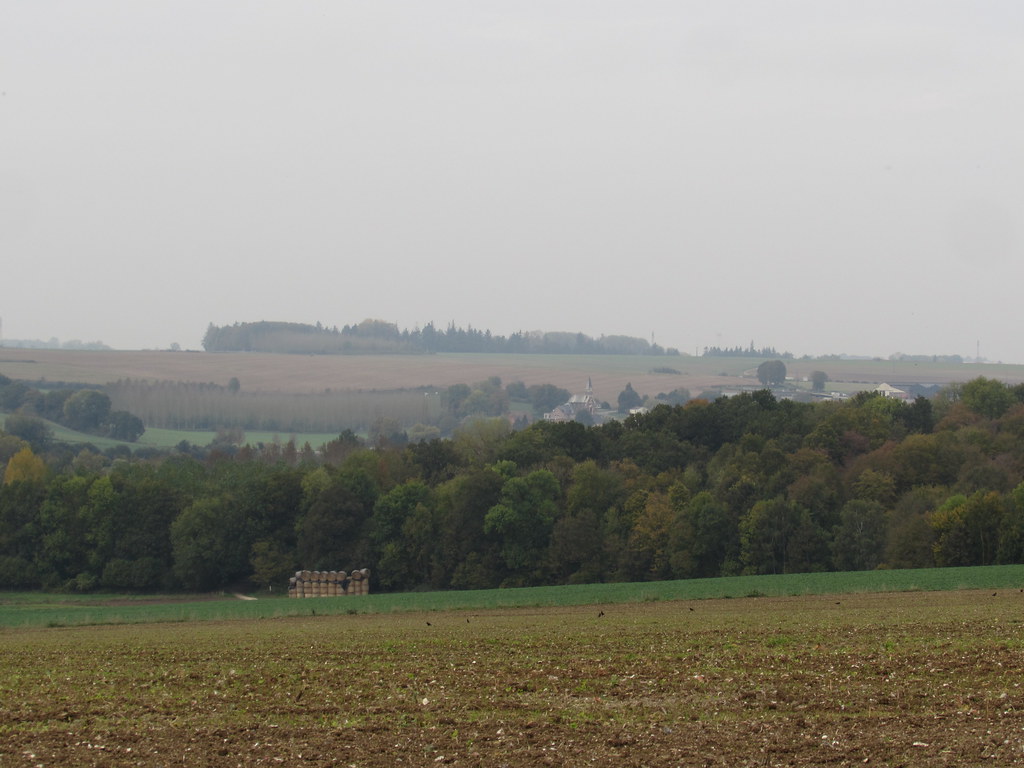
Authuille: View across the Ancre Valley towards Hamel; the Beaumont-Hamel Newfoundland Memorial is marked by the group of trees on the horizon (Somme). Source: Flickr.
Historians usually attribute the lack of success at Beaumont-Hamel on two serious errors in the VIII Corps plan of attack. The first was that the Hawthorn Redoubt mine was blown too early, ten minutes before Zero. The second was the premature lifting of the artillery barrage across the entire VIII Corps front. While the intention of both of these decisions was to avoid causing casualties amongst the assault battalions — especially those detailed to capture the crater — the timing gave clear notice to the German defenders that an attack was about to commence and gave them time to win the “race to the parapet.” Andrew Macdonald has explained how decisions on the timing of the Hawthorn mine led to adjustments to the artillery plan [50]:
It [the artillery barrage] was to start on the German front line and step back at six set intervals until the final objective was taken. But Hunter-Weston fiddled with the timetable to accommodate the mine-blast timing: infantry could not seize the crater if heavy artillery was shelling the area. Astoundingly, he ordered his corps’ heavy artillery to lift its shellfire off the entire German front line opposite his corps at 7.20 a.m. to targets further back, rather than just that opposite 29th Division. Field artillery would step its ‘thin’ fire further back at 7.30 a.m., but in the 29th’s sector it would be halved from 7.37 a.m. Gunnery officers tweaked their fire plans, but infantry planners were oblivious.
Those decisions made what was always going to be a challenging task, an impossible one.
Despite that, there have been many who have tried to gloss over the total failure of the attack at Beaumont Hamel on the 1st July. For example, Stair Gillon’s history of the 29th Division suggested that the attack in the VIII Corps sector should not be considered a disaster because it was the enabler of success further south [51]:
The gallant and strenuous attacks on the left were essential to the success gained on the right, and all have their due share of the general success.
This seems to genuinely reflect the thinking of the commanding officer narratives from whom Gillon compiled his history.
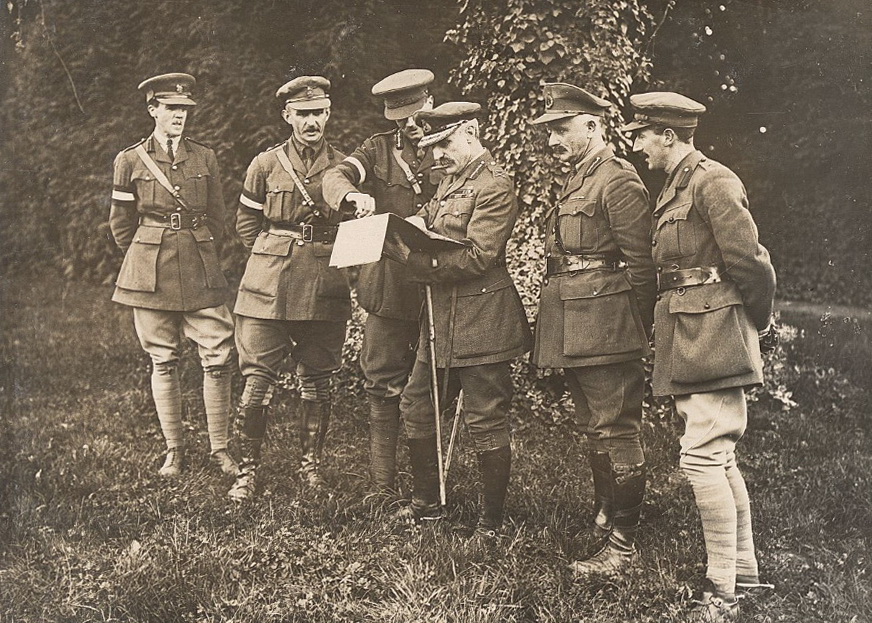
Lieut-Gen Hunter-Weston and his VIII Corps staff on the 1st July 1916. Source: British Library Add MS 48365, f53v. (Digitised Manuscripts)
One thing that we can say is that this idea surfaced very soon after the 1st July attack. General Hunter-Weston’s papers are now part of the collections of the British Library (BL Add MS 48365) [52, 53]. His diary for the 1st July (f49r) first records the death of his old friend Brigadier-General Charles Bertie Prowse, the commander of 11th Infantry Brigade (4th Division), but formerly of the Somerset Light Infantry (and the most senior British officer killed on the 1st July):
July 1st
Opening day of the “Battle of the Somme”
A very heavy day’s fighting. Busy all day at H.Qrs. Gen. Gough came to see me at 9 pm & discussed further plans for attack. My old friend, Brig. Gen. Prowse, commanding the 11th Inf. Bde. was killed. Gen. Fanshawe & his A.D.C. dined & stayed the night.
[Extract from] Letter of 1.7.16
. . . . . . we have not attained the success we hoped for. Though in the morning the first reports were very rosy, to the effect that all the German front line had been taken. The result of the day’s fighting up to the present 3 pm. has been disappointing. We have gained very little ground & our hold on what we have got is precarious. It is very probable that the result of the VIIIth Corps attack will be that we shall find ourselves back in our original lines. However that is the torture of war. We cannot always be successful, & we’ll have better luck next time. On the rest of our 4th Army front, we have attained considerably better results & I hear that on our own extreme south & on the French front much ground has been won & many Germans killed. We shall know more about the situation later.
General Hubert Gough was visiting the headquarters of the 29th Division because General Rawlinson had transferred X and VIII Corps to the Reserve Army late on the 1st July.
The same page of Hunter-Weston’s diary also contains a transcript of telegrams that Hunter-Weston sent to his three Divisions on the evening of the 1st July:
Well done my Comrades of the —- Division, Your discipline and determination was magnificent and it was bad luck alone that has temporarily robbed you of success.
A page or so further on (f50r), Hunter-Weston records a communication from the Generalissimo:
Joffre has sent a message appreciative of the hard fighting up here in the north. He attributes the success of the French South of the SOMME not a little to the fact that the Germans were expecting a serious attack in the north, & that they were held up there by our hard fighting when we attacked. This is satisfactory as far as it goes, but it is of course, a disappointment to all of us in the VIIIth Corps that our splendid preparations, excellent discipline, & magnificent courage in attack, have not had the result we all hoped for, which was a Victory over the Germans in front of us & a considerable advance.
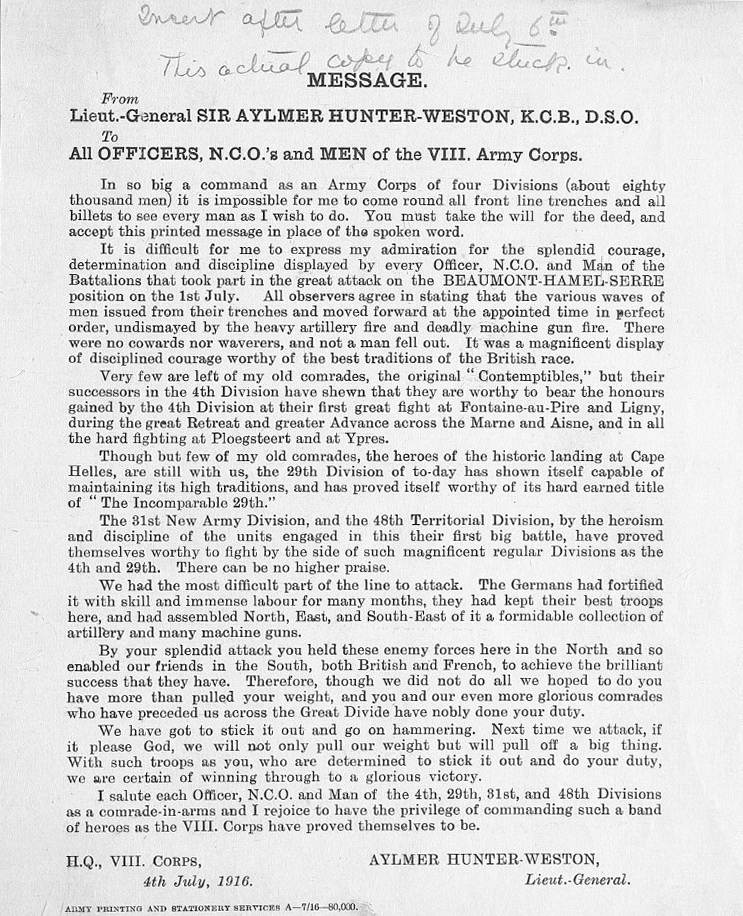
Message from Lieut-Gen Hunter-Weston to all in VIII Corps, 6th July 1916. Source: British Library Add MS 48365, f63r. (Digitised Manuscripts)
At around about that point in time, the doctrine became consolidated in a famous message that Hunter-Weston sent to all in VIII Corps on the 4th July 1916 [54]:
By your splendid attack you held these enemy forces here in the north and so enabled our friends in the south, both British and French, to achieve the brilliant success that they have. Therefore, though we did not do all we hoped to do, you have more than pulled your weight, and you and our even more glorious comrades who have preceded us across the Great Divide have nobly done your Duty.
This all seems to have been a means of putting a brave face on extreme disappointment. A hundred-years later, it is clear that the assault on Beaumont-Hamel could have been conceived and planned as a diversion to a stronger attack made elsewhere, but — as the detailed operation orders in the 2nd SWB War Diary show — it was not.
When it comes to the 1st July attack on the Somme there seems to be a lot of truth in Sir B. H. Liddell Hart’s comment many years ago that the British high command (including Hunter-Weston) had not looked clearly enough at the ground under their feet [55].
In The Old Front Line, John Masefield provides a detailed description of the Beaumont-Hamel sector a year after the battle, noting the particular strength of the German positions there. It is worth quoting at length [56]:
Looking out on all this [the high ground beyond Beaumont Hamel from the Hawthorn Ridge] the first thought of the soldier was that here he could really see something of the enemy’s ground.
It is true, that from this hill-top much land, then held by the enemy, could be seen, but very little that was vital to the enemy could be observed. His lines of supply and support ran in ravines which we could not see ; his batteries lay beyond crests, his men were in hiding places. Just below us on the lower slopes of this Hawthorn Ridge he had one vast hiding place which gave us a great deal of trouble. This was a gully or ravine, about five hundred yards long, well within his position, running (roughly speaking) at right angles with his front line. Probably it was a steep and deep natural fold made steeper and deeper by years of cultivation. It is from thirty to forty feet deep, and about as much across at the top; it has abrupt sides, and thrusts out two forks to its southern side. These forks give it the look of a letter Y upon the maps, for which reason both the French and ourselves called the place the “Ravin en Y” or “Y Ravine.” Part of the southernmost fork was slightly open to observation from our lines; the main bulk of the gully was invisible to us, except from the air.
Whenever the enemy has had a bank of any kind, at all screened from fire, he has dug into it for shelter. In the Y Ravine, which provided these great expanses of banks, he dug himself shelters of unusual strength and size. He sank shafts into the banks, tunnelled long living rooms, both above and below the gully-bottom, linked the rooms together with galleries, and cut hatchways and bolting holes to lead to the surface as well as to the gully. All this work was securely done, with baulks of seasoned wood, iron girders, and concreting. Much of it was destroyed by shell fire during the battle, but much not hit by shells is in good condition to-day even after the autumn rains and the spring thaw. The galleries which lead upwards and outwards from this underground barracks to the observation posts and machine-gun emplacements in the open air, are cunningly planned and solidly made. The posts and emplacements to which they led are now, however, (nearly all) utterly destroyed by our shell fire.
In this gully barracks, and in similar shelters cut in the chalk of the steeper banks near Beaumont Hamel, the enemy could hold ready large numbers of men to repel an attack or to make a counter-attack. They lived in these dugouts in comparative safety and in moderate comfort.
William Phillpott quotes Edmund Blunden’s comment that the German front near Beaumont-Hamel was “a fortress and a masterwork of German brainwork, spadework and ironwork” [57]. The village would finally fall to the 51st (Highland) Division on the 13th November, a few days before the formal end of the offensive that had commenced on the 1st July [58].
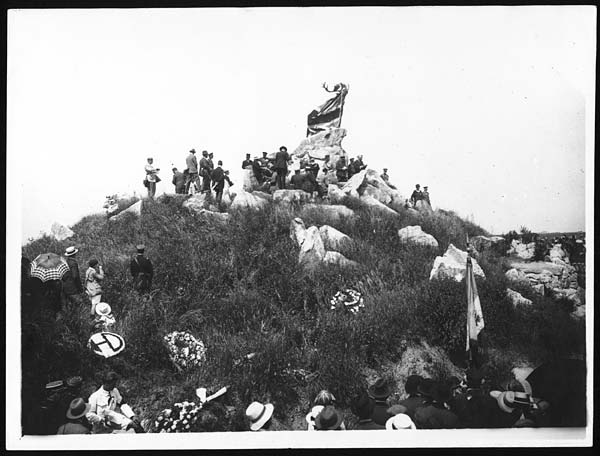
Beaumont Hamel. Inauguration du monument élevé à la mémoire des soldats de Terre-Neuve. Vue générale de la cérémonie. 1925. Source: National Library of Scotland Acc.3155/234 (CC BY-NC-SA 4.0): https://digital.nls.uk/74463580
The ground over which the 2nd SWB’s attacked on the 1st July now lies partly within the grounds of the Beaumont-Hamel Newfoundland Memorial. The land was purchased as a memorial in 1921 by the people of Newfoundland, and it is the largest section of the Somme battlefield to have been preserved, with its trench lines still in situ. The site incorporates a number of memorials, including one for the 29th Division, as well as three CWGC cemeteries: Hawthorn Ridge Cemetery No. 2, Y Ravine Cemetery and Hunter’s Cemetery.
The Ypres Salient:
After the frustrations of the 1st July, the 29th Division were eventually relieved by the 25th Division on the 24th-25th July, after which they moved to the Ypres sector, where they were put to work repairing trenches and wire. The 2nd SWB mostly alternated between trenches in the St Jean / Wieltje area and dugouts on the Canal Bank, with some spells in divisional reserve, e.g. training at Camp ‘O’ (near Brandhoek). The weather at times was atrocious [59]:
30th Aug [1916]. A very bad day, blowing a gale from the west, and later veering to N.W. accompanied by deluges of rain. We had to find numerous working parties for the front trenches by day and night, chiefly for draining the trenches. 2000. In the evening, the rain ceased, but the wind remained strong, dying towards morning.
31st Aug. A very fine day, and the men were able to dry their clothing. The usual working parties were found.
At times, there were more gruesome events to be witnessed:
1st Oct [1916]. 0850. In the morning we saw an enemy observation balloon brought down by one of our aeroplanes. The aeroplane dived straight onto the balloon from the clouds and passed very close it, then turning and making a second attack. Nothing appeared to happen for about ten seconds, and then some smoke appeared, and immediately afterwards, a large sheet of fame shot up from the balloon, which fell and disappeared from view still burning. Just before the balloon fell, two men were seen to jump from it and descend by parachute, but they were apparently caught up and engulfed by the flaming balloon.
On the 7th October, the 2nd SWB left the Ypres sector for Longeau, near Amiens, from where they would march first to Cardonette and then, on the 10th, to Buire. On the 13th October the battalion would march to a camp near Fricourt for their return to the Somme front.
The Battle of the Somme — Gueudecourt, October 1916:

The area around Gueudecourt. Source: Stair Gillon, The Story of the 29th Division (London: Nelson, 1925); via British Library.
In October 1916, the 29th Division was called on to assist the 12th Division on the Somme front near Gueudecourt. The 88th Brigade, which had suffered less than the other brigades on the 1st July, were the first to go forward [60]. The 87th Brigade relived the 88th on the 19th October. The divisional history highlights the appalling weather [61]:
It would be more accurate to say the relief began [on the 19th October], for it was not completed even by 10.30 a.m. on the 20th. The cross-country tracks were impassable, and the extra traffic blocked the roads. The result was that the two battalions detailed to relieve those of the 88th in the line did not start on their final lap of about five miles till 8 p.m. The experience of the S.W.B. is characteristic of Somme fighting. They did not finish the relief of the [2nd] Hampshires till 11 p.m. on the 20th, after twenty-seven hours, during which period they had six officer casualties. They had no greatcoats, and by a caprice of the weather the thermometer dropped to about 10 degrees below freezing-point.
There was an attack planned for the 25th October, but it was postponed. The 29th Division was relieved on the 30th October by the 1st Australian Division. It was in this period before the Division was relieved that Lieutenant Harford was killed in a night-time trench raid.
The War Diary of the 2nd SWB (WO 95/2304/2) provides additional information on the effects of the bad weather as well as a brief description of the raid led by Lieutenant Harford [62]:
22/10/16. On leaving the trenches the following were sent to Hospital nearly all suffering from trench feet.
Lieut M. THOMAS. – 2Lieut W. J. RHOADES – 2Lt P.J. MULVEY – 2Lt J.E. HARRIS
NCOs & men – 64.
23/10/16. We remained in the support trench 600 yards S.W. of GUEUDECOURT and during the day 75 men were sent to Hospital, mostly suffering from trench feet. All men had been given dry socks and whale oil on leaving the trenches, and every endeavour made to check the sickness.
Each man was also issued with a leather jerkin.
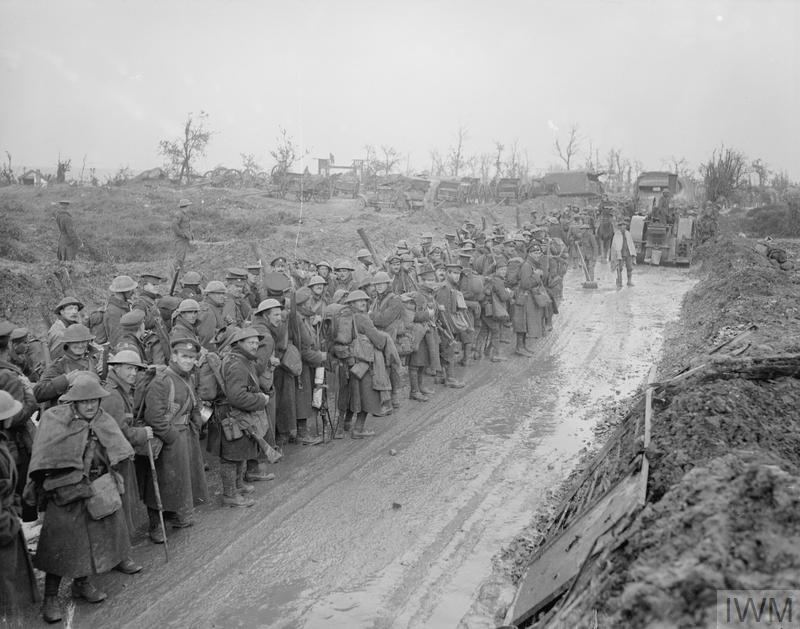
IWM Q 5320: Troops of the 2nd Battalion, South Wales Borderers, on the road to the trenches in the rain at Montauban, October 1916. © IWM. Source: Imperial War Museums: https://www.iwm.org.uk/collections/ item/object/205237466
24/10/16. Remained in support trench and 25 further men admitted to Hospital.
Rain fell for nearly the whole day.
15/10/16. Remained in support trench, and 18 men admitted to hospital. The strength at present with the battalion is 19 Officers 393 other ranks, the number in trenches being 16 Officers and 330 other ranks. [1800]. The Battalion moved up to the trenches again at night, but did not hold quite the same line.
Only half the previous front trench was held i.e. the right half of GREASE Trench in front of GUEUDECOURT, a front of about 350 yards.
This was held by two Companies (A and C), the remaining two being respectively in support in the sunken road, west of GUEUDECOURT, and in reserve in GOAT trench near Batt. H.Q. The relief was accomplished during the night without mishap. Head Quarter Bombers and Lewis Gunners were attached to Coys, owing to casualties in these specialists.
26th Oct. A normal day with the exception of heavy shelling by the enemy in the afternoon, due apparently to nervousness of an attack by us. Orders were prepared for an attack by us on the 28th Oct which had been previously postponed from today. [0200]. In the early morning a patrol under Lieut J.H. Harford went out to discover if the enemy had any wire out on our front. The patrol was unfortunately caught by the enemy’s fire and Lieut Harford was killed. During the night also, both Capt. B.J.R. Kelly and 2nd Lt W.M. Evans reported sick and were sent to Hospital.
27th Oct. During the day orders came through that our attack had again been postponed, and that we were to be relieved at night by the 4th Worcester Regt. [1900]. The relief was carried out without mishap and the battalion moved back into Brigade reserve in SWITCH and GAP trenches about half a mile in front of DELVILLE Wood.
The weather had been very bad during the day and our new trenches were in a terribly muddy condition, and there was practically no shelter from rain or cold for officers or men.
News of Lieutenant Harford’s death:
In 1916, the death of Lieutenant Harford was announced in newspapers on both sides of the Welsh/English border.
The Cambria Daily Leader, 1st November 1916 [63]:
SCROLL OF FAME.
[…]
LIEUTENANT JACK HARFORD.
Information has been received at Lampeter of the death of Lieutenant Jack Harford, aged 20, eldest son of Major J. C. Harford, D.L., J.P., Falcondale, Lampeter, and lord of the manor, who has died in action in France. He was wounded in action several months ago.
Gloucestershire Echo, 4th November 1916 [64]:
LIEUT. J. H. HARFORD.
The death occurred in action on October 25th of Lieut. John Henry Harford (South Wales Borderers). The gallant officer, who was only 20 years of age, was the eldest son of Mr. John C. Harford, of Falcondale, Lampeter, a grandson of Mrs. Harford, of Blaise Castle, Henbury, and a nephew of her Grace the Duchess of Beaufort. He received his commission in August, 1914, and was promoted in October of last year.
The Brecon County Times, Neath Gazette, and General Advertiser, etc., 9th November 1916 [65]:
BRECONSHIRE WAR ITEMS.
Second Lieut R D Beardshaw and Second-Lieut E T S Bricknell, South Wales Borderers, have died of wounds received in action.
Lieut John Henry Harford, South Wales Borderers, eldest son of Mr John C Harford, of Falcondale, Lampeter, was killed in action on October 25th. He was 20 years of age.
Lieut R D Beardshaw, South Wales Borderers, of Tondu, has died of wounds received in action. Deceased enlisted as a private on the outbreak of war, and had served in Gallipoli.
Casualties amongst non-commissioned officers and men officially notified, the place named being the address of the next of kin, except where otherwise stated:–
Reported killed, previously reported missing: 17770 Pte. J. S. Jones, King’s Own Yorkshire Light Infantry, Hirwain.
Died of Wounds: 21549 Lance-Corporal J. Woodhouse, South Wales Borderers (enlisted at Brecon).
Wounded: 18754 Driver E. Moseley, R.F.A., Brecon.
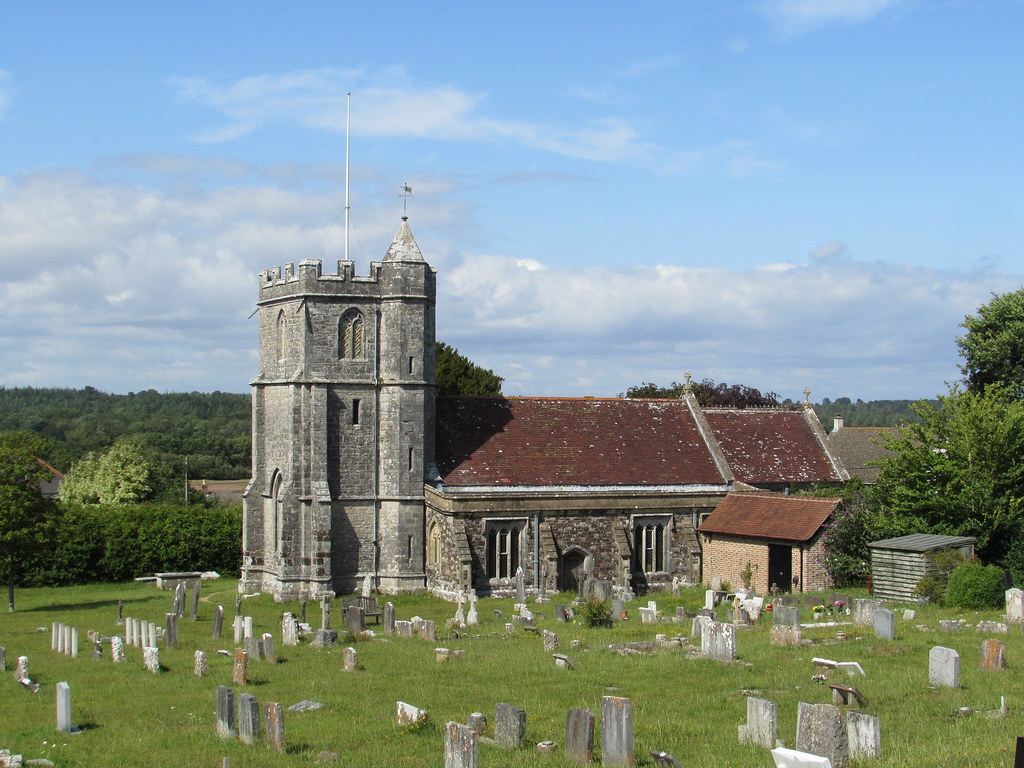
A memorial service was held at St Peter’s Church, Lampeter on the 7th November.
The Amman Valley Chronicle and East Carmarthen News, 9th November 1916 [66]:
A crowded congregation assembled at St. Peter’ s Church, Lampeter, on Tuesday, when a service was held in memory of the late Lieut. John Henry Harford, eldest son of Major J. C. Harford, land heir to the Peterwel [i.e. Peterwell] Estate, was held. The Revs. W. Ll. Footman, D. J. Evans, and R. H. Richards officiated. A pathetic service was brought to a close by the singing of “O fryniau Caersalem.” At Soar Congregational Chapel reference was made by the pastor, the Rev. Evan Evans, and a vote of condolence with Major Harford and relatives was passed.
Richard Humphrey Richards was Professor of Welsh at St. David’s College, Lampeter.
A slightly-longer description of the service was published in the Welsh-language Y Llan of the 10th November [67]:
LLANBEDR-PONT-STEFFAN
[…]
Y DIWEDDAR IS-GADBEN HARFORD:–
Prydnawnddydd Mawrth, cynhaliwyd gwasanaeth coffadwriaethol i’r diweddar Is-gadben Harford, mab hynaf ac etifedd yr Uch-gadben Harford, Falcondale, yr hwn a gollodd ei fywyd yn Ffrainc, Hydref 25ain. Yr oedd yr eglwys yn orlawn, a llawer yn methu myned i fewn. Darllenwyd y gwasanaeth gan y Parchn. D. J. Evans a’r Proffeswr Richards, a’r llith gan y Parch. W. Ll. Footman, a phregethwyd gan y Pareh [i.e. y Parch.] D. J. Evans. Canwyd Salm xxiii. ac emynau priodol i’r achlysur yn ystod y gwasanaeth. Yr oedd y canu dan arweiniad Mr. W. Lewis (Arfryn), Mr. Llewellyn, organydd Coleg Dewi Sant yn gwasanaethu wrth yr organ, yr hwn chwareuodd y “Dead March” ar ddiwedd y gwasanaeth. — X.
A rough translation might read:
THE LATE LIEUTENANT HARFORD:–
A memorial service was held on Tuesday afternoon for the late Lieutenant Harford, eldest son and heir to Major Harford, Falcondale, who lost his life in France, October 25th. The church was overcrowded, and many could not enter. The service was taken by the Rev. D. J. Evans and Prof. Richards, the lesson was read by the Rev. W. Ll. Footman, and the Rev. D. J. Evans preached. Psalm xxiii and hymns appropriate to the occasion were sung during the service. Mr. W. Lewis (Arfryn) led the singing; at the organ, Mr. Llewellyn, the organist at St. David’s College, played the “Dead March” at the end of the service.
Tributes to Lieutenant Harford were later to come from Lampeter Town Council.
The Cambrian News and Merionethshire Standard, 10th November 1916 [68]:
Lampeter Town Council.
CONDOLENCE WITH MAJOR HARFORD.
Lampeter Town Council met on Thursday. Present: Councillor Ll. Bankes-Price, mayor; Aldermen Walter Davies, Wm. Jones, Lewis Jones; Councillors E. Davies, J. S. Jones, D. F. Lloyd, D. Jones. D. Thomas, W. Davies (St David’s College), Wm. Davies (saddler), D Davies, and T. W. Jones; Mr J. E. Lloyd, town clerk: and other officials.
Prior to starting the business, the Mayor feelingly referred to the sad fact of the death of Lieut. John Harford, eldest son and heir of Major Harford, Falcondale. There had always existed a very good feeling between the inhabitants of the town and the Falcondale family, and on behalf of the Council and the town he proposed a vote of condolence with Major Harford and family in their sad bereavement. The vote was passed in silence.
A memorial service was also held at the the Church of St Mary, Henbury (Bristol), where members of the Harford family lived at Blaise Castle.
Western Daily Press, 10 November 1916 [69]:
THE LATE LIEUT. J. H. HARFORD.
A service in memory of the late Lieutenant John Henry Harford (South Wales Borderers), killed in action on October 25, was held in the Henbury parish church on Tuesday afternoon. It was conducted by the Vicar (Rev. C. P. Way), and in addition to members of the Blaise Castle family and other relatives, many others attended, including the choir. The organist, Mr. A. B. Cleaves, played suitable music on the organ before and after the service, including Chopin’s Funeral March.
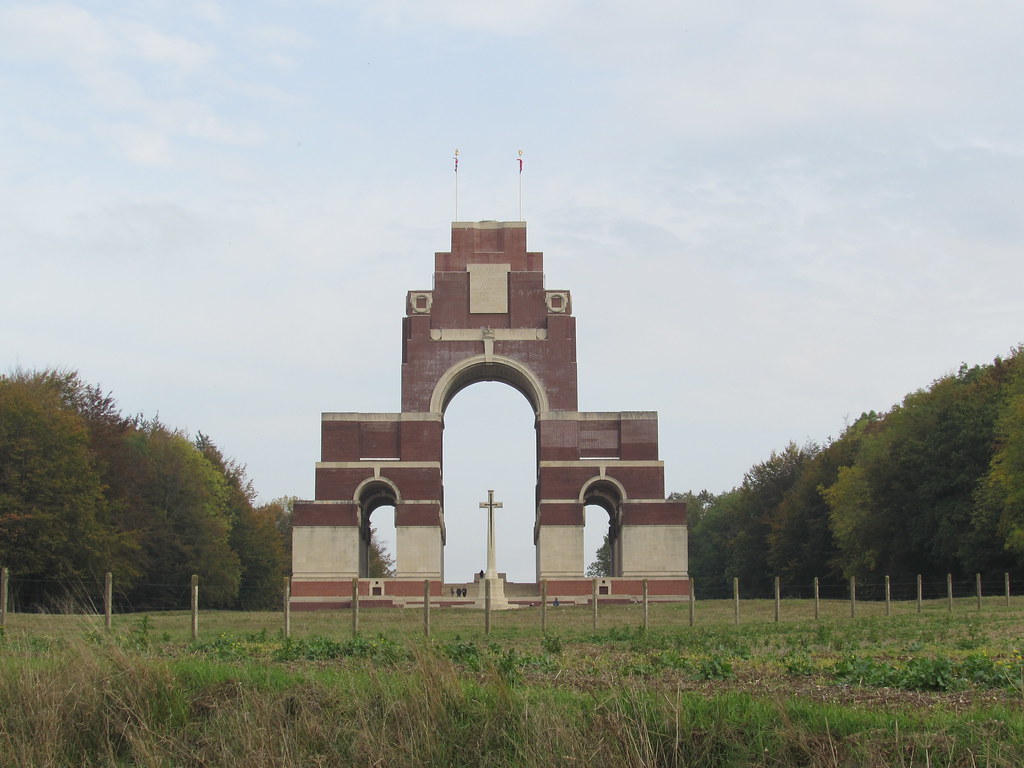
Thiepval: The Thiepval Memorial to the Missing (Somme). Source: Flickr.
Memorials:
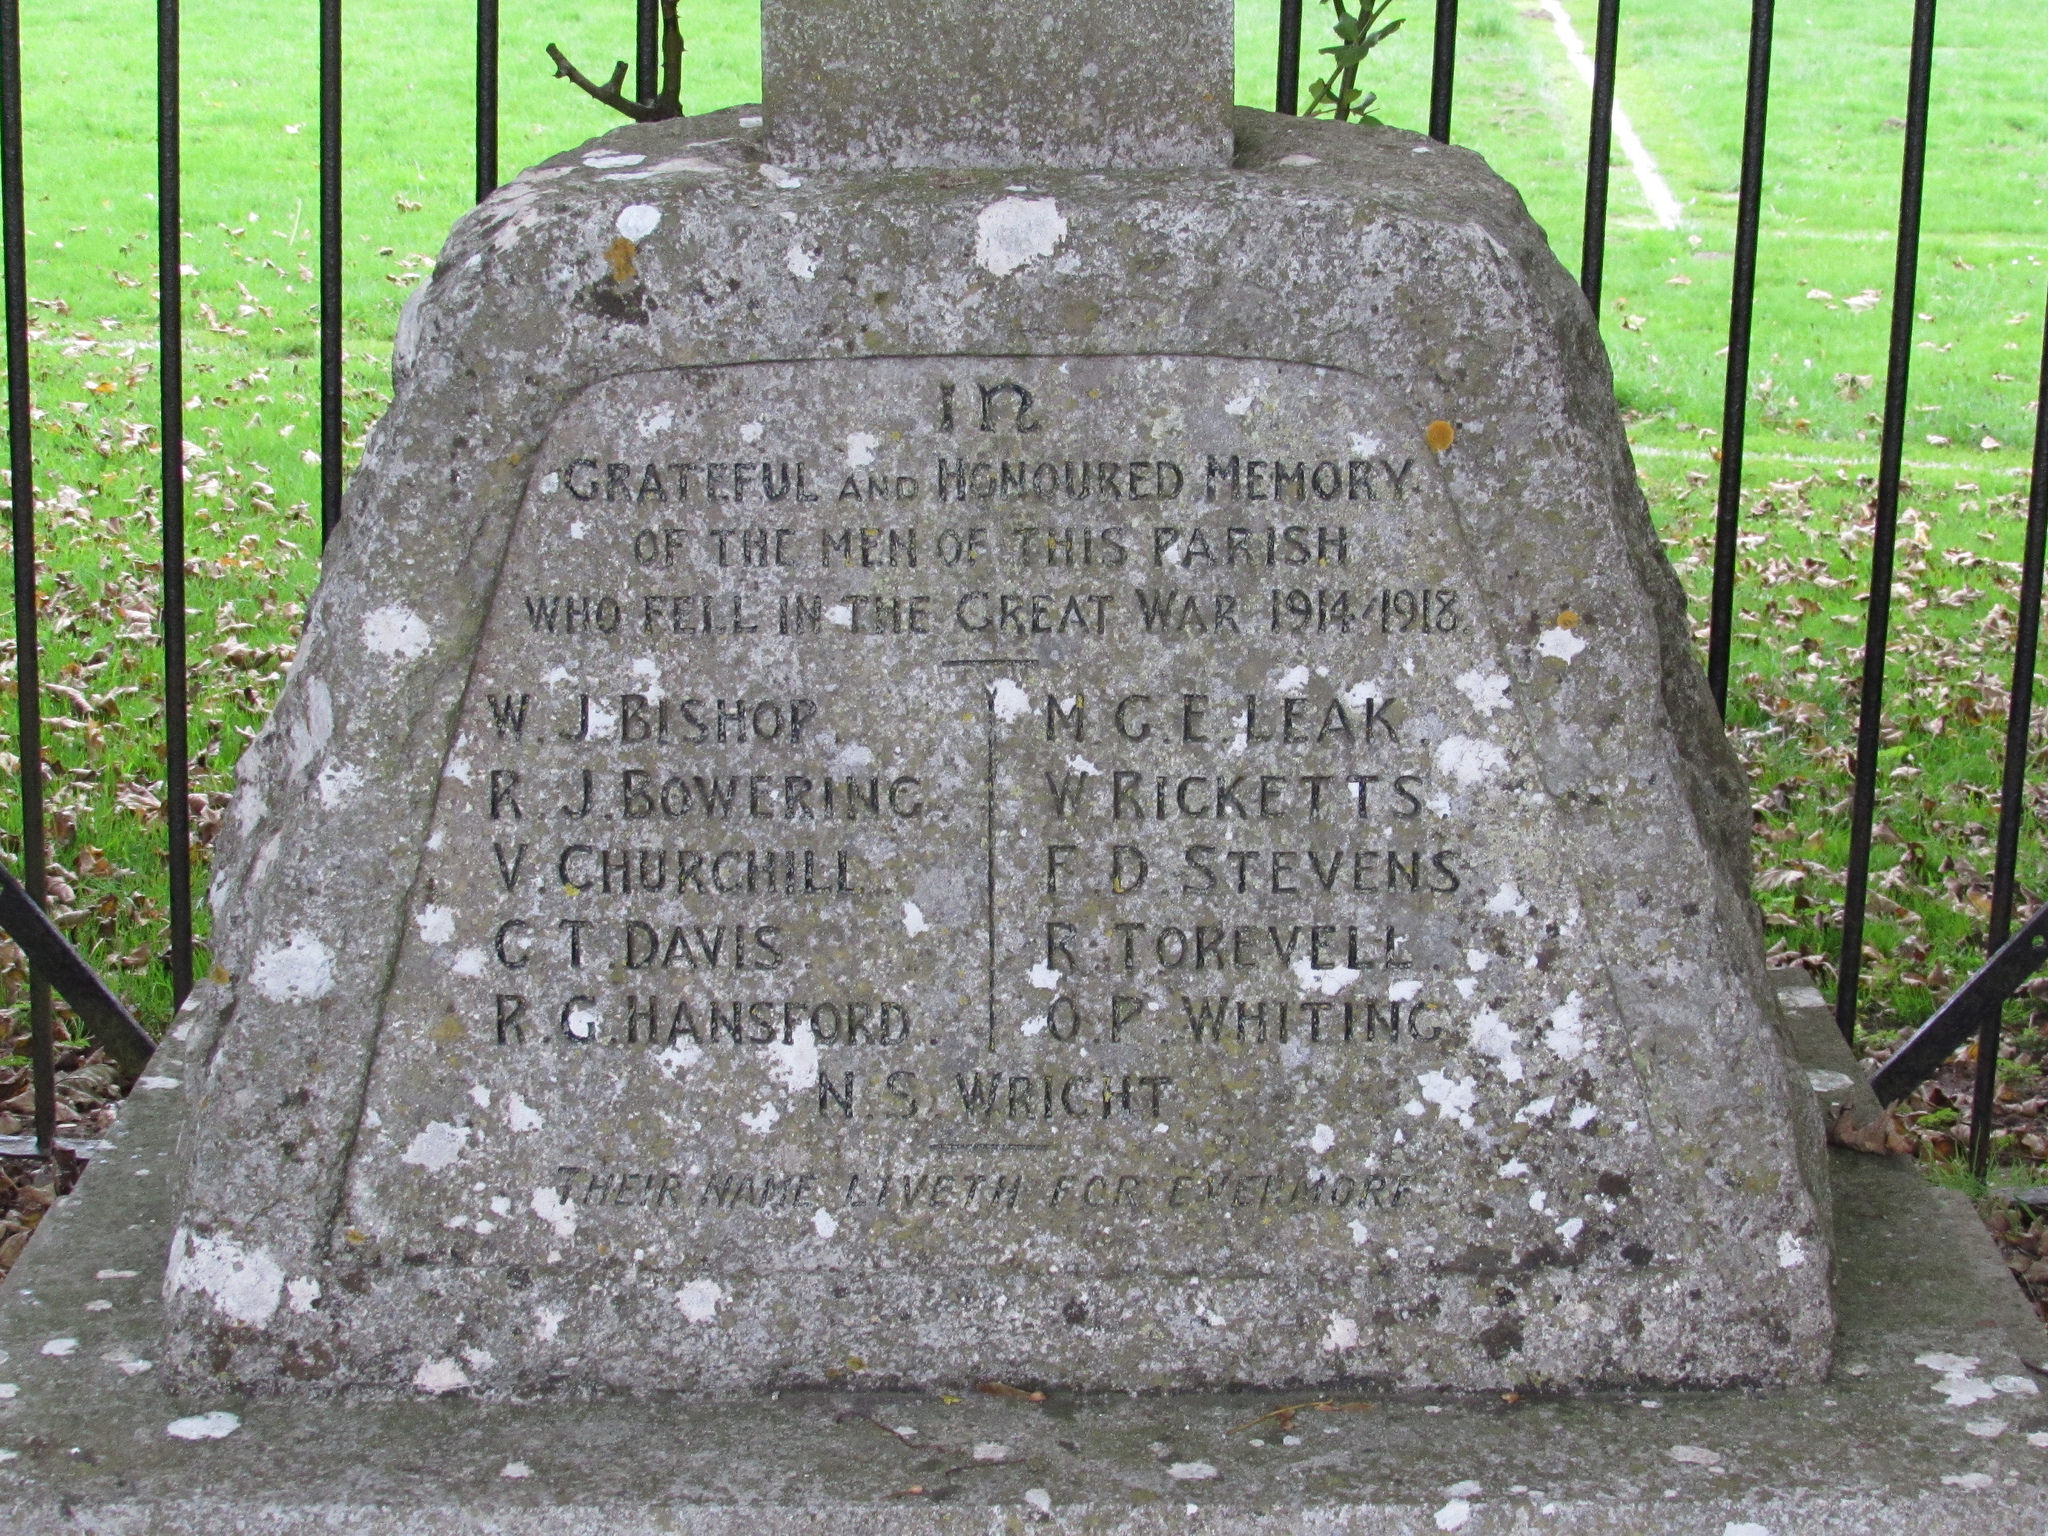
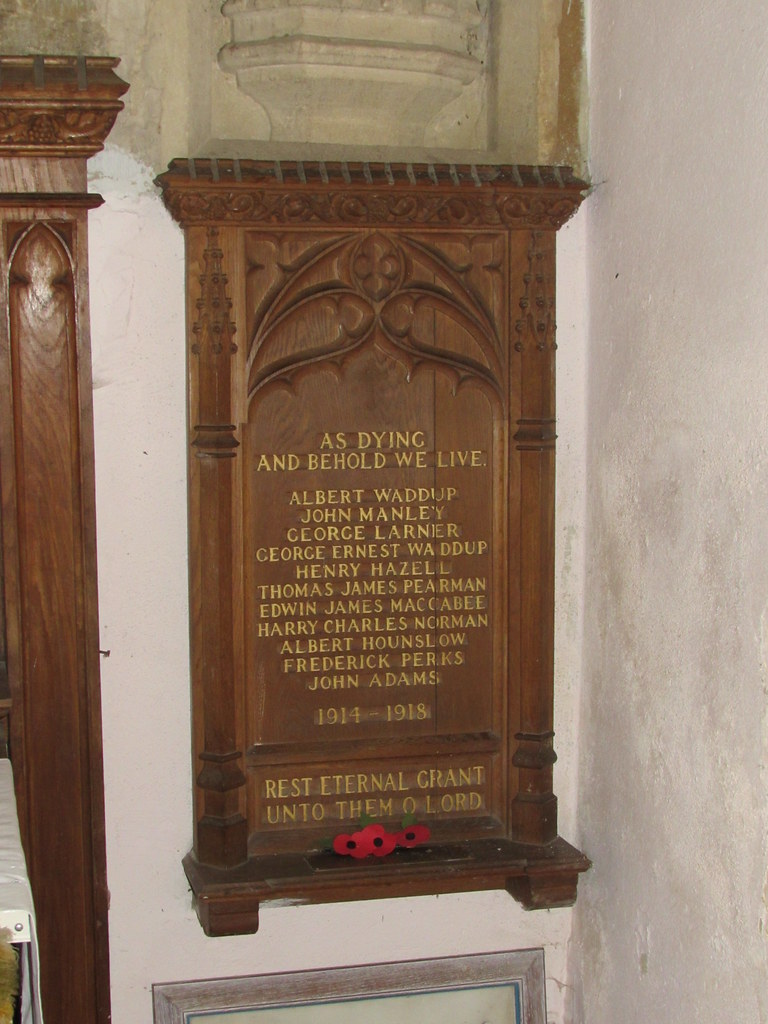
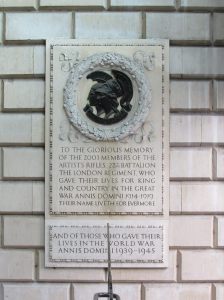
In France, Lieutenant Harford is commemorated on the Thiepval Memorial to the Missing of the Somme. In the UK, his name features on the war memorials at Lampeter (Cardiganshire) and Henbury (Bristol), the memorials at Magdalen College, Oxford, Harrow School, and the Durnford School memorial in the the Church of St. George, Langton Matravers (Dorset). There is also a memorial plaque to Lieutenant Harford in the Church of St Peter, Lampeter [70]. This provides a succinct summary of his military service and his death:
In loving memory of John Henry Harford,
Lieut. 3rd Bn South Wales Borderers, eldest son of
John Charles Harford of Falcondale & Blaise Castle.
He joined on Sept. 16th 1914 & was severely wounded
in Gallipoli June 30th 1915, whilst attached to the
2nd Bn Royal Fusiliers; joined the 1st Bn South
Wales Borderers in France May 1916, and was
killed when on patrol Oct. 26th 1916 aged 20 years.
He left a letter stating that he expected to be killed
& was quite ready and willing to die for his country.
Family background:
John Henry Harford was born at Lampeter on the 7th February 1896, the son of Major Sir John Charles Harford (1860-1934) and Blanche Amabel Harford (née Raikes) (1865-1904) of Falcondale [71]. John Henry was baptised at Lampeter by the vicar, the Rev. Daniel Jones, on the 10th March 1896.
The family were resident at Falcondale, near Lampeter, at the time of the 1901 Census. John Henry was four-years-old, the second eldest of three children. His father, John Charles Harford, was forty-years-old and described as “living on own means,” while his mother was thirty-four. John Henry’s siblings were: Mary Amabel (aged six) and George Arthur (two). Also living with the family at that time was John Charles’s older sister, Charlotte Louisa Harford (aged forty-five), and an array of servants: a butler (William John Turner Pomroy), footman (Hugh Lewis), housemaid (Mary Jane Puffit), nurse (Annie Eda Eliza), under nurse (Martha Jones), under housemaid (Ellen James), and kitchen maid (Violet Skuse). It was obviously not recorded in the census, but there had also been a fourth child, William Harford who had been born in 1899, but who had died in infancy.
John Henry’s mother, Blanche Amabel Harford, died in 1904, aged 39; she was buried at Lampeter on the 31st August, the officiating minister being the Rev. Canon Harford of Bath and Wells, who was a cousin.
By the time of the 1911 Census, John Henry Harford was fifteen-years-old, resident at Harrow-on-the-Hill, a student at Harrow School. At the same time, his younger brother was at Durnford School. No members of the Harford family appeared to be resident at Falcondale at the time of the census.
Lieutenant John Henry Harford was not the only one of the family to serve during the war [72]. His father became a Major in the Pembroke Yeomanry and served on the Western Front. His brother (George) Arthur served as a Lieutenant in the 21st Lancers, which spent the whole duration of the war in India. His sister, Mary Amabel (of Coombe House, Westbury-on-Trym), served with the British Red Cross between June 1915 and February 1916 as a VAD (Voluntary Aid Detachment) nurse, being based at Horton V.A. Hospital, near Chipping Sodbury (Gloucestershire). [73]. The hospital was based at the house of another relative, Hugh Wyndham Luttrell Harford (he was the great grandson of John Scandrett Harford, senr.) [74].
In June 1916, while Lieutenant J. H. Harford would have been in France, Mary Amabel Harford married Charles Lorraine Hill, the son of Charles Gathorne Hill. This was reported in The Cambrian News and Merioneth Standard of the 23rd June 1916 [75]:
Lampeter Lady.
MARRIAGE OF MISS HARFORD.
At St. Peter’s Church, Eaton-square, London, on Tuesday, the wedding took place of Miss M. A. Harford, daughter of Major J. C. Harford of Falcondale, Lampeter, and Mr. Chas. Lorraine Hill, son of Mr. Charles Gathorne Hill, of Pool Court Gate, Gloucestershire. The bride was given away by her father. The Bishop of St. David’s, assisted by the Rev Harold Prask, officiated, and the service was fully choral. The church was prettily decorated with white lilies and foliage. Miss Kathleen Hill (sister of the bridegroom), Miss Phyllis Methuen, and Miss Dorothy Wilson Fox (cousin of the bride) were the bridesmaids, and a younger brother of the bridegroom was the best man. A reception was afterwards hold at 10, South-street, Park-lane, lent for the occasion by a relative of the bride.
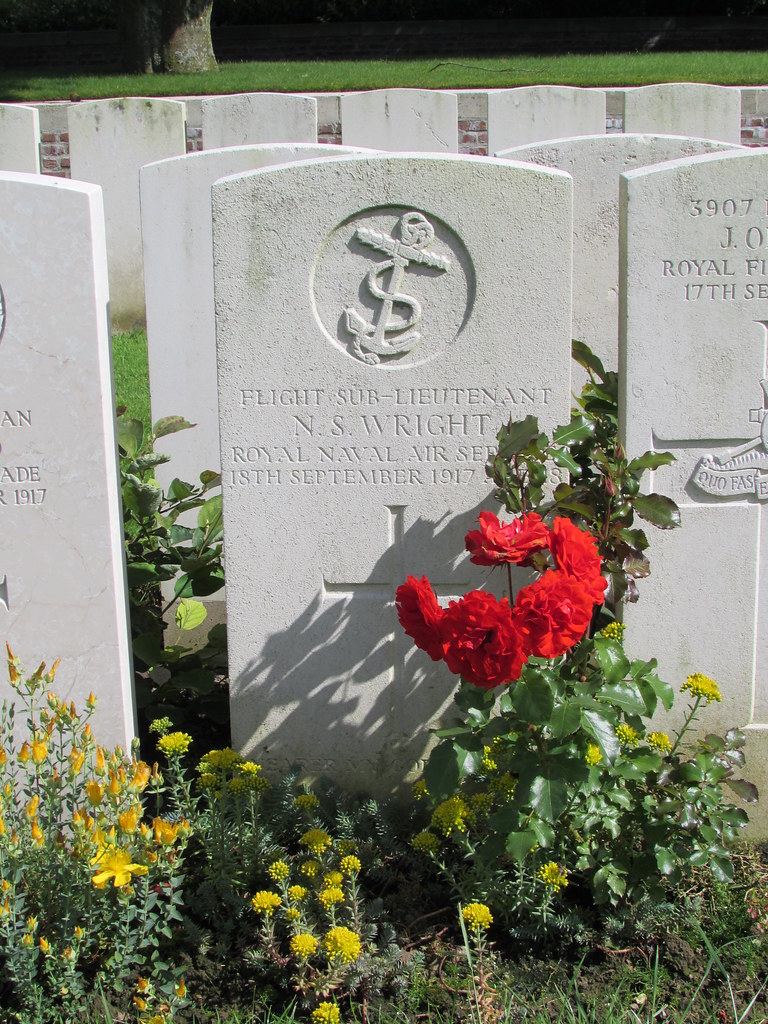
Charles Lorraine Hill’s younger brother, Richard Alexander Gathorne Hill, was another former pupil of Durnford that died during the war. He gained a commission in the Somerset Light Infantry, but transferred to the Royal Naval Air Service and, on its formation, the Royal Air Force. Lieutenant Richard Alexander Gathorne Hill of 204th Squadron, Royal Air Force was shot down and killed while leading a patrol off the Belgian coast on the 12th August 1918 [76].

The Harford coat-of-arms, from the cover of: Alice Harford, Annals of the Harford Family (1909). Source: Internet Archive.
The Harford family:
The Harford family tradition claimed descent from John Harford of Bosbury (Herefordshire), who had lived during the reign of King Henry VIII. Despite that, in 1909, Alice Harford was only able to definitively trace the family line back to a Charles Harford (or Harvorde) of Marshfield (Gloucestershire), who had married Mary Bushe at St Peter’s Church, Bristol in 1656 [77]. Charles joined the Society of Friends after his marriage, and the Harfords became a prominent Quaker merchant family in Bristol for several generations. Charles’s great-grandson, John Scandrett Harford, senr. (1754-1815), a banker, and his wife Mary (née Gray) acquired Blaise Castle at Henbury (Bristol) in 1790. The castle was a gothic fantasy built in 1766, which Catherine Morland had looked forward in vain to visiting in Jane Austen’s novel Northanger Abbey. The Harfords built a new house at Blaise, while the grounds (with the folly) were landscaped by Humphry Repton [78].
It was John Scandrett Harford’s eponymous son who, together with his younger brothers, Abraham Grey Harford-Battersby (1786-1851) and Alfred Harford, acquired the Peterwell estate at Lampeter in 1819 from their father-in law, Richard Hart Davis. In the 18th Century, Peterwell had been the home of Sir Herbert Lloyd, who was a barrister and MP, but who had also lived well beyond his means, leaving the estate on his death in 1769 with considerable debts [79]. His nephew, John Adams, was eventually forced to sell the estate and mansion in 1781 [80]. The estate passed through several hands while the house at Peterwell itself fell into dilapidation. After the acquisition of the estate by the Harford brothers, they chose not to renovate the house itself [81].
In 1820, the year after the Harfords had acquired the estate, John Scandrett Harford, junr. (1785-1866) offered the Castle Field at Lampeter to Thomas Burgess, the Bishop of St Davids, for the establishment of the bishop’s long-planned college [82]. The foundation stone of St David’s College was laid at Lampeter in 1822 and it admitted its first students in 1827.
On the death of John Scandrett Harford, junr. in 1866, the Peterwell estate passed to his nephew, John Battersby-Harford (1819-1875), the son of Abraham Gray Harford-Battersby. John Battersby Harford had married Mary de Bunsen at St James’s Church, Piccadilly in 1850, the ceremony being conducted by the Bishop of London [83]. Mary’s father was Christian Charles Josias von Bunsen, Baron von Bunsen (1791-1860), who was a scholar as well as a Prussian diplomat in London (Prussian Envoy Extraordinary and Minister Plenipotentiary). Mary had been born in the Palazzo Caffarelli in Rome on the 11th June 1829, the fourth daughter of Baron Bunsen and Frances Waddington Bunsen, Baroness Bunsen (née Frances Waddington) [84]. The two families were connected twice by marriage, as John’s sister, Mary Harford-Battersby, had married Henry de Bunsen, the then Vicar of Lilleshall, in 1847 [85].
John and Mary Charlotte would have eight children. Their eldest son, John Charles Harford (John Henry’s father), was born at Stoke Bishop on the 28th July 1860.
It was John Battersby Harford that decided to live at Lampeter, and in the late 1850s he commissioned Thomas Talbot Bury to build an Italian-style villa at Falcondale. John and Mary Charlotte Harford contributed a lot to the development of Lampeter and were deeply involved in the building of the new parish church at Lampeter, which was consecrated in 1870. John also built a church at Sillian [86]:
In a hilly outlying part of the parish of Lampeter, where not even a chapel existed, a small church arose, of which he was not only the architect but the builder. Every working drawing done to scale for masons and carpenters was his work; the small nave and the semi-circular apse are perfectly proportioned and thoroughly well-built.
According to their daughter Alice’s book on the family, the couple spent a great deal of time travelling on the continent, especially in Italy and France. Despite this, they were resident at Falcondale on the date that the 1871 Census was taken.
John Battersby Harford died near Nice in 1875. His widow would survive him for over forty years. Mary Charlotte Harford, of Blaise Castle, died at Thornbury (registration district), Gloucestershire on the 17th February 1919, aged 89, and was buried at Henbury. Her obituary in the Cambrian News is interesting in that it doesn’t mention her part-Prussian ancestry [87].
MRS.HARFORD LAMPETER. The death occurred on Monday at the age of ninety, of Mrs. Charlotte Elizabeth Harford, Blaise Castle, Bristol and Falcondale, Lampeter. Deceased, who was married to the late Mr. John Battersby Harford, M.A., of Falcondale in 1850 was greatly respected in Lampeter. She and her husband closely identified themselves with every movement to help forward the town and College. It was through Mrs. Harford that the Town Hall was built at a cost of £3,000. This improved the status of the town and resulted in the assizes being held there. Mrs Harford’s sons are Major J. C. Harford, Falcondale; and Mr. Frederic D. Harford, C.V.O., H.M. Diplomatic Service.
The one sentence report in the Somerset Standard of the 28th February 1919 managed to get both her age and the name of her residence incorrect [88]:
The death at the venerable age of 95 of Mrs. Harford, of Blaize Castle, will be regretted by those who had known of her through the late Rev. Canon Harford, of Marston.
So ended a long life that had begun on the Capitoline Hill in Rome in 1829.
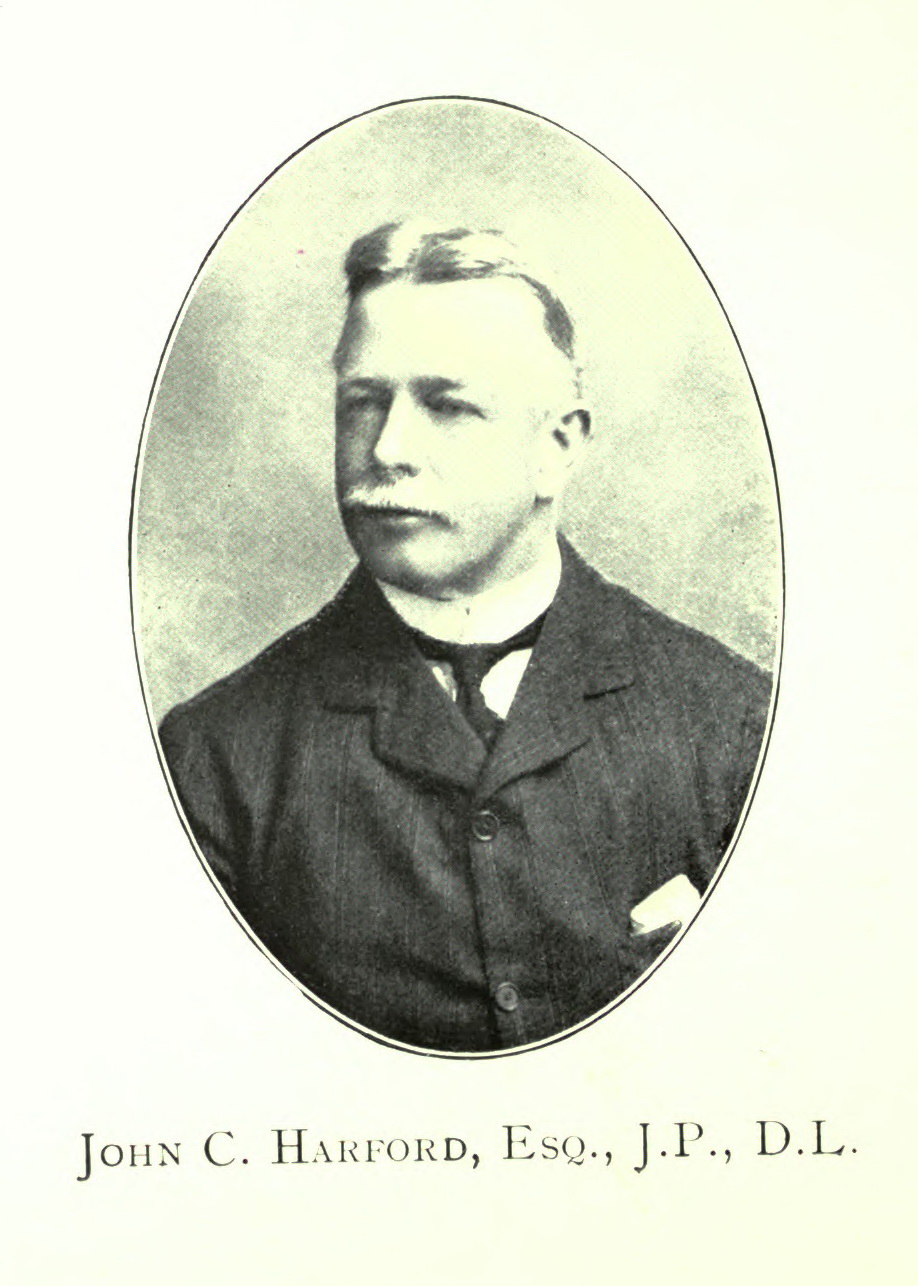
John Charles Harford, Esq., J.P., D.L. From: South Wales: historical, biographical and pictorial (ca. 1908). Source: Internet Archive.
John Charles and Blanche Amabel Harford:
As has already been stated, John Battersby and Mary Charlotte Harford’s eldest son, John Charles Harford (John Henry Harford’s father), was born at Blaise Castle (Stoke Bishop) on the 28th July 1860. Alice Harford’s book on the family notes that [89]:
He was given the name of John, borne by his father and his great-uncle, and of Charles after his Bunsen grandfather. His was the first baptism in the new church of St. Mary Magdalene, Stoke Bishop, planned and built by the untiring efforts of John Battersby-Harford.
By the time of the 1881 Census, John Charles Harford was twenty-years-old and serving as an officer in the Gloucestershire Hussars, boarding at 1 New King Street, Bath, part of the household of George and Annie Aplin. The 1891 Census recorded John Charles Harford, aged thirty and “living on own means,” boarding at the residence of Henry and Ruth Jones in the High Street, Malmesbury (Wiltshire). Also boarding there was his distant relative, the twenty-nine-year-old Hugh Harford — who during the First World War would establish a V.A. Hospital at his home at Horton, near Chipping Sodbury.
John Charles Harford married Blanche Amabel Raikes at St Peter’s Church, Eaton Square, Pimlico on the 11 April 1893 [90]. The marriage was widely reported, e.g. in the South Wales Daily News of the 12th April 1893 [91]:
MARRIAGE OF MR J. C. HARFORD.
The marriage of Miss Blanche Raikes, second daughter of the late Mr Cecil Raikes, M.P., with Mr J. C. Harford, of Blaise Castle, Gloucester, and Falconbridge [sic], Cardiganshire, was solemnised on Tuesday afternoon at St. Peter’s Church, Eaton-square. Owing to the bride’s family being in mourning, only the near relatives of the two families received invitations. The ceremony was performed by the Venerable Archdeacon of London, assisted by the Rev. Walter Raikes.
Also in Ye Brython Cymreig of the 14th April 1893 [92]:
Priodas Mr Harford, Falcondale. Dydd Mawrth diweddaf, yr lleg cyfisol, priodwyd Mr J. C. Harford, Falcondale; Llanbedr, a Blaise Castle, sir Gaerloew, â Miss Blanche Raikes, ail ferch y diweddar Wir Anrhydeddus Cecil Raikes, A.S., yn Eglwys St. Peter’s, Eaton Square, Llundain. Oherwydd fod teulu y briodasferch mewn galar, ni ddanfonwyd gwahoddiadau i neb heblaw perthynasau agosaf y ddau deulu. Cyflawnwyd y ddefod gan yr Hybarch Archddiacon Llundain, a’r Parch Walter Raikes.
Blanche Amabel Raikes, had been born in Middlesex in 1865, the daughter of the Rt. Hon. Henry Cecil Raikes and Charlotte Blanche Raikes (née Trevor-Roper). Henry Cecil Raikes (1838-1891) was a Conservative Party MP, serving at various times Chairman of Ways and Means, and Postmaster General. Unfortunately, Blanche Amabel Harford died in 1904, aged 39, and was buried at Lampeter.
Shortly after his wife’s death, a publication entitled, South Wales, historical, biographical and pictorial published a long profile of John Charles Harford, giving full attention to his involvement in public service and politics [93]:
John Charles Harford, Esq., J.P., D.L.
ONE of the most active public men in the County of Cardigan, Mr. John Charles Harford, J.P., D.L., of Falcondale, Lampeter, is still on the right side of fifty, so that he may look forward to rendering for many years such useful public service as has already gained for him a great measure of esteem. He was born at Stoke Bishop, near Bristol, on July 28th, 1860, being the elder son of the late John Battersby Harford, Esq., J.P., D.L., by his marriage with Mary Charlotte, daughter of His Excellency Baron Bunsen, formerly Prussian Envoy Extraordinary and Minister Plenipotentiary in London, the latter’s wife being a daughter of James Waddington, of Llanover, co. Monmouth.
Mr. J. C. Harford represents a family which, migrating from Marshfield, co. Gloucester, settled at Bristol in the course of the seventeenth century. His paternal grandfather was the late Abraham Gray Harford. Esq., of Stoke House, co. Gloucester, who assumed by Act of Parliament the name and arms of Battersby on inheriting the estate of his kinsman, William Battersby. He was married to Elizabeth, daughter of Major-General Dundas, of Fingask and Carron Hall, member of a famous Scottish house, and died in 1851. His elder son, Mr. J. C. Harford’s father, succeeded to the estates of his uncle in 1866, the latter gentleman, John Scandrett Harford, Esq., J.P., D.L., D.C.L., F.R.S., of Blaise Castle, who was married to a daughter of Richard Hart Davies, Esq., for many years Member of Parliament for Bristol, having died without issue. Mr. John Charles Harford, who was educated at Harrow, succeeded his father in 1875, and married on April 11th, 1893, Blanche Amabel, second daughter of the Right Hon. Henry Cecil Raikes, P.C., J.P., D.L., of Llwynegrin, Mold, co. Flint. The right hon. gentleman, who died in 1891, had a distinguished Parliamentary career, being for six years Chairman of Ways and Means and Deputy-Speaker of the House of Commons, and after-wards, from 1886 to 1891, Postmaster-General in Lord Salisbury’s Administration.
Mr. Harford is perhaps best known in Cardiganshire as a politician. He has for many years fought strenuously for the Conservative cause in Cardiganshire, twice contesting the County representation in Parliament, but despite his excellent qualities as a vigorous and influential candidate, he was unable to defeat the traditional Liberalism of the constituency. Nevertheless, his splendid services for the Party in the County are readily acknowledged on all hands, and defeat at the polls has in no wise checked his ardour or slackened his enthusiasm for principles he has advocated with much courage and consistency for many years.
His devotion to public duties in the County is a pleasing feature in his career, and one concerning which all parties gladly concede his integrity and usefulness. A Deputy-Lieutenant of Cardiganshire, he is on the Commission of the Peace for that County and also for Gloucestershire, and takes a prominent part in affairs in the neighbourhood of Lampeter, where he is Lord of the Manor. He is a member of the Council of the University College of Wales, Aberystwyth, and a member of the Council of St. David’s College, devoting to both offices much careful attention, as he does to all business which he undertakes. He is Chairman of the Four Counties’ Farm, and a Trustee of the Diocese of St. David’s. He was High Sheriff of Cardiganshire in 1885, and has done good service as an Alderman of the County Council.
It goes almost without the saying that Mr. Harford is a keen sportsman. He is an enthusiastic follower of hounds, indulges in a good deal of shooting in the season, and is also a motorist.
Mr. Harford, whose wife died in August, 1904, has two sons and one daughter. In addition to his Cardiganshire seat, he is the owner of Blaise Castle, Henbury, Bristol. He is a member of the Junior Carlton Club.
The profile did not mention it, but John Charles Harford also served as an officer with the Volunteers. On the 1st April 1908, presumably as part of the establishment of the new Territorial Force, Major John Charles Harford from the Pembroke Imperial Yeomanry was appointed to the Pembroke (Castlemartin) Yeomanry, “with rank and precedence as in the Imperial Yeomanry” [94]. He would afterwards serve during the First World War, being gazetted as a temporary Major in the Pembrokeshire Yeomanry in 1915, as reported in the Carmarthen Journal and South Wales Weekly Advertiser of the 29th October [95]:
Captain J. C. Harford, of Falcondale, Lampeter, was this week gazetted as temporary major in the Pembrokeshire (Castlemartin) Yeomanry.
Major John C. Harford’s medal card [96] states that he served in France from June 1917, presumably attached to another regiment, as there were no units of the Pembroke Yeomanry serving on the Western Front at that point in time. The 1/1st Pembroke Yeomanry had been combined with the Glamorgan Yeomanry to form an infantry battalion, the 24th (Pembroke & Glamorgan) Battalion, The Welsh Regiment, but they were based at that point in time in Palestine, moving to the Western Front with the 74th (Yeomanry) Division in May 1918 [97].
As the profile in the South Wales book stated, John Charles Harford served for a long time as a magistrate in both Cardiganshire and Gloucestershire. He was also very heavily involved in Cardiganshire local government, acting for a time as deputy lieutenant of that county. He was granted a baronetcy in the King’s birthday honours of 1934, just a few weeks before he died, aged 74.
There was a full report on Sir John’s death (with photograph) in the Western Mail of the 17th July 1934 [98]:
BARONET DIES ON GOLF LINKS
Sir John Charles Harford
LORD OF MANOR OF LAMPETER
FROM OUR OWN CORRESPONDENT
LAMPETER, Monday.
Major Sir John Charles Harford, Bart., of Falcondale, Lampeter, died suddenly on the golf links adjoining his home this afternoon, aged 74.
He attended the jubilee service at the parish church yesterday, and next week he was to receive the freedom of the borough in recognition of his many public services.
Sir John had been prominent in the life of Cardiganshire for many years and had served on the county council and guardians’ committee, being chairman on several occasions. He was a justice of the peace for the county as well as for Gloucestershire.
He was high sheriff for Cardiganshire in 1885 and was at the time of his death deputy-lieutenant. He had twice contested the county as Conservative Parliamentary candidate, but was unsuccessful.
WORK FOR EDUCATION
Sir John, who was Lord of the Manor of Lampeter, was born at Stoke Bishop, near Bristol, being the elder son of the late Mr. John Battersby Harford, J.P., by his marriage with Mary Charlotte, daughter of H. E. Baron Bunsen, formerly Prussian Envoy Extraordinary and Minister Plenipotentiary in London, whose wife was a daughter of Mr. James Waddington, of Llanover, Monmouth. He was educated at Harrow and had served as major with the Pembroke Yeomanry and in France during the Great War, in which his eldest son was killed.
He was greatly interested in education and was a member of the council of the University College of Wales, Aberystwyth, and St. David’s College, Lampeter.
He was also the chief promoter of the light railway between Lampeter and Aberayron.
Last month he was made a baronet for political and public services in Cardiganshire.
His wife, who predeceased him, was a daughter of the late Mr. Henry Cecil Raikes, Postmaster-General in Lord Salisbury’s second administration.
He is survived by a son and daughter.
Sir John’s death was also reported in the Gloucestershire Echo of the 18th July 1934 [99]:
BARONET FOR A MONTH
Death Of A Gloucestershire Magistrate
Major Sir John Charles Harford, aged 74, who was created a baronet last month, on the occasion of the King’s birthday, in recognition of public and political services in Cardiganshire, died suddenly on the golf links near his home, Falcondale, Lampeter, Cardiganshire.
Lampeter Corporation had arranged to confer the freedom of the borough on him next week in recognition of his services to the town, of which he was lord of the manor.
Sir John contested Cardiganshire unsuccessfully twice as a Conservative. He was formerly high sheriff and was ex-chairman of the county council and quarter sessions. He was also a deputy lieutenant for Cardiganshire and a justice of the peace for that county and for Gloucestershire.
He rendered valuable service as chairman of Cardiganshire Territorial Force Association, and was largely for the construction of the light railway to Aberayron. His wife, who predeceased him, was a daughter of the late Right. Hon. H. C. Raikes, a former Postmaster-General. He leaves a son and daughter.
Sir John was buried at Lampeter. In other circumstances, John Henry Harford would have inherited the baronetcy. Instead, Sir John’s surviving son, George Arthur Harford, became the 2nd Baronet. Falcondale was sold in 1951 and is now a hotel. Mary Amabel Harford died in 1966, her brother Sir George Arthur Harford the following year.
O fryniau Caersalem:
“O fryniau Caersalem ceir gweled” was one of the hymns sung at Lieutenant Harford’s memorial service at Lampeter in 1916. The hymn was written by David Charles (1762-1834), a Calvinistic Methodist minister. It was very popular in Wales, and was frequently used at burials and memorial services. The hymn confidently looks back at the pilgrim’s journey through the wilderness from the perspective of the heights of Zion, “From the hills of Jerusalem, I can see all the wilderness journeys, …” The tune used would have been Crug-y-bar, of which it is well-worth seeking out a recording [100].
O fryniau Caersalem ceir gweled,
Holl daith yr anialwch i gyd;
Pryd hyny daw troion yr yrfa,
Yn felys i lanw ein bryd;
Cawn edrych ar stormydd ac ofnau.
Ac angeu dychrynllyd a’r bedd,
A ninau’n ddiangol o’u cyrhaedd,
Yn nofio mewn cariad a hedd.
David Charles (1762-1834)
Hymn CXLVIII, in: Richard Williams and Joseph Williams, Hymnau a salmau: Yr hymnau gan mwyaf o waith Y Parch. William Williams, o Bantycelyn; a’r salmau gan Y Parch. Edmund Prys, o Feirionydd, wedi eu casglu ar ddymuniad ac at wasanaeth y Methodistiad Calfinaidd yn Liverpool (Liverpool: Printiwyd gan R. Ll. Morris, 1840), p. 130; source: Internet Archive (via Bodleian Library):
https://archive.org/details/hymnauasalmauyr00willgoog/page/n142/
References:
[1] D. T. W. Price, A history of Saint David’s University College, Lampeter, Vol. 1, to 1898 (Cardiff: University of Wales Press, 1977), p. 19.
[2] Alice Harford, ed., Annals of the Harford family (London: The Westminster Press, 1909); source: Internet Archive (via Allen County Public Library Genealogy Center):
https://archive.org/details/annalsofharfordf00harf
[3] Harrow Memorials of the Great War, Vol. IV (London: Philip Lee Warner, for Harrow School, 1919); source: Internet Archive (via University of California Libraries):
https://archive.org/details/harrowmemorialso04warn/page/n105
[4] The Durnford Memorial Book of the Great War, 1914-1918 (London: Medici Society, 1924), pp. 25-27.
[5] WO 339/25521, Officers’ Services, First World War: Lieutenant John Henry Harford, The National Archives, Kew.
[6] The Long, Long Trail: Royal Fusiliers (City of London Regiment):
https://www.longlongtrail.co.uk/army/regiments-and-corps/the-british-infantry-regiments-of-1914-1918/royal-fusiliers-city-of-london-regiment/
[7] Jenny MacLeod, Gallipoli (Oxford: Oxford University Press, 2015), p. 35.
[8] Stair Gillon, The story of the 29th Division: a record of gallant deeds (London: Thomas Nelson and Sons, 1925; Naval and Military Press reprint), pp. 20-21; digitised version also available from the British Library (Digital Store 09084.cc.37.):
http://access.bl.uk/item/viewer/ark:/81055/vdc_100002339298.0x000002
[9] Ibid., p. 23.
[10] Stephen Snelling, VCs of the First World War: Gallipoli (Stroud: History Press, 2010), pp. 10-32.
[11] B. H. Liddell Hart, History of the First World War (London: Pan Books, 1972), p. 175.
[12] Snelling, pp. 33-68.
[13] Ibid., pp. 69-91.
[14] Liddell Hart, p. 176.
[15] Durnford Memorial Book of the Great War, 1914-1918, p. 26.
[16] The Carmarthen Journal and South Wales Weekly Advertiser, 14th May 1915, p. 8; via Welsh Newspapers (National Library of Wales):
https://newspapers.library.wales/view/3678672/3678680/93/
[17] H. C. O’Neill, The Royal Fusiliers in the Great War (London: William Heinemann, 1922), pp. 95-96; source: Internet Archive (via University of California Libraries):
https://archive.org/details/royalfusiliersin00onei/page/94
[18] Chaplain 4th Class Oswin Creighton was killed in action in France on the 15th April 1918; Creighton’s father was the historian Mandell Creighton (1843-1901), who had been Dixie Chair of Ecclesiastical History at the University of Cambridge (1884-1891), Bishop of Peterborough (1891-1896), and Bishop of London (1897-1901); O. Creighton, With the Twenty-Ninth Division in Gallipoli: a chaplain’s experiences (London: Longmans, Green, and Co., 1916); digitised version available from the Internet Archive (via University of Toronto):
https://archive.org/details/withtwentyninthd00creiuoft/page/n9
[19] Creighton, With the Twenty-Ninth Division in Gallipoli: a chaplain’s experiences, p. 102:
https://archive.org/details/withtwentyninthd00creiuoft/page/102
[20] Ibid., p. 112: https://archive.org/details/withtwentyninthd00creiuoft/page/112
[21] Ibid., p. 125: https://archive.org/details/withtwentyninthd00creiuoft/page/n187
[22] Ibid., p. 128: https://archive.org/details/withtwentyninthd00creiuoft/page/128
[23] Ibid., p. 129: https://archive.org/details/withtwentyninthd00creiuoft/page/128
[24] Ibid., p. 131: https://archive.org/details/withtwentyninthd00creiuoft/page/130
[25] Ibid., p. 138: https://archive.org/details/withtwentyninthd00creiuoft/page/148
[26] O’Neill, pp. 99-100: https://archive.org/details/royalfusiliersin00onei/page/98
[27] Gillon, pp. 50-51.
[28] Sir Ian Hamilton, Gallipoli diary (London: Edward Arnold, 1920), Vol. I, pp. 344-345; source: Internet Archive (via Cornell University Library): https://archive.org/details/cu31924088057215/page/n381
[29] Creighton, p. 148.
[30] Ibid.
[31] Western Mail, 13 July 1915, p. 8; via British Newspaper Archive.
[32] Western Mail, 16 July 1915, p. 7; via British Newspaper Archive.
[33] The Carmarthen Journal and South Wales Weekly Advertiser, 16 July 1915, p. 4; via Welsh Newspapers (National Library of Wales):
https://newspapers.library.wales/view/3678753/3678757/35/
[34] The Carmarthen Journal and South Wales Weekly Advertiser, 10 September 1915, p. 4; via Welsh Newspapers (National Library of Wales):
https://newspapers.library.wales/view/3678825/3678829/31/
[35] The Long, Long Trail: South Wales Borderers:
https://www.longlongtrail.co.uk/army/regiments-and-corps/the-british-infantry-regiments-of-1914-1918/south-wales-borderers/
[36] Gillon, p. 77.
[37] WO 95/2304/2, 2nd Battalion, South Wales Borderers War Diary, The National Archives, Kew.
[38] Gillon, p. 77.
[39] WO 95/2304/2, 2nd Battalion, SWB War Diary.
[40] Jack Sheldon, The Germans at Beaumont Hamel, Battlefield Europe (Barnsley: Pen & Sword Military, ), pp. 40-48.
[41] WO 95/2304/2, 2nd Battalion, SWB War Diary.
[42] Ibid.
[43] WO 95/2304/2; also transcribed in: Slaughter on the Somme, 1 July 1916: the complete War Diaries of the British Army’s worst day, comp. Martin Mace and John Grehan (Barnsley: Pen & Sword Military, 2013), pp 171-172.
[44] WO 95/2308/1, 1st Battalion, Newfoundland Regiment War Diary; transcribed in Slaughter on the Somme, p. 140.
[45] Gillon, p. 81.
[46] Ibid.
[47] Ibid., p. 82.
[48] Ibid.
[49] WO 95/2304/2, 2nd Battalion, SWB War Diary.
[50] Andrew Macdonald, First day of the Somme (Auckland: HarperCollins, 2016), p. 146.
[51] Gillon, p. 82.
[52] British Library, Add MS 48365, HUNTER-WESTON PAPERS. Private War Diary; Vol. XI. 8th Army Corps [VIII Corps]. Somme and Ypres. 1 Jan – 31 Dec. 1916 (277 images) available from the British Library Digitised Manuscripts website:
http://www.bl.uk/manuscripts/FullDisplay.aspx?ref=Add_MS_48365&index=0
[53] Laura Walker, “We go into action in a day or two and I’m leaving this in case I don’t come back”. On the eve of the Somme. British Library Untold Lives blog, 30 June 2016:
https://blogs.bl.uk/untoldlives/2016/06/remembering-the-somme.html
[54] Lieutenant-General Sir Aylmer Hunter-Weston, Message to All Officers, NCOs and Men of the VIII Army Corps, 4 July 1916, British Library, Add MS 48365, f63r; also quoted in: W. D. Lowe, War history of the 18th (S.) Battalion, Durham Light Infantry (London: Oxford University Press, 1920), pp. 158-159; source: Internet Archive (via McMaster University):
https://archive.org/details/18thdurham00loweuoft/page/n225
[55] Liddell Hart, p. 233.
[56] John Masefield, The old front line (New York: Macmillan, 1917), pp. 43-44; source: Internet Archive (via Library of Congress):
https://archive.org/details/oldfrontline01mase/page/n55
[57] William Philpott, Three armies on the Somme: the first battle of the Twentieth Century (New York: Alfred A. Knopf, 2010), p. 193.
[58] Ibid., p. 386.
[59] WO 95/2304/2, 2nd Battalion, SWB War Diary.
[60] Gillon, p. 87.
[61] Ibid., p. 89.
[62] WO 95/2304/2, 2nd Battalion, SWB War Diary.
[63] The Cambria Daily Leader, 1 November 1916, p. 4; via Welsh Newspapers (National Library of Wales):
https://newspapers.library.wales/view/4102483/4102487/99/harford
[64] Gloucestershire Echo, 4 November 1916, p. 3; via British Newspaper Archive.
[65] The Brecon County Times, Neath Gazette, and General Advertiser, etc., 9 November 1916, p. 8; via Welsh Newspapers (National Library of Wales):
https://newspapers.library.wales/view/3858334/3858342/85/harford
[66] The Amman Valley Chronicle and East Carmarthen News, 9 November 1916, p. 6; via Welsh Newspapers (National Library of Wales):
https://newspapers.library.wales/view/4013549/4013555/71/
[67] Y Llan, 10 November 1916, p. 5; via Welsh Newspapers (National Library of Wales):
https://newspapers.library.wales/view/3688481/3688486/60/
[68] The Cambrian News and Merionethshire Standard, 10 November 1916, p. 2; via Welsh Newspapers (National Library of Wales):
https://newspapers.library.wales/view/3413510/3413512/10/
[69] Western Daily Press, 10 November 1916, p. 5; via British Newspaper Archive.
[70] Imperial War Museums, War Memorials Register: Lieutenant J H Harford:
https://www.iwm.org.uk/memorials/item/memorial/6935
[71] This section of the post is based on the genealogical records made available by Findmypast, but has been supplemented with information from other sources:
[72] WO 372/9/18463, Medal card of Harford, George Arthur, 21st Lancers, Lieutenant; WO 372/9/18499, Medal card of Harford, John C., Pembrokeshire Yeomanry, Major; WO 371, British Army medal index cards 1914-1920, The National Archives, Kew.
[73] British Red Cross, First World War Volunteers:
https://vad.redcross.org.uk/
[74] Gloucestershire Red Cross hospitals 1914-1919: Horton V.A. Hospital:
http://www.angelfire.com/az/garethknight/redcross/horton.html
[75] The Cambrian News and Merioneth Standard, 23rd June 1916, p. 5; via Welsh Newspapers (National Library of Wales):
https://newspapers.library.wales/view/3413313/3413318/50/
[76] Durnford Book of the Great War, p. 30.
[77] Alice Harford, Annals of the Harford family (1909), p. 26:
https://archive.org/details/annalsofharfordf00harf/page/26/
[78] Ibid., p. 54: https://archive.org/details/annalsofharfordf00harf/page/54/
[79] Bethan Phillips, Peterwell: the history of a mansion and its infamous squire (Aberystwyth: Cymdeithas Lyfrau Ceredigion, 1983), p. 214.
[80] Ibid., p. 218.
[81] Ibid., p. 223.
[82] Price, A history of Saint David’s University College, Lampeter, Vol. 1, pp. 18-19.
[83] Harford, Annals, p. 132: https://archive.org/details/annalsofharfordf00harf/page/132/
[84] Augustus J. C. Hare, The life and letters of Frances, Baroness Bunsen, 3rd ed., Vol. I (London: Smith, Elder, & Co., 1882), p. 326; source: Internet Archive (via Princeton Theological Seminary Library):
https://archive.org/details/lifelettersoffra01hare/page/326/
[85] Harford, Annals, p. 127: https://archive.org/details/annalsofharfordf00harf/page/126/
[86] Ibid., p. 148: https://archive.org/details/annalsofharfordf00harf/page/148/
[87] The Cambrian News and Merionethshire Standard, 21st February 1919, p 8; via Welsh Newspapers (National Library of Wales):
https://newspapers.library.wales/view/3414584/3414592/118/
[88] Somerset Standard, 28th February 1919, p. 8; via British Newspaper Archive.
[89] Harford, Annals, p. 141: https://archive.org/details/annalsofharfordf00harf/page/140/
[90] Westminster Marriages, City of Westminster Archives Centre; via Findmpast.
[91] South Wales Daily News, 12th April 1893: p. 6; via Welsh Newspapers (National Library of Wales):
https://newspapers.library.wales/view/3728574/3728580/90/
[92] Ye Brython Cymreig, 14 April 1893, p 2; via Welsh Newspapers (National Library of Wales):
https://newspapers.library.wales/view/3691336/3691338/17/
[93] John Charles Harford, Esq., J.P., D.L. In: South Wales: historical, biographical and pictorial (London: Allan North, ca. 1908); source: Internet Archive (via University of Toronto):
https://archive.org/details/southwaleshistor00londuoft/page/n309
[94] The London Gazette, No. 28159, 17 July 1908, p 5222:
https://www.thegazette.co.uk/London/issue/28159/page/5222/
[95] The Carmarthen Journal and South Wales Weekly Advertiser, 29th October 1915, p. 6; via Welsh Newspapers (National Library of Wales):
https://newspapers.library.wales/view/3678888/3678894/62/
[96] WO 372/9/18499, Medal card for Harford, John C., Pembrokeshire Yeomanry, Major; WO 371, British Army medal index cards 1914-1920, The National Archives, Kew.
[97] Stephen John, Welsh Yeomanry at war: a history of the 24th (Pembroke and Glamorgan) Battalion, The Welsh Regiment (Barnsley: Pen & Sword Military, 2016), p. 156.
[98] Western Mail, 17 July 1934, p 6; via British Newspaper Archive.
[99] Gloucestershire Echo, 18 July 1934, p. 5; also published in: Cheltenham Chronicle, 21 July 1934 p. 3; via British Newspaper Archive.
[100] The Welsh Quartette, O Fryniau Caersalem, ca. 1908 (Zonophone Twin) Gramophone Record; via Internet Archive.

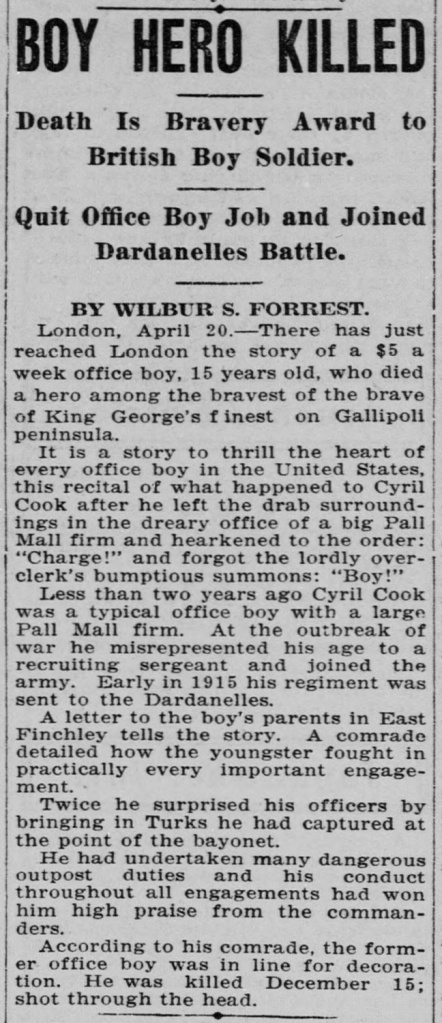

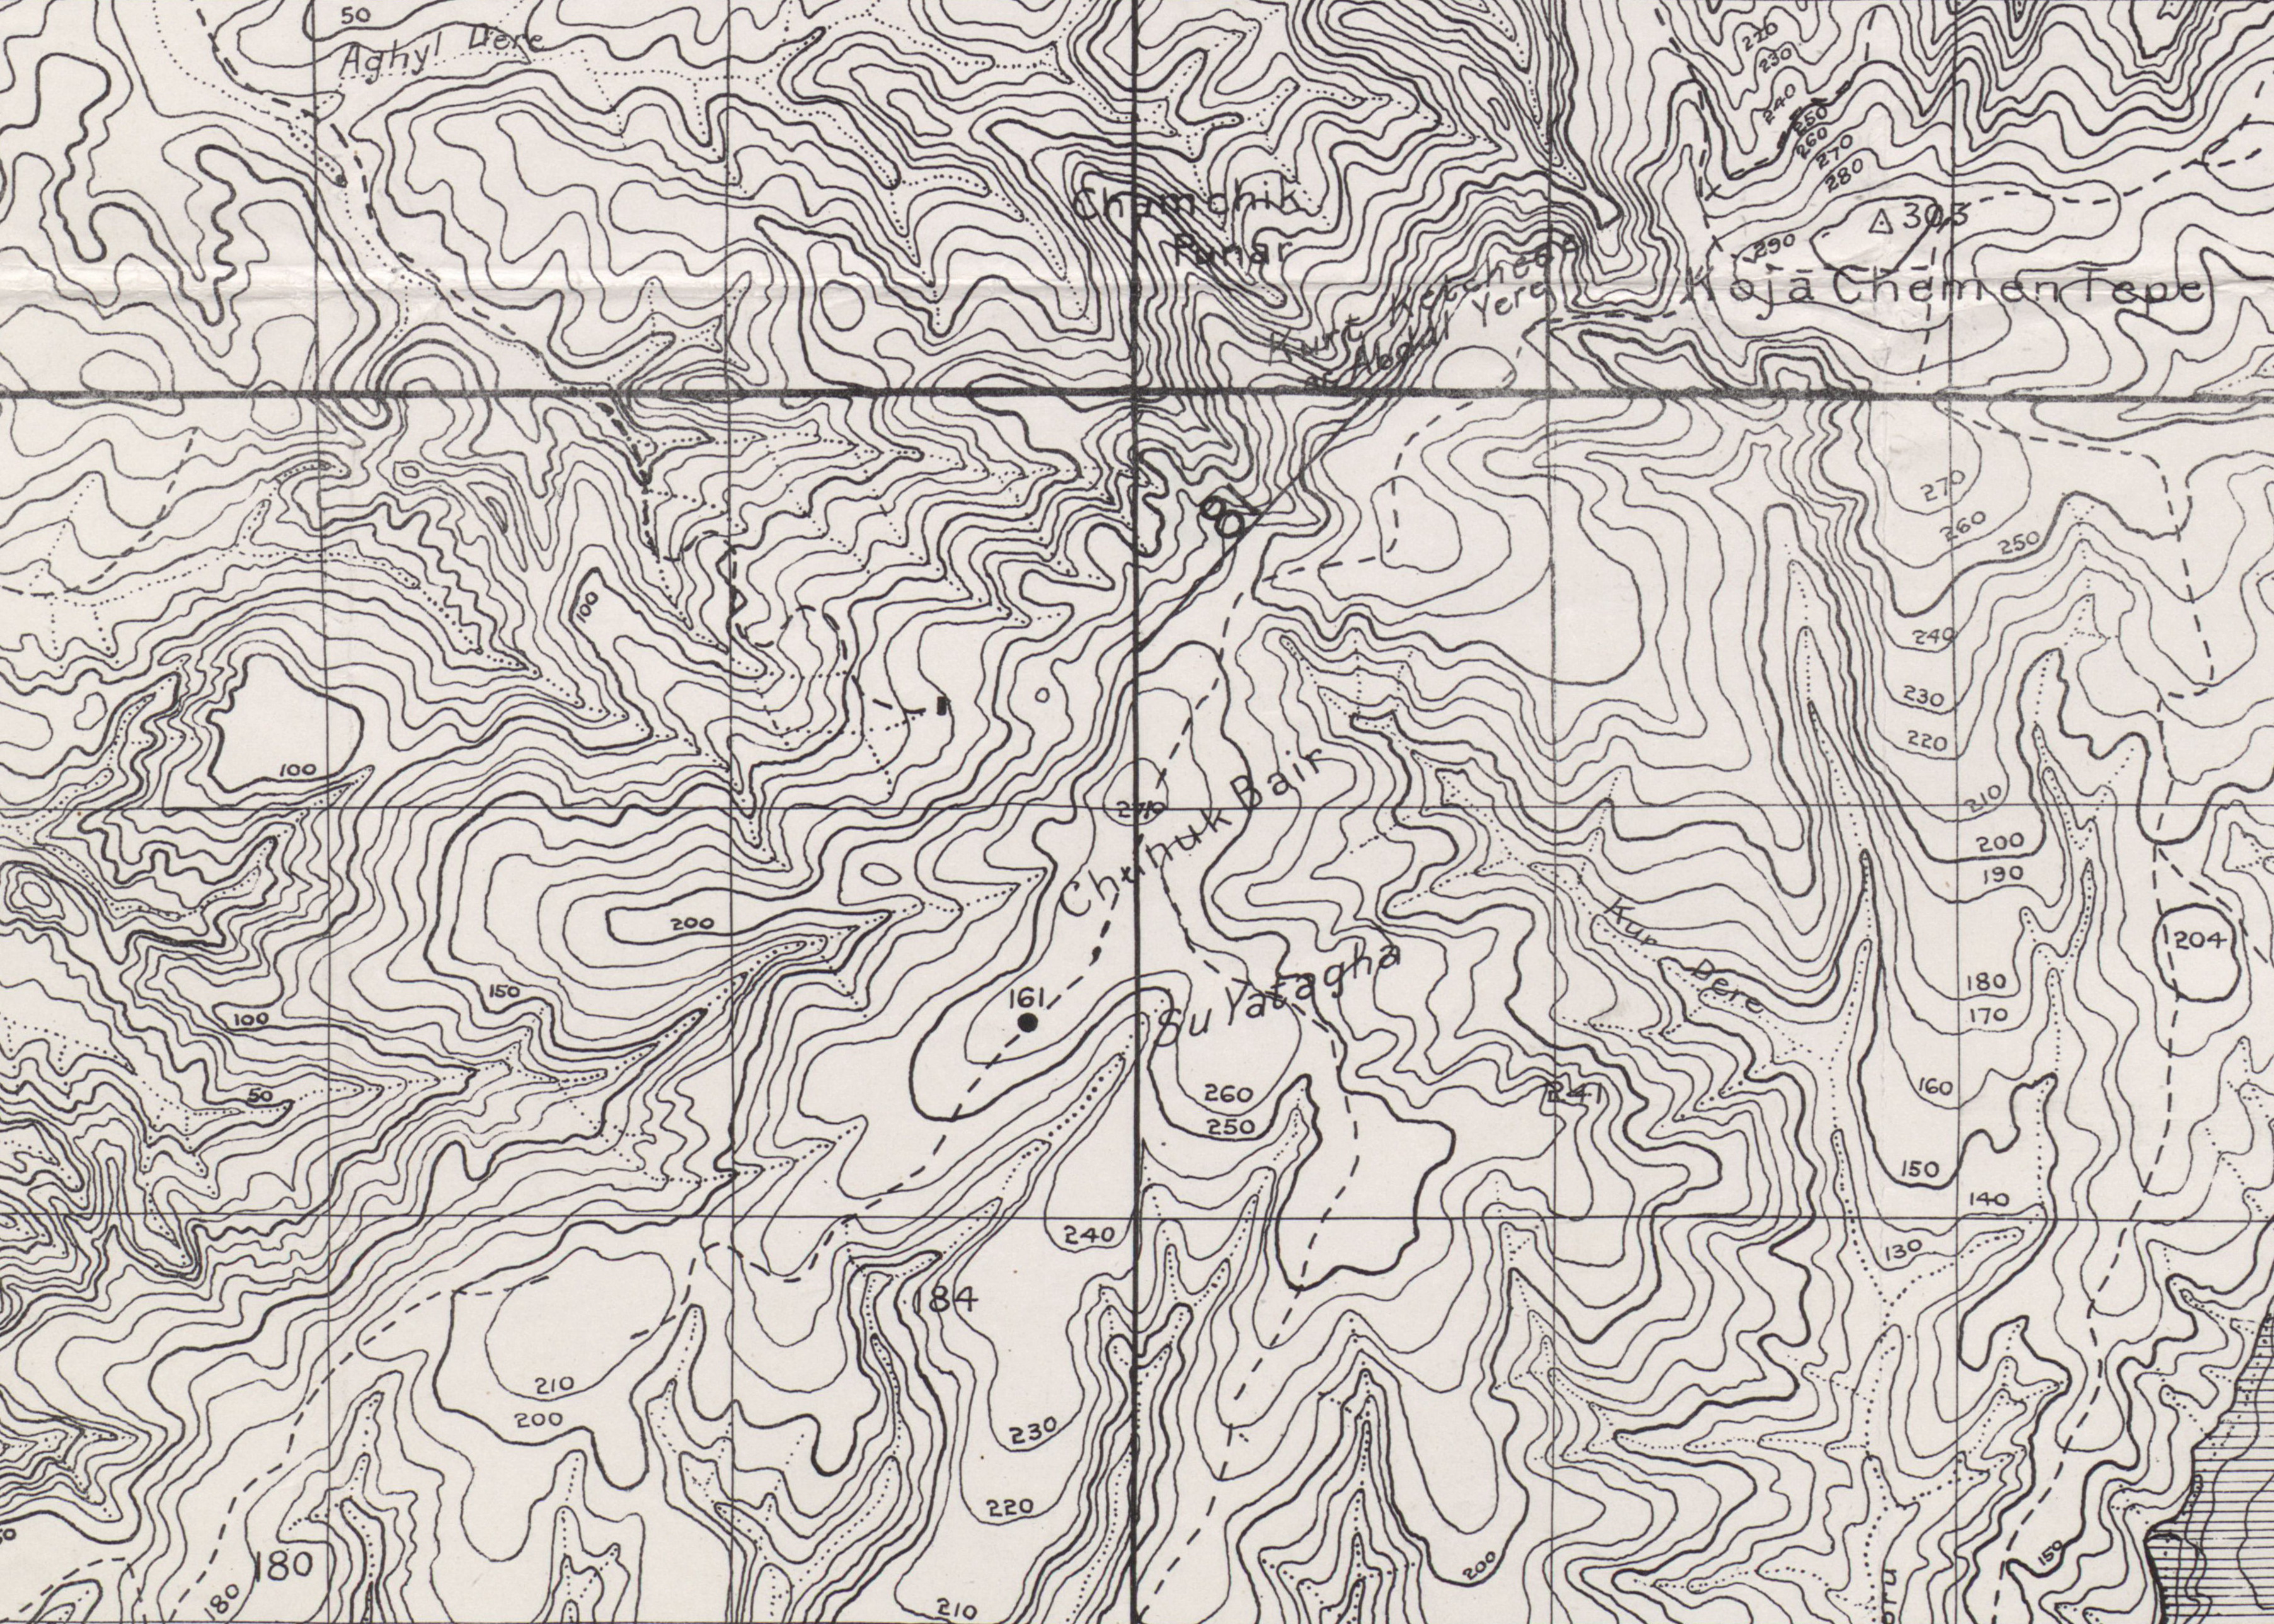
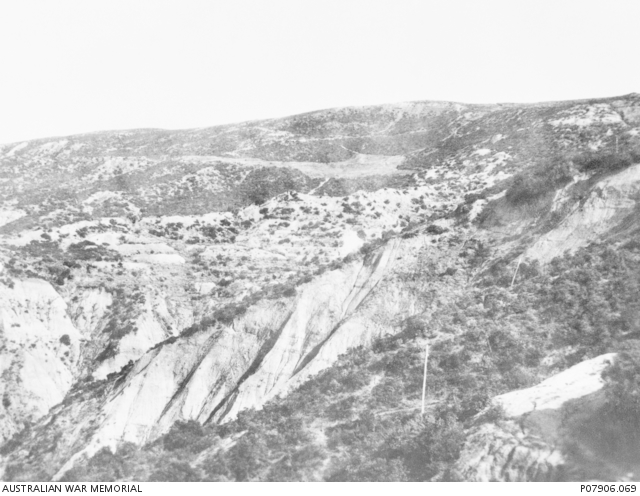


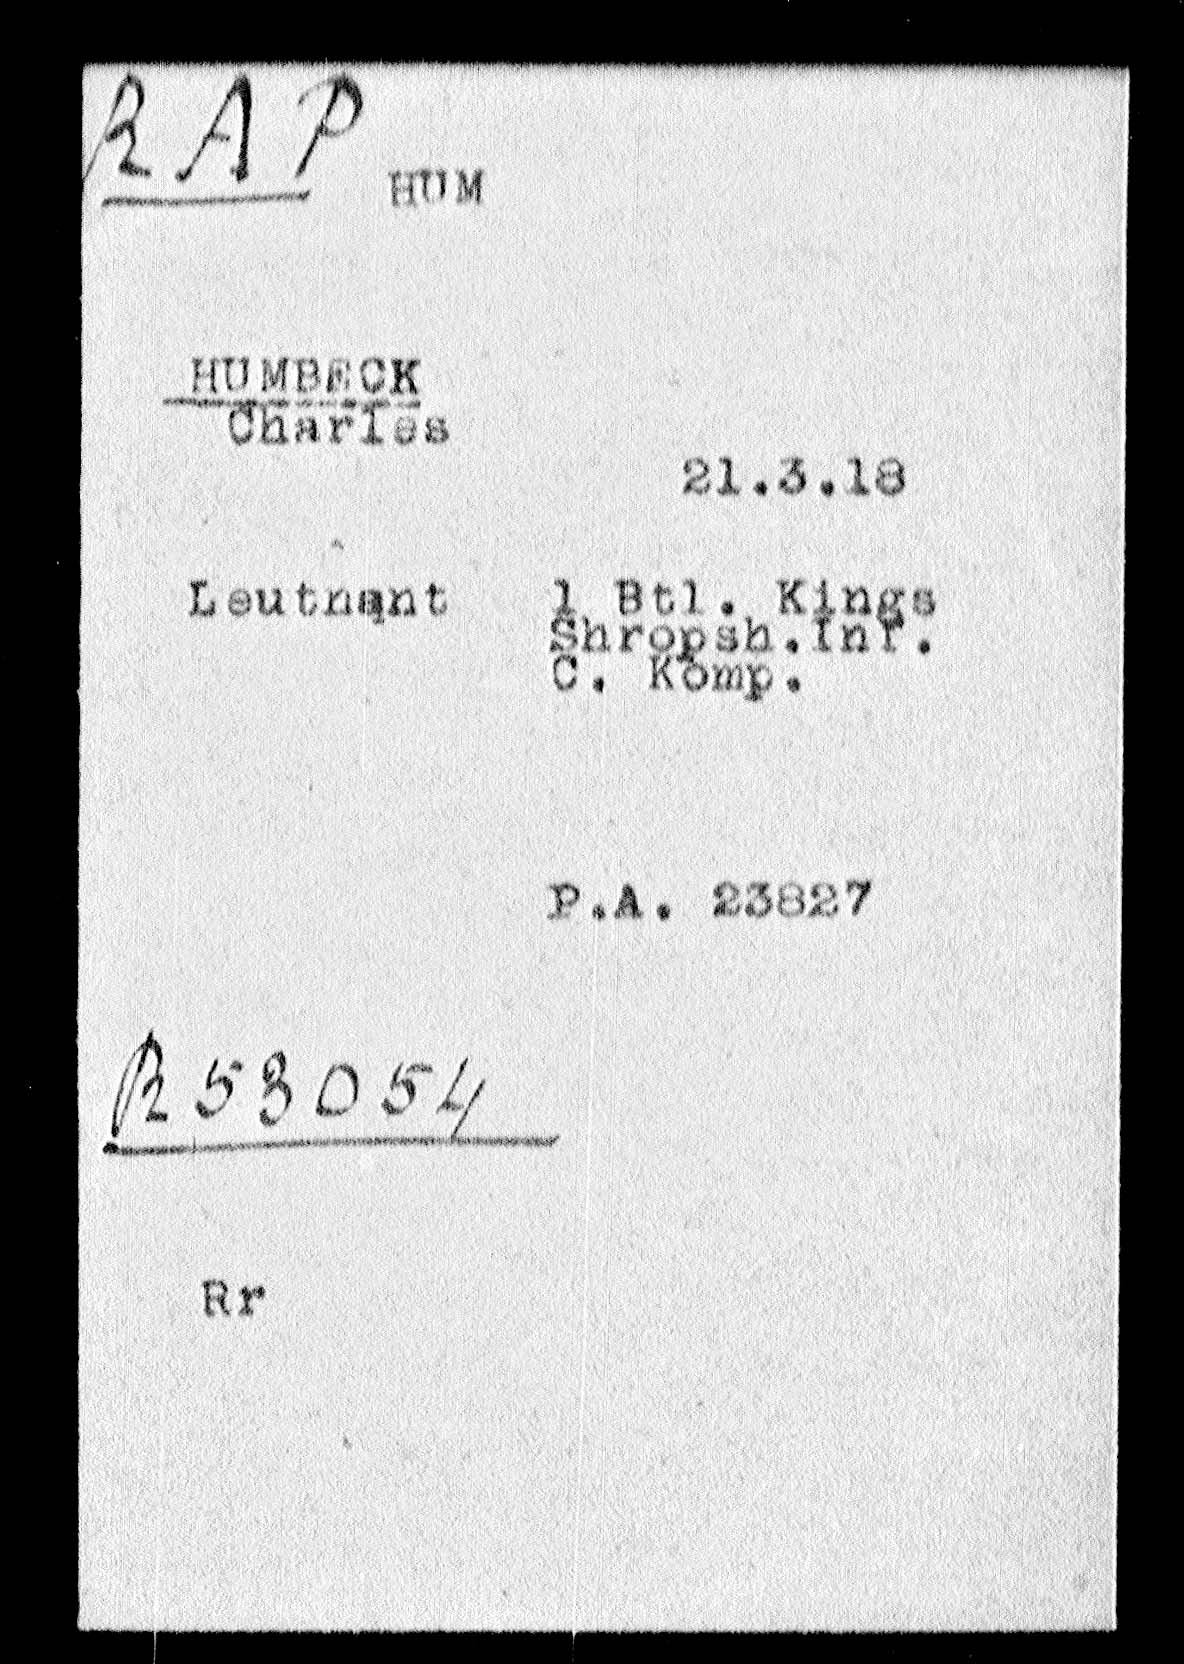
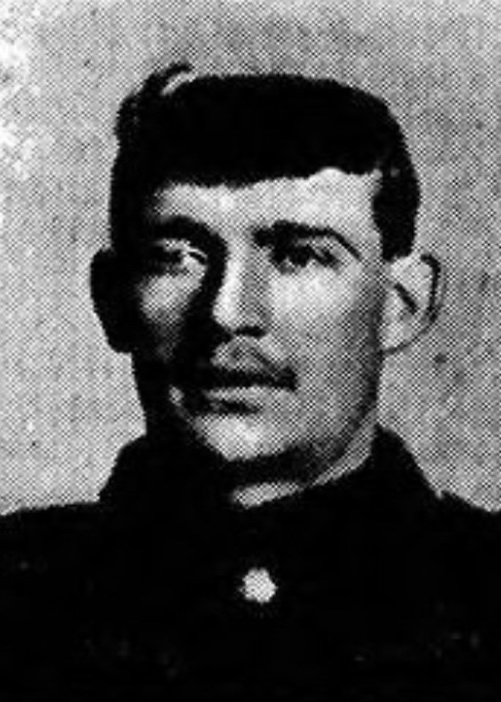

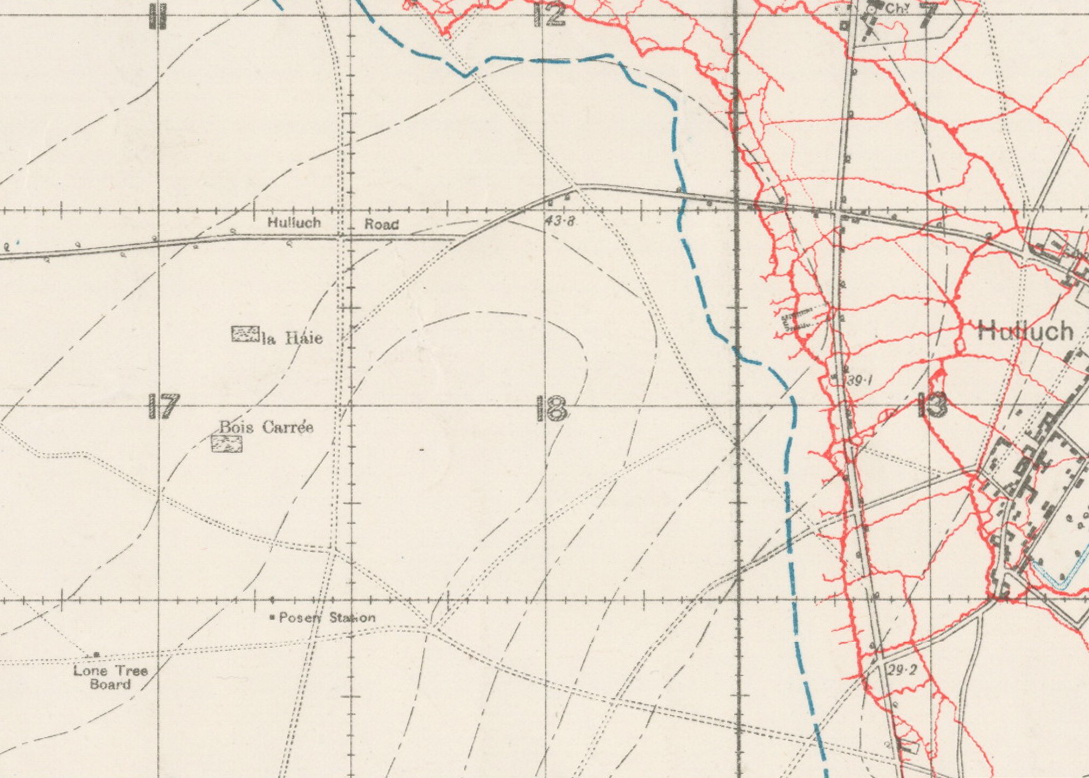
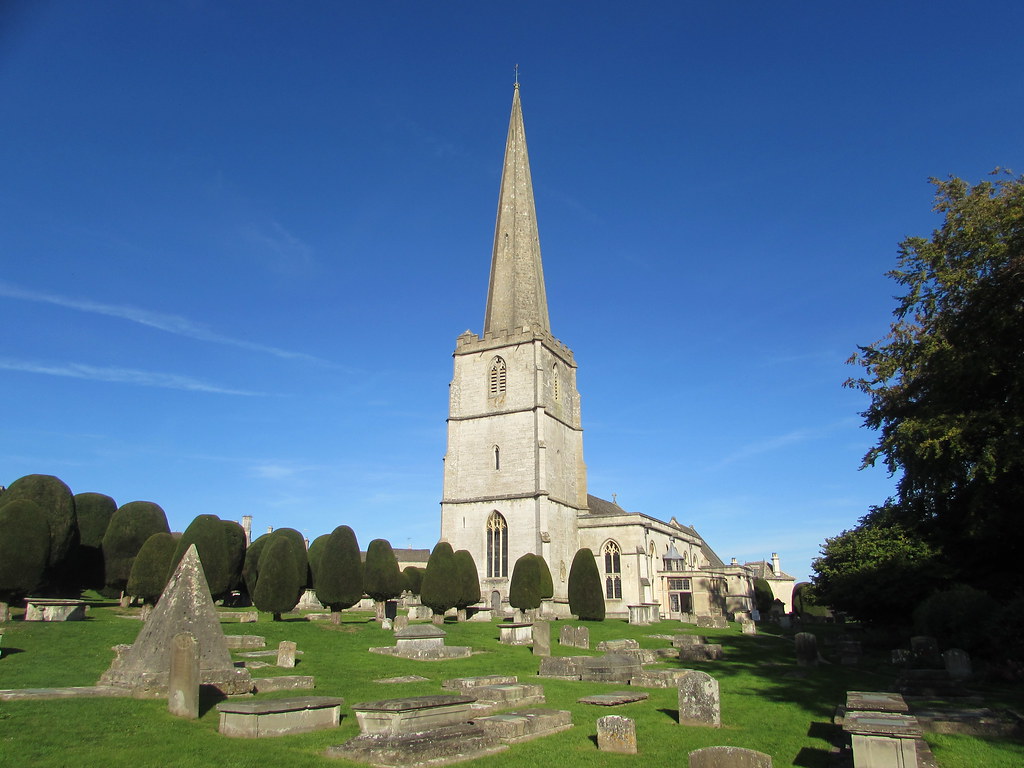
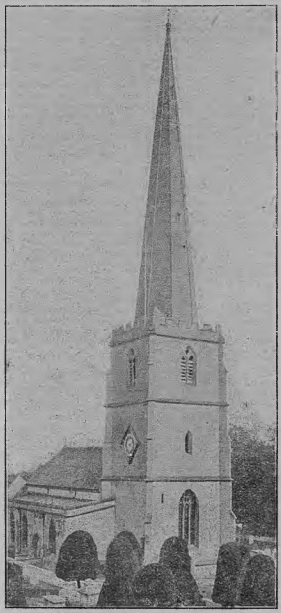


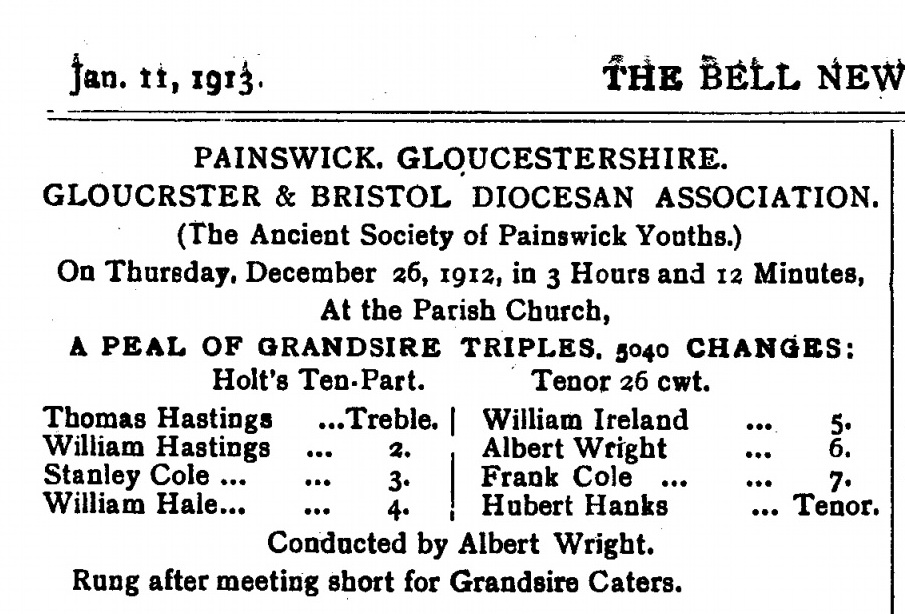


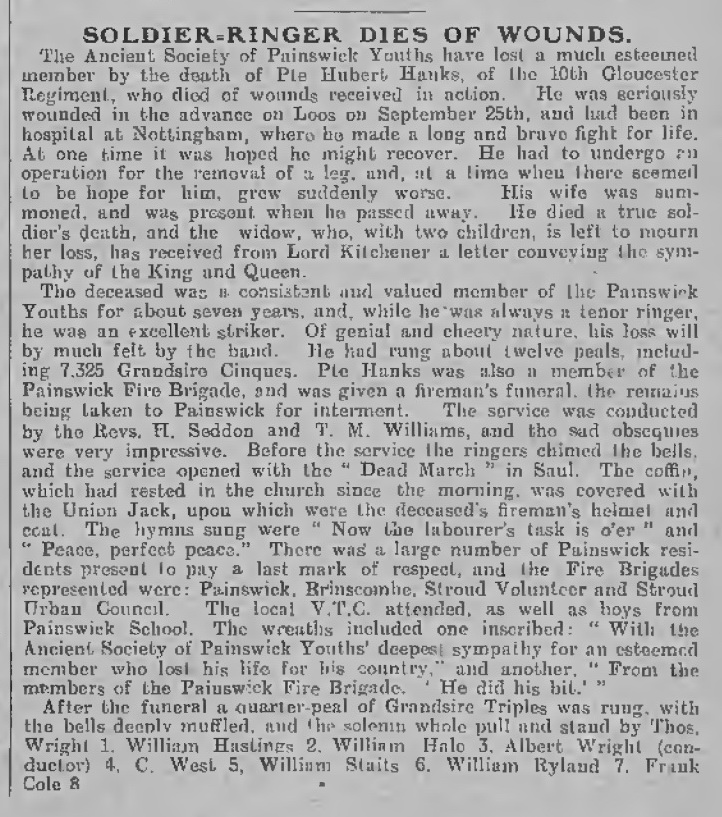
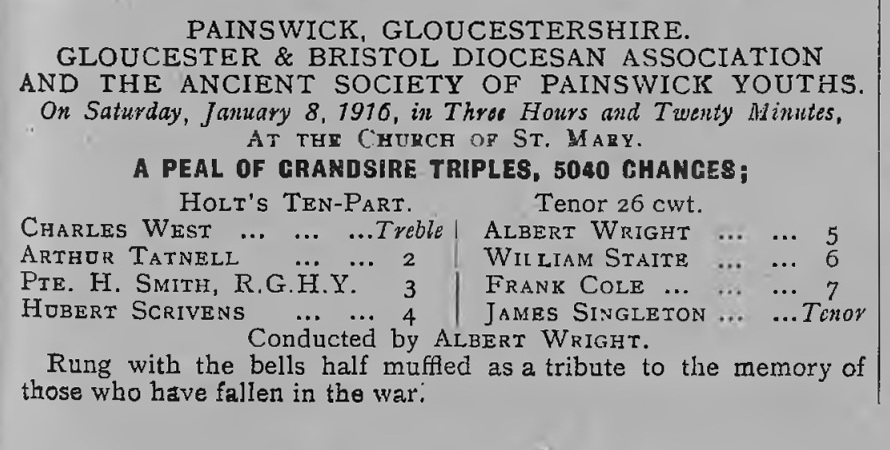
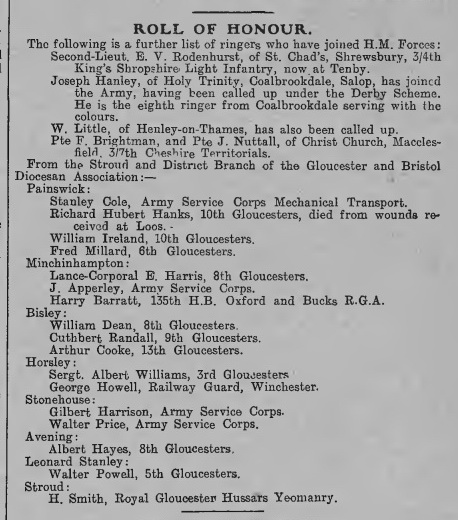
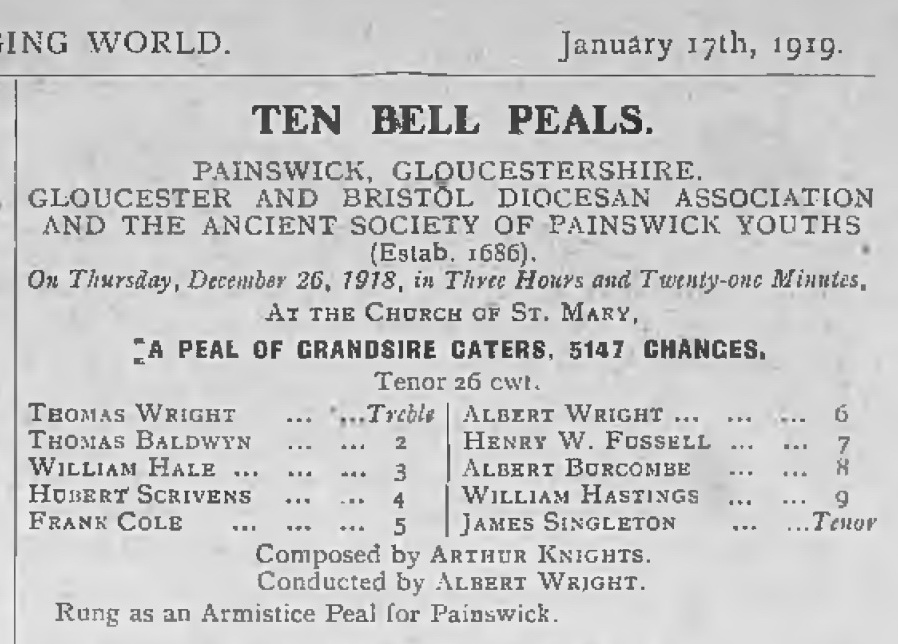
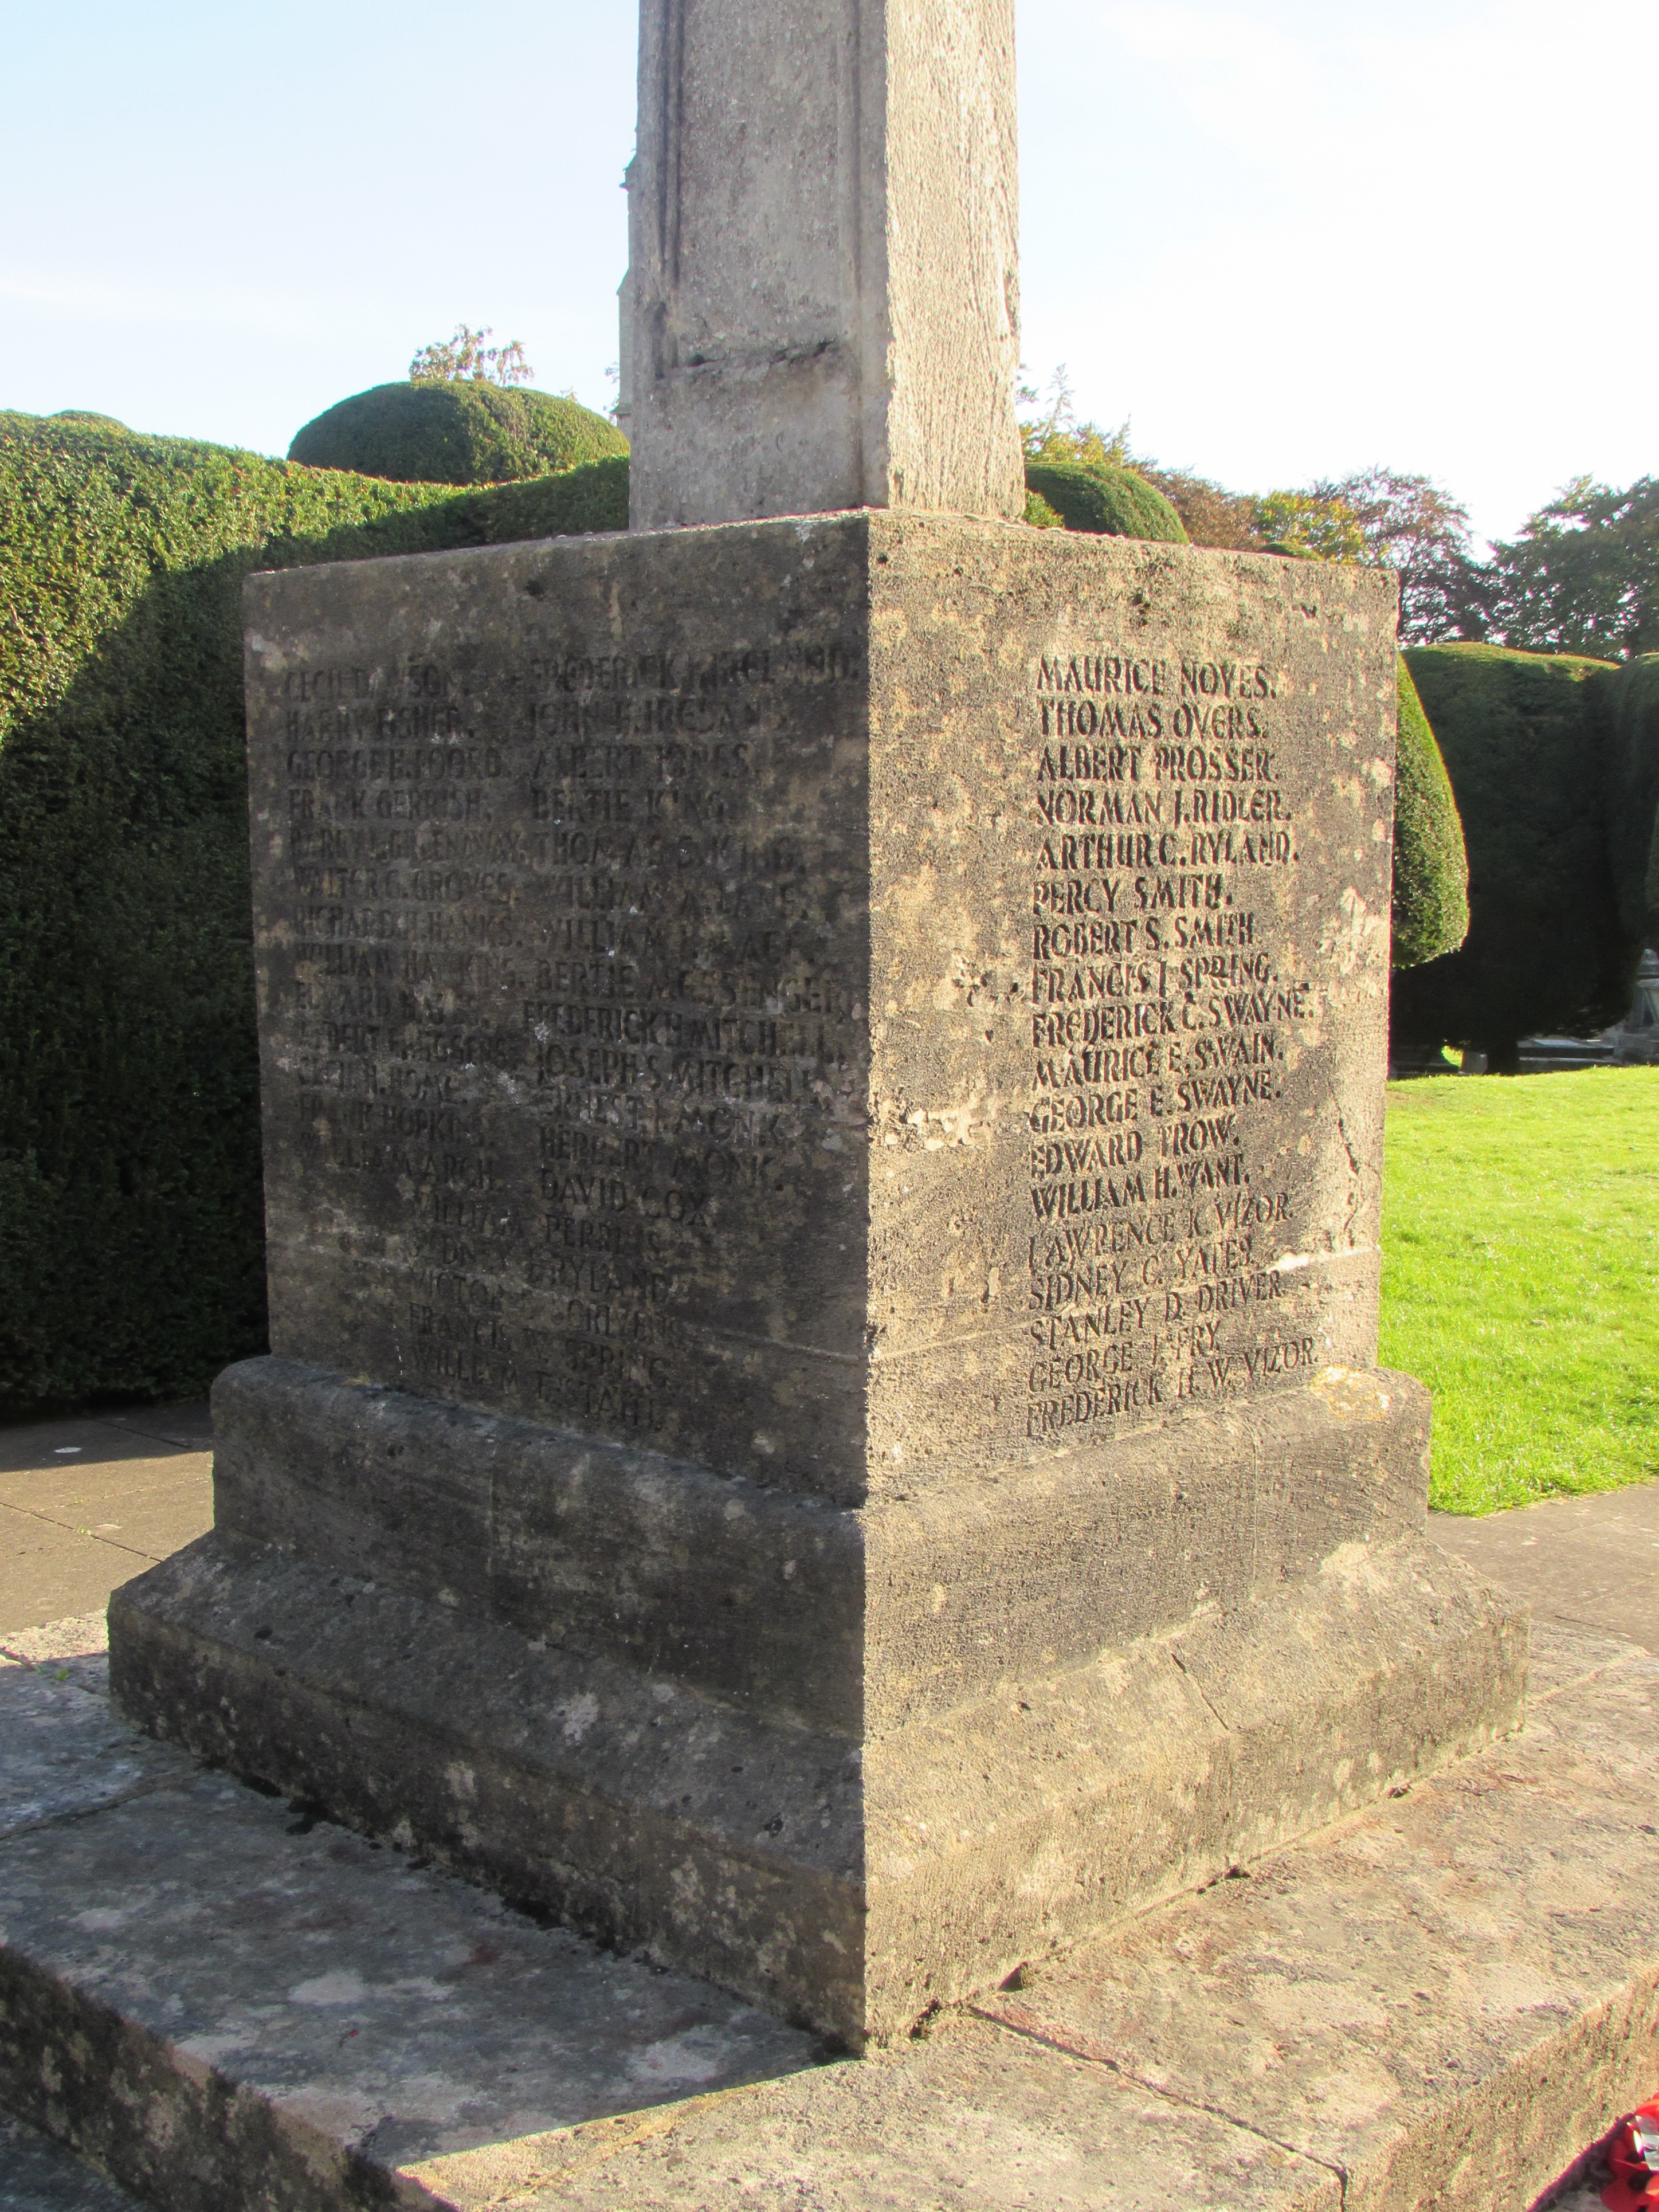
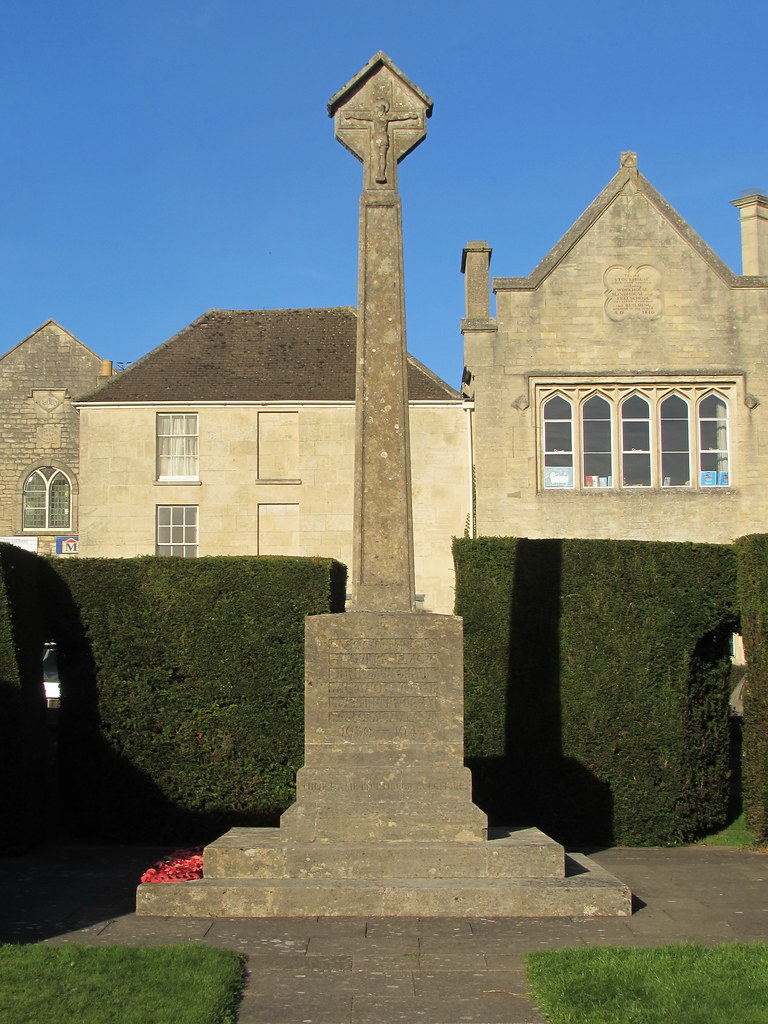
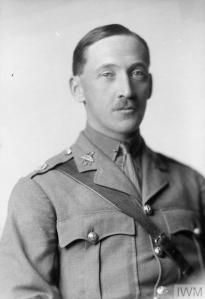

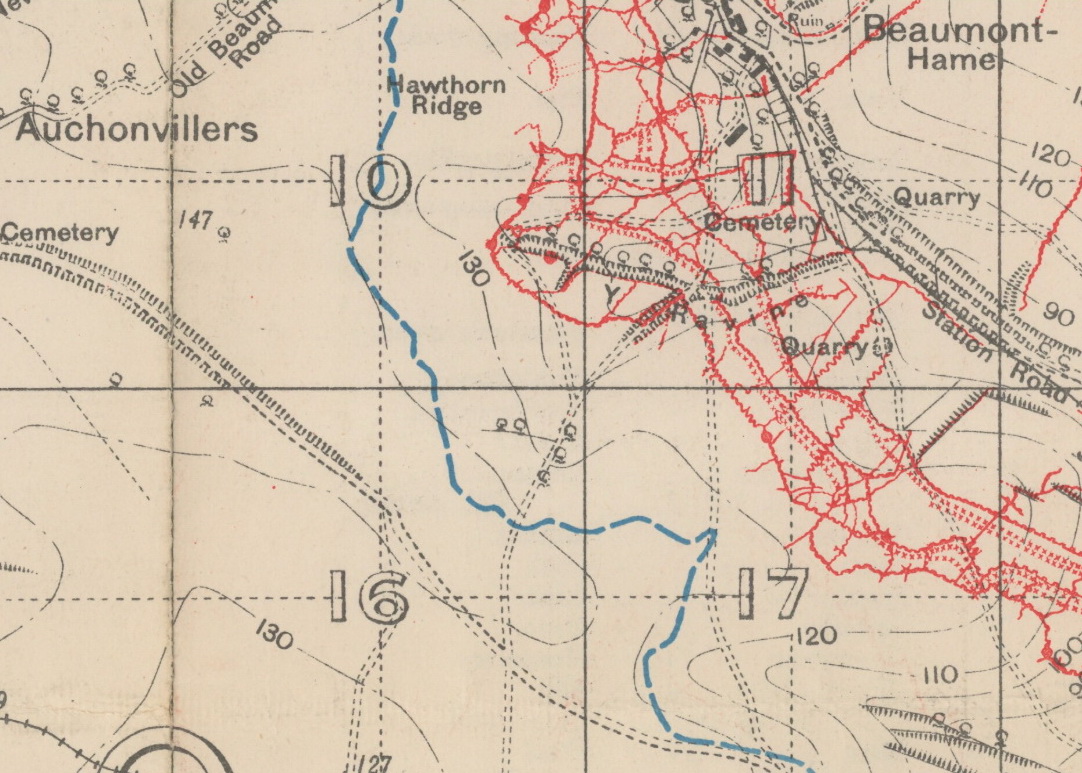


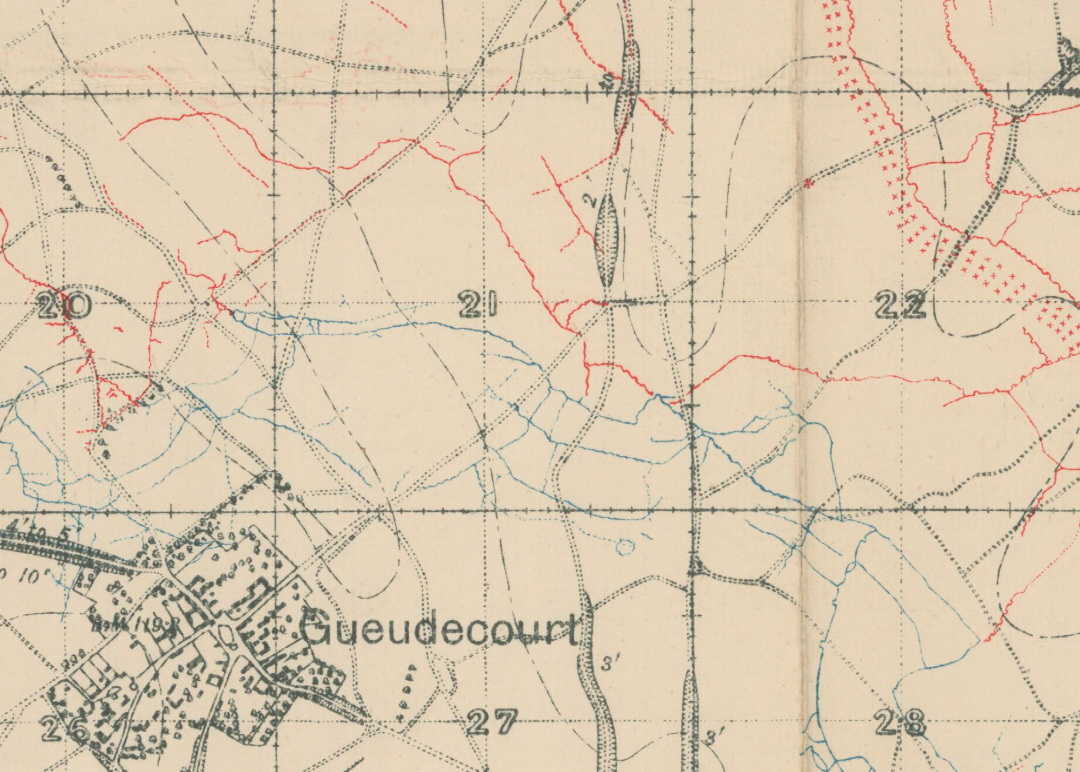


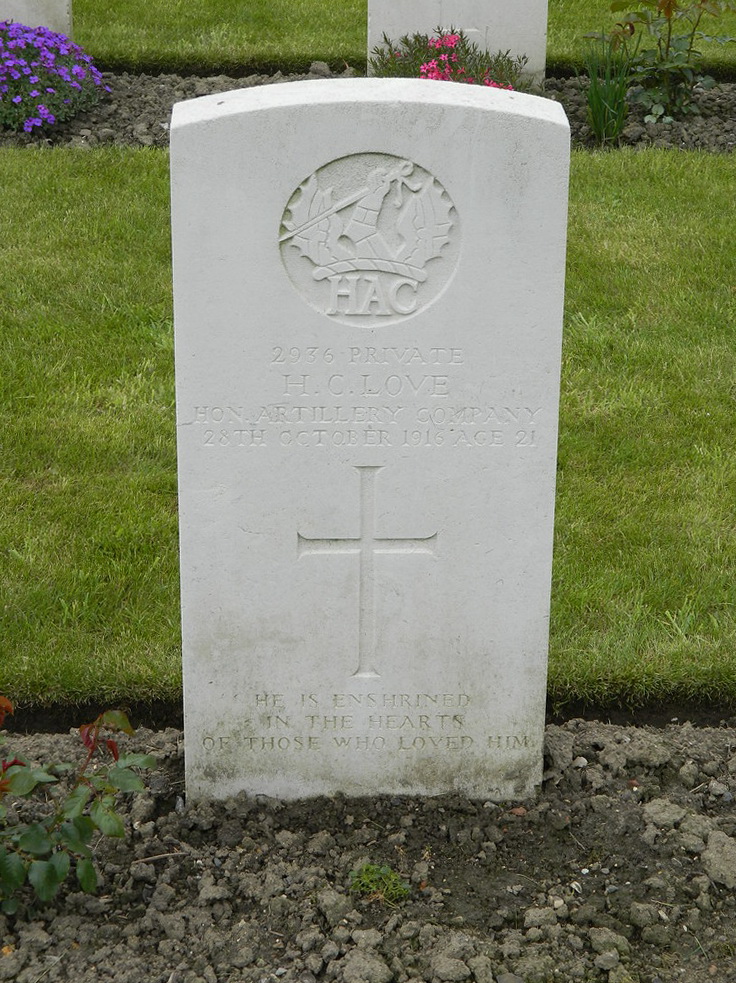


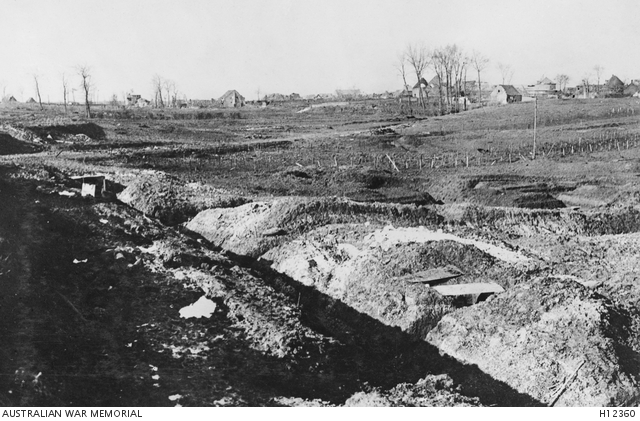

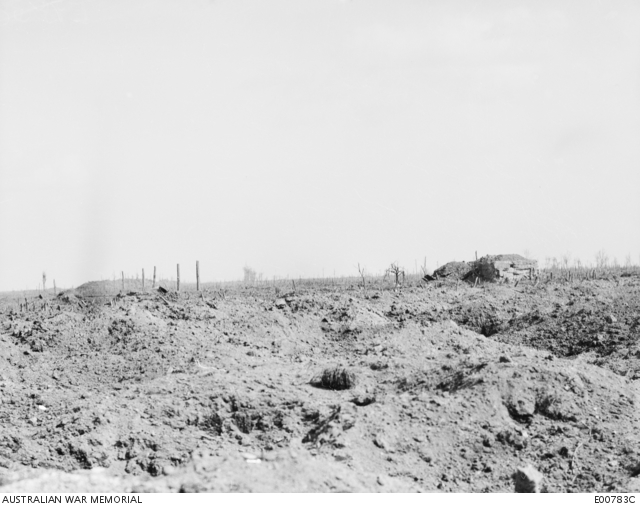
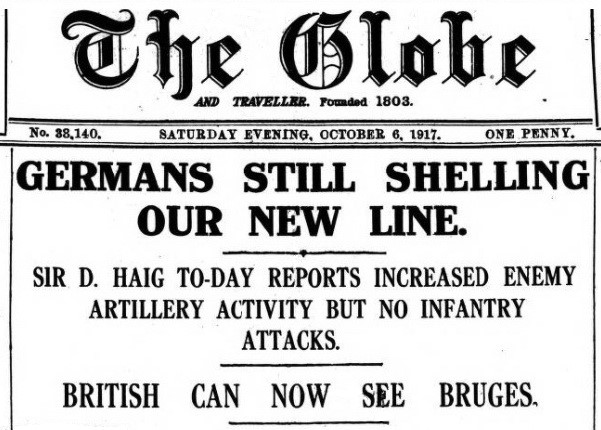

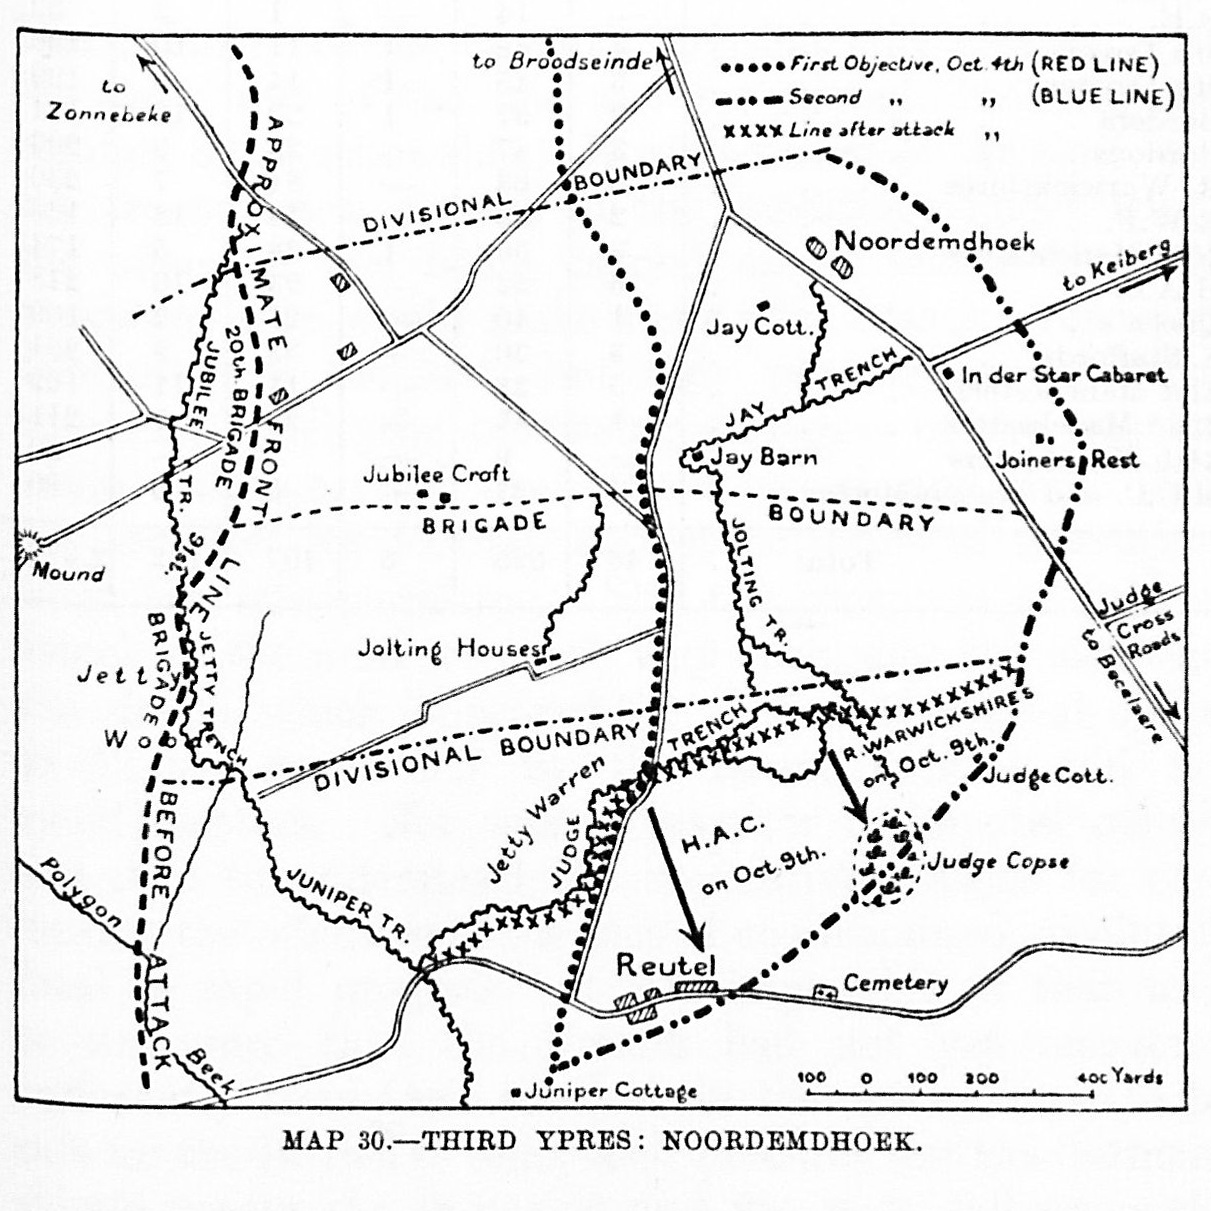
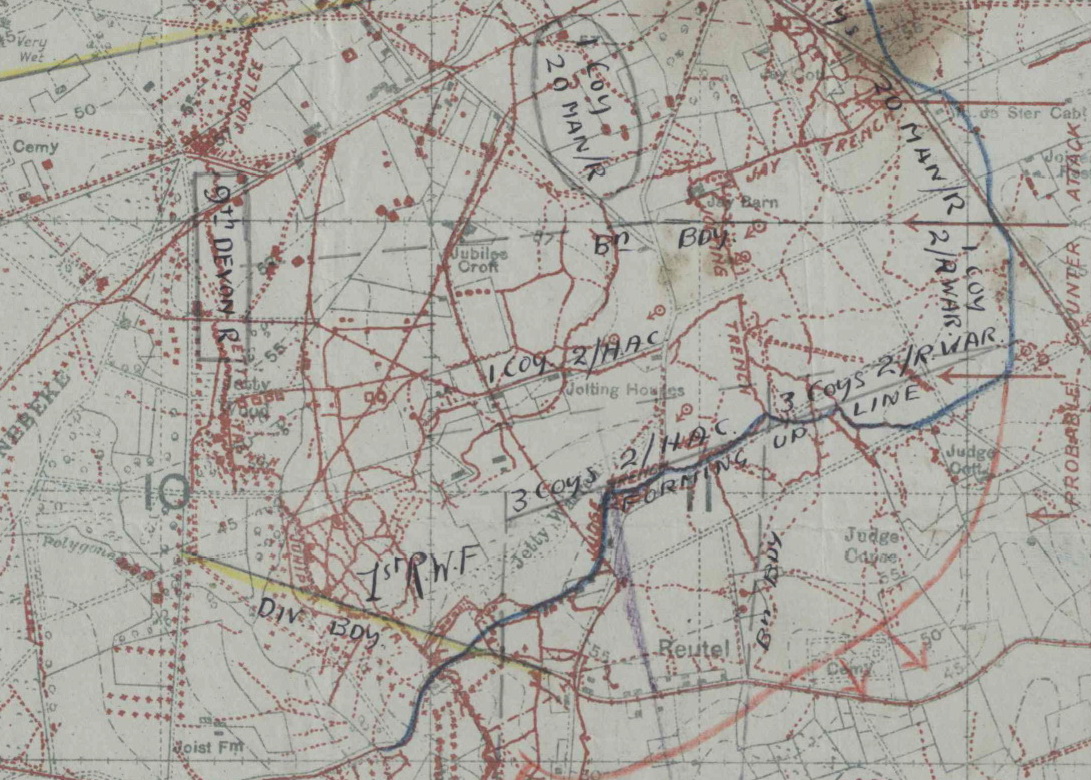
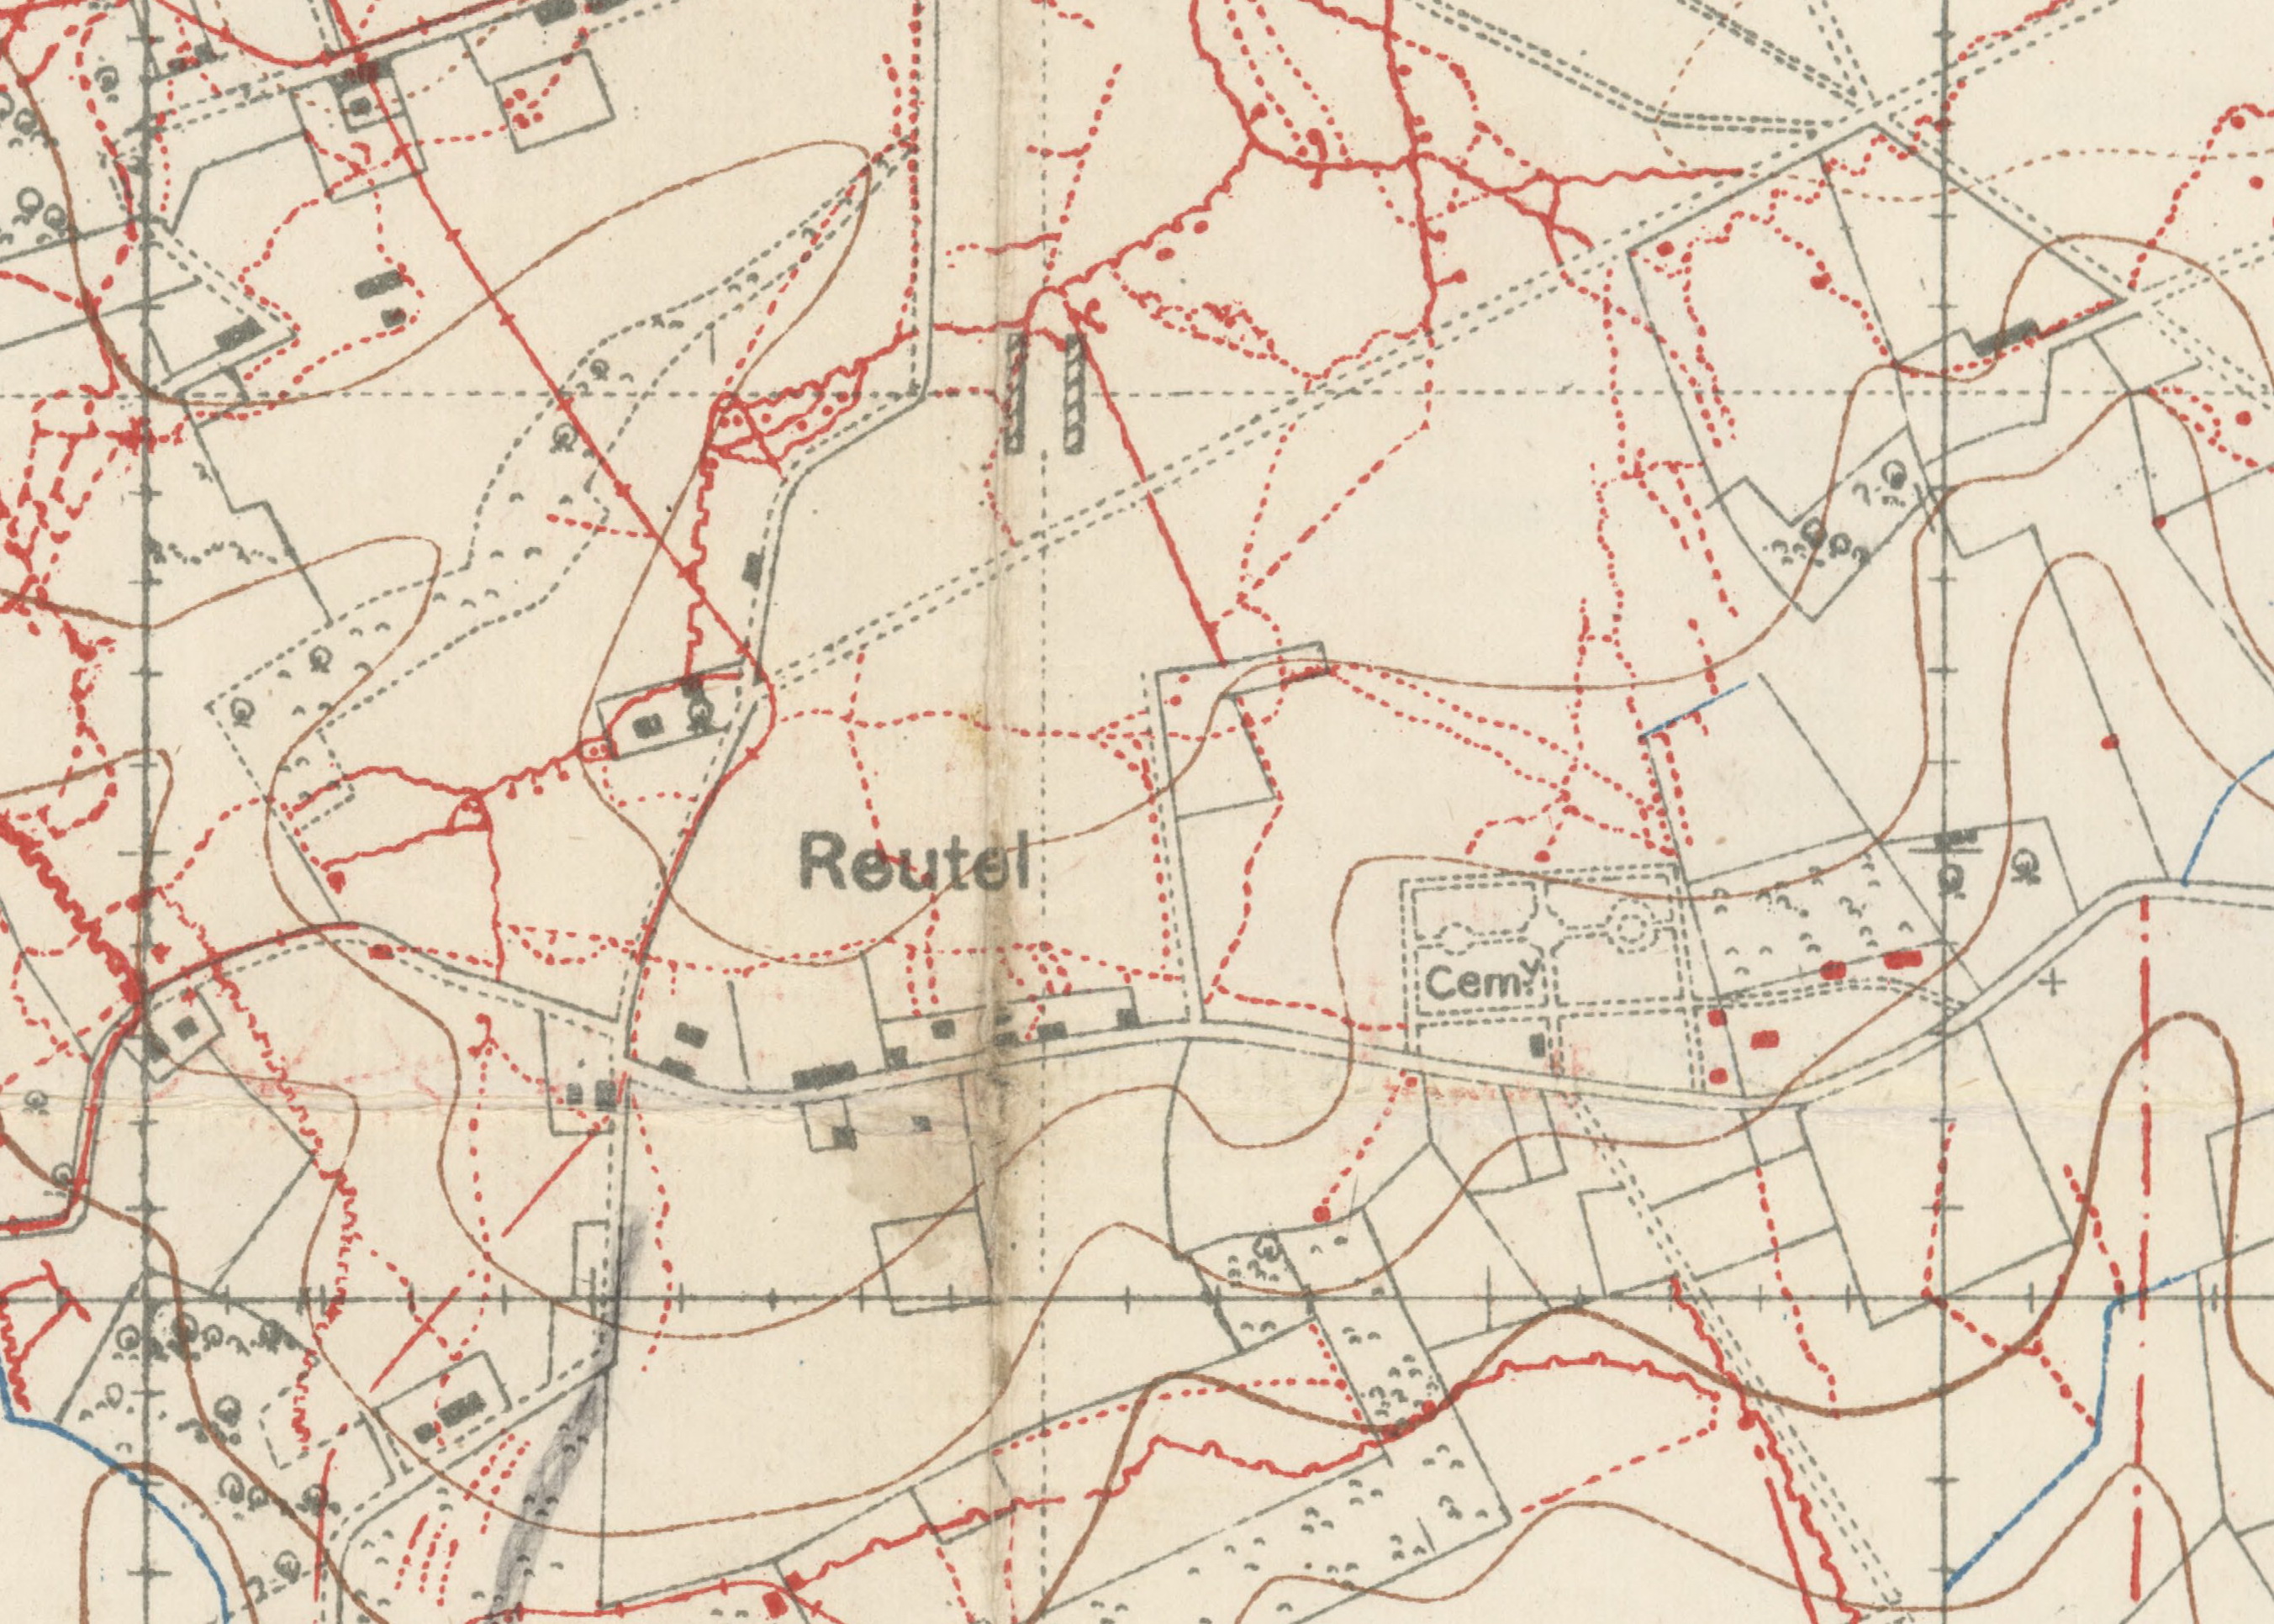


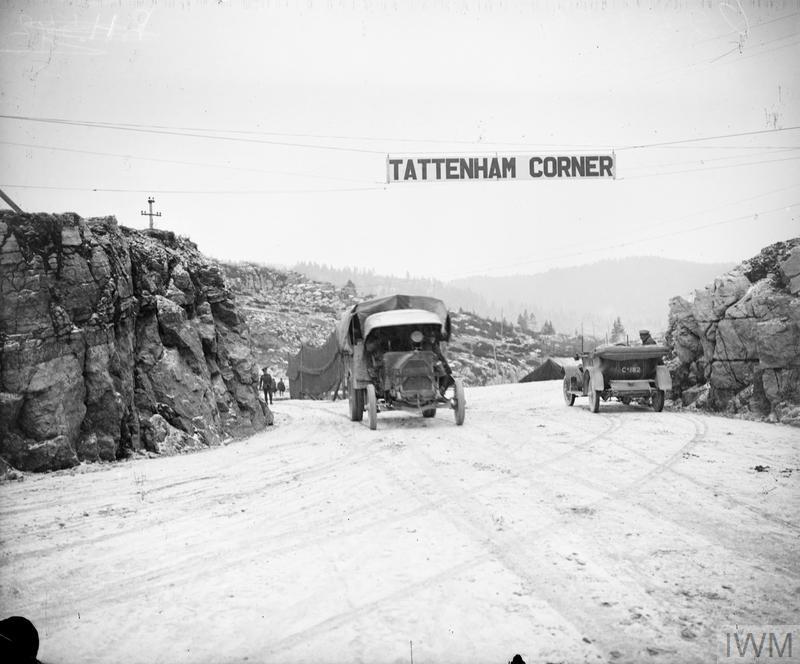
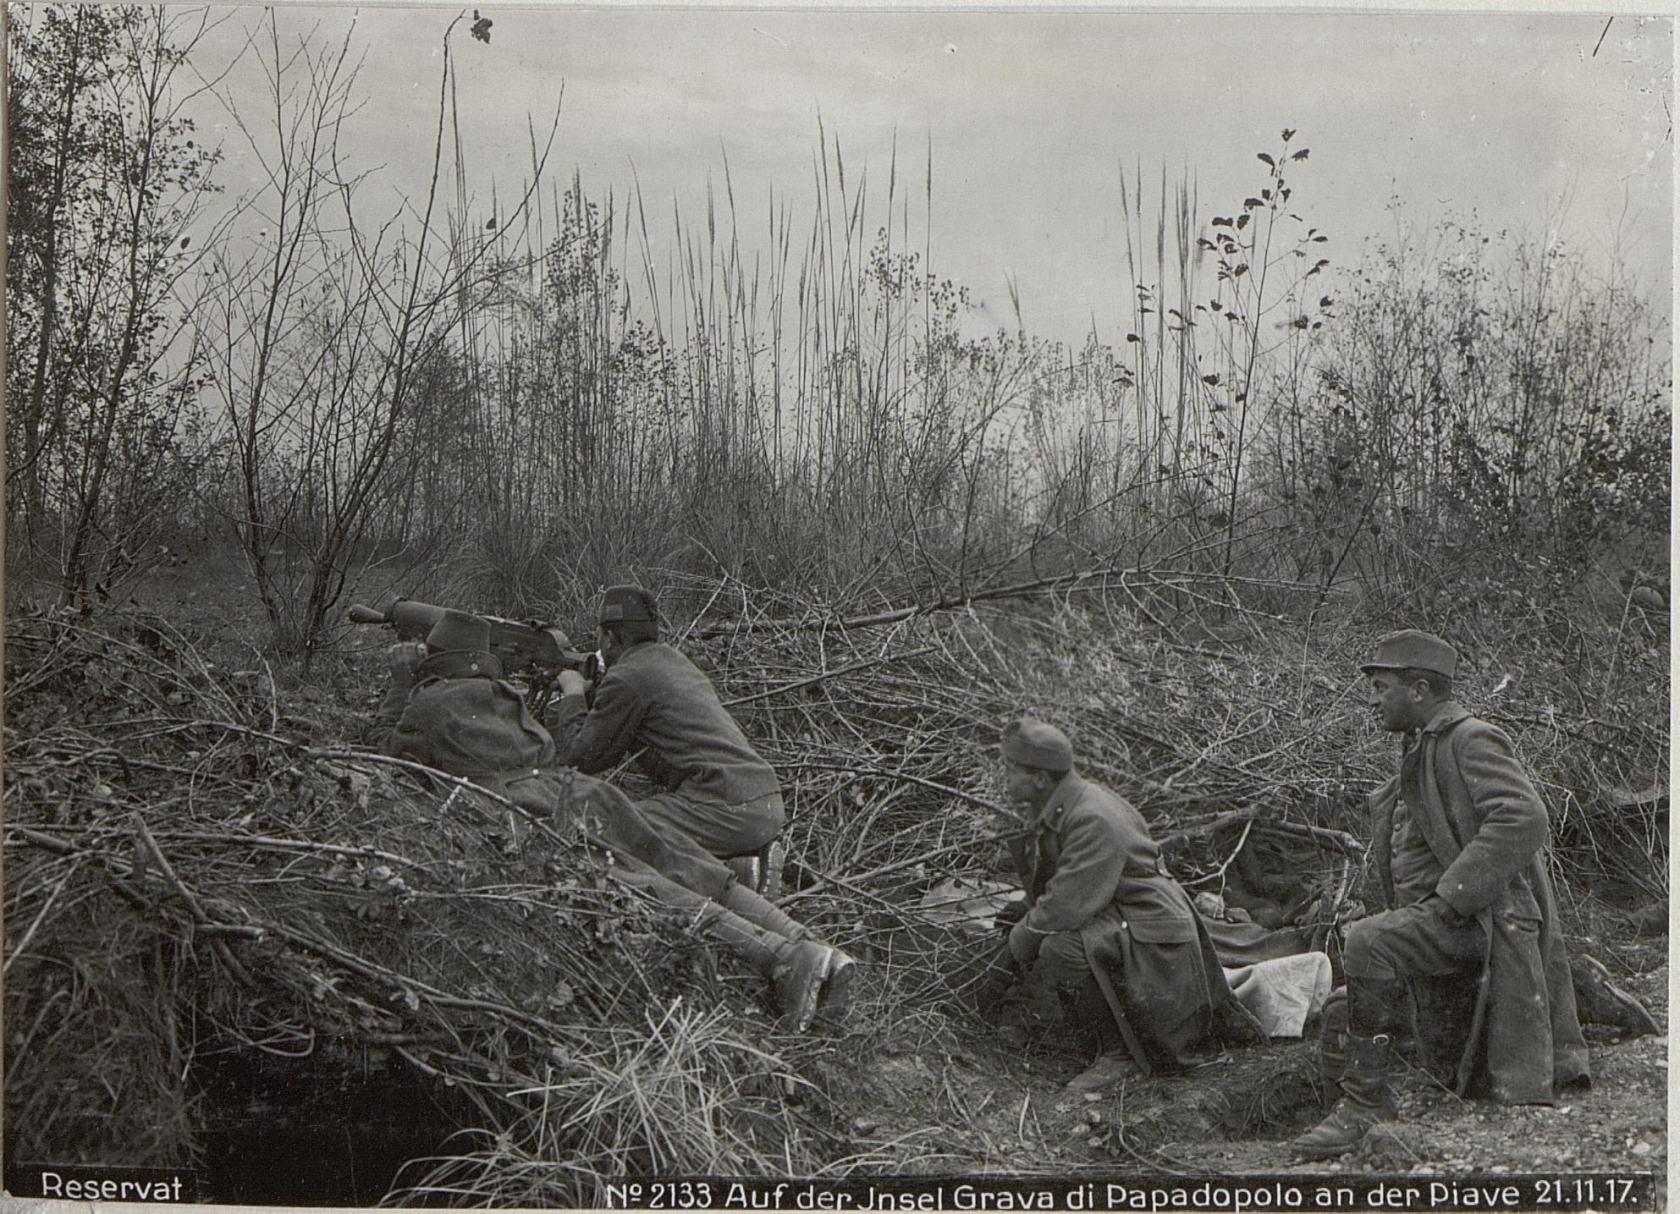
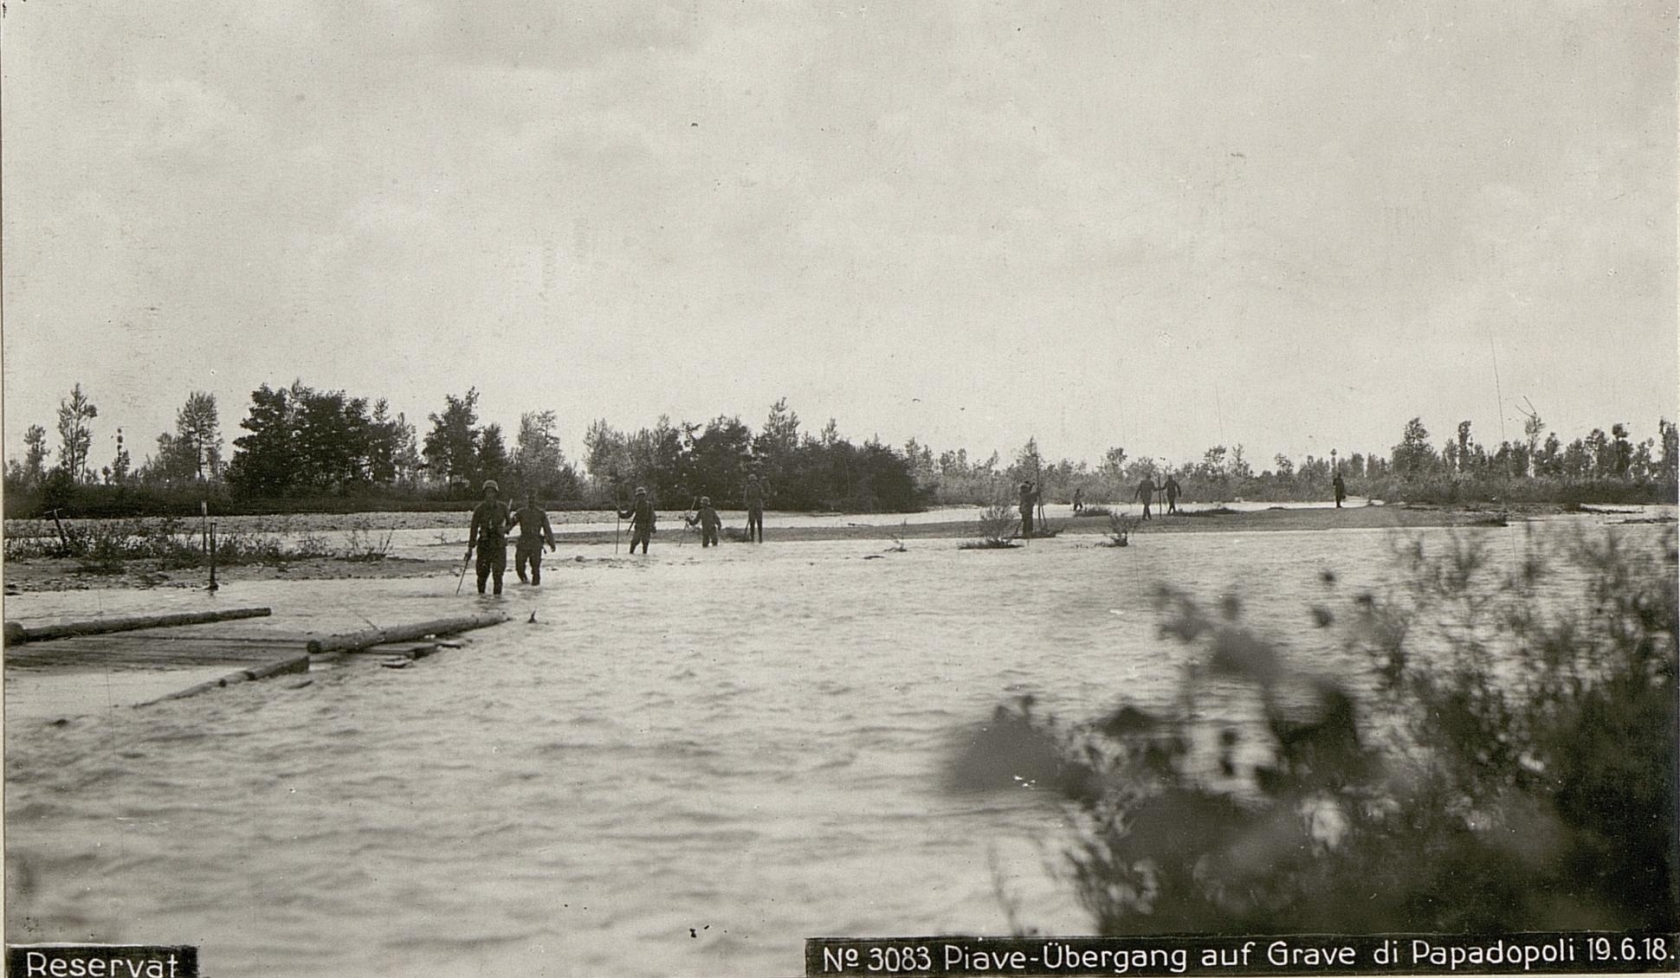

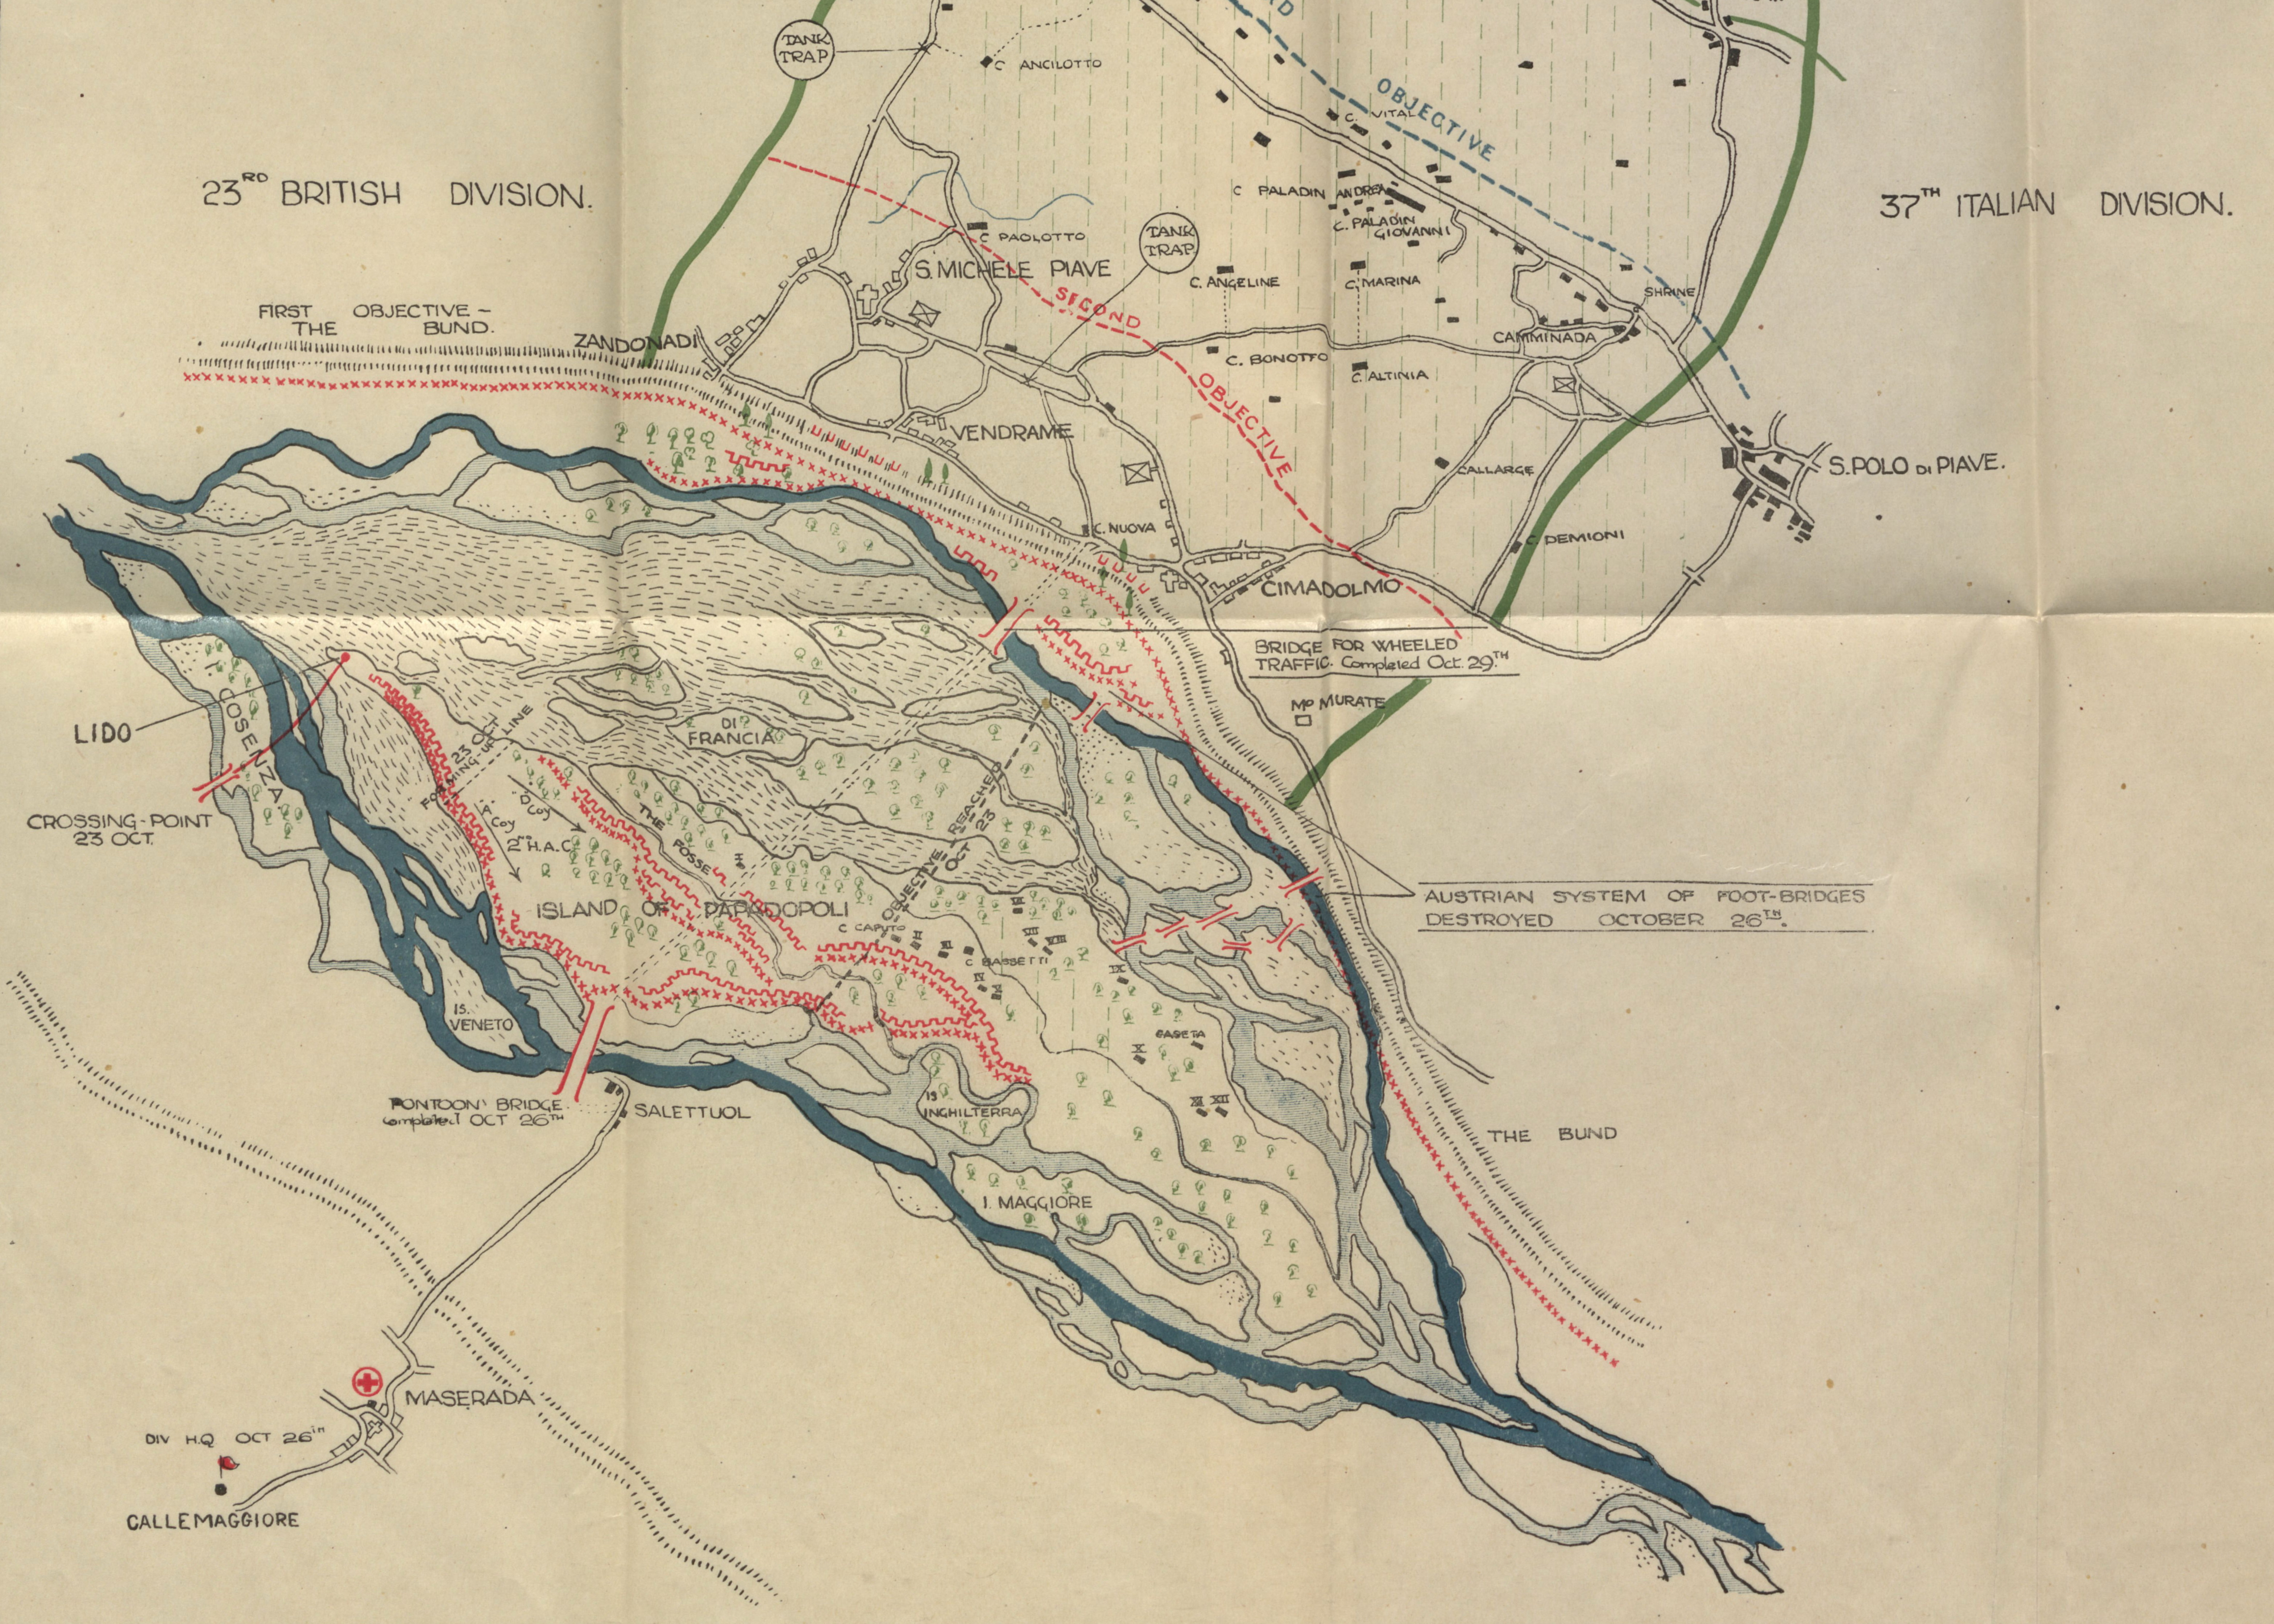


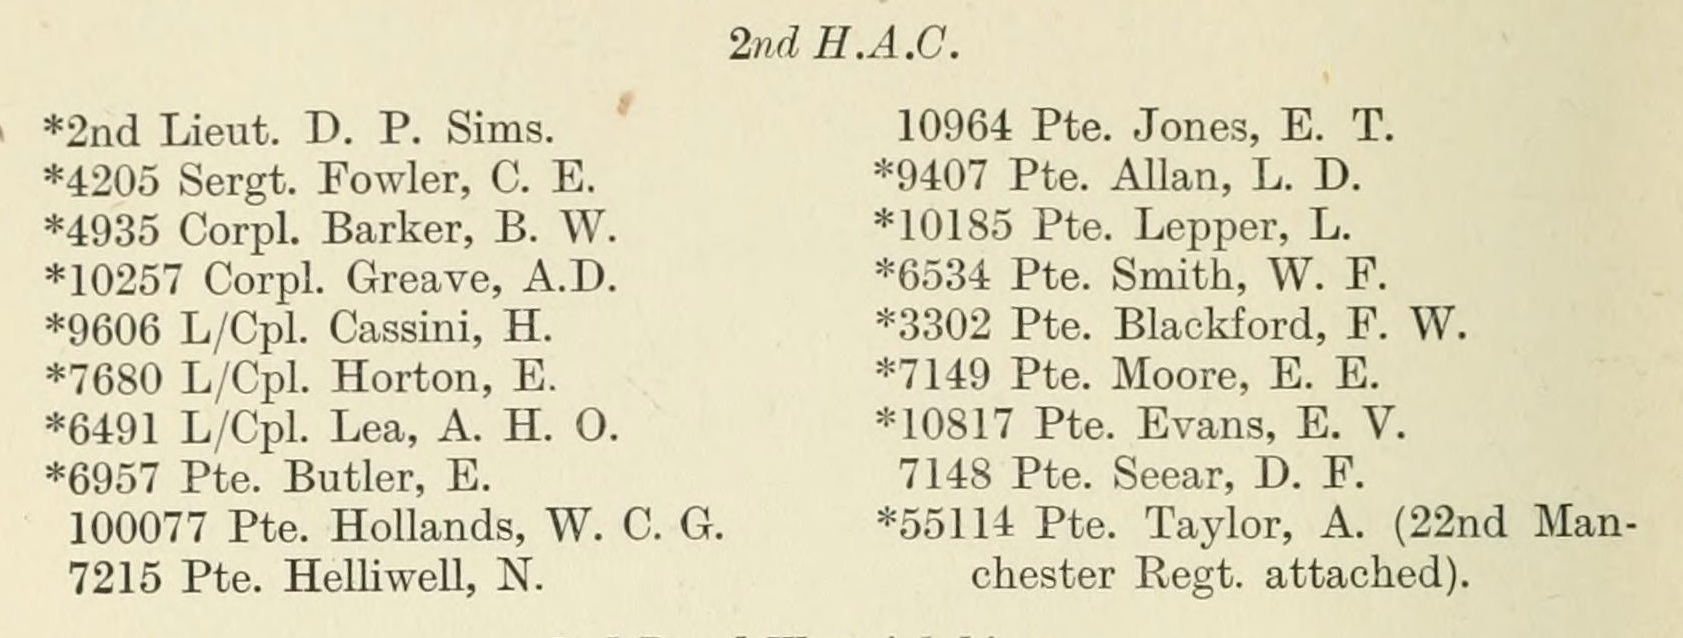

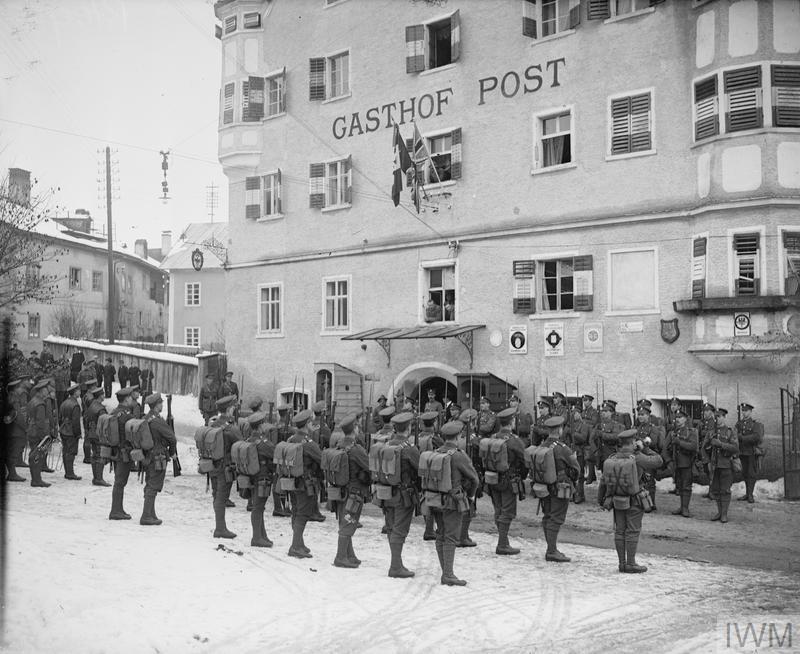
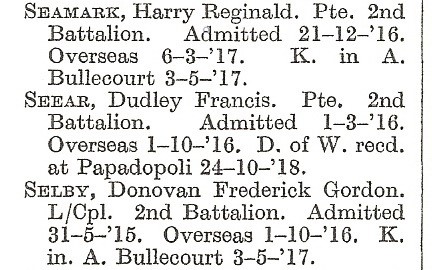
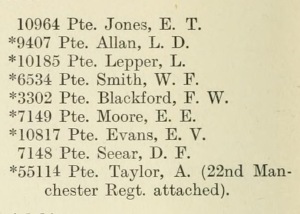

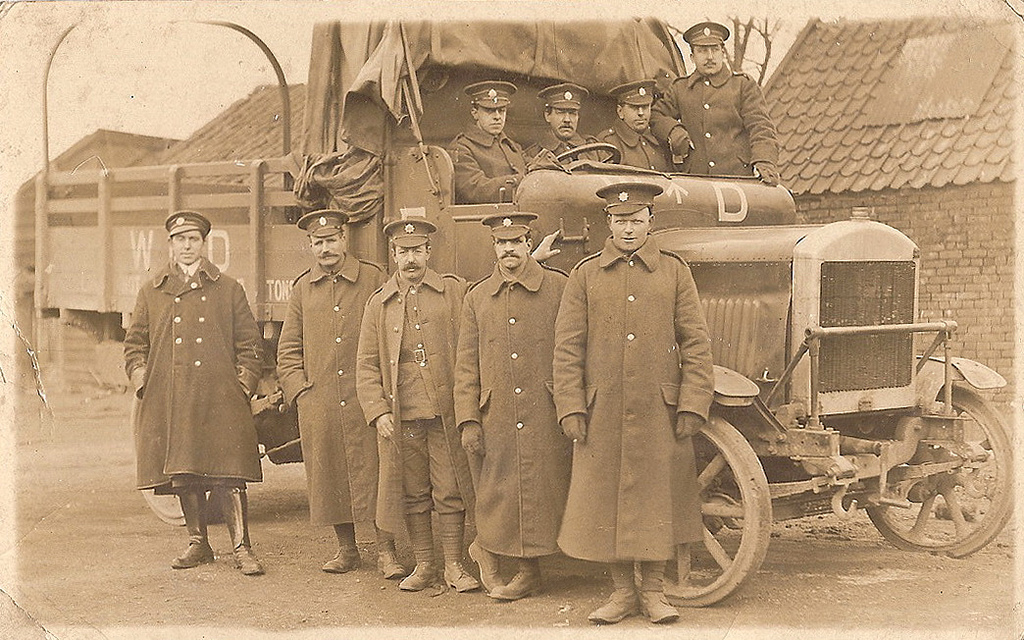
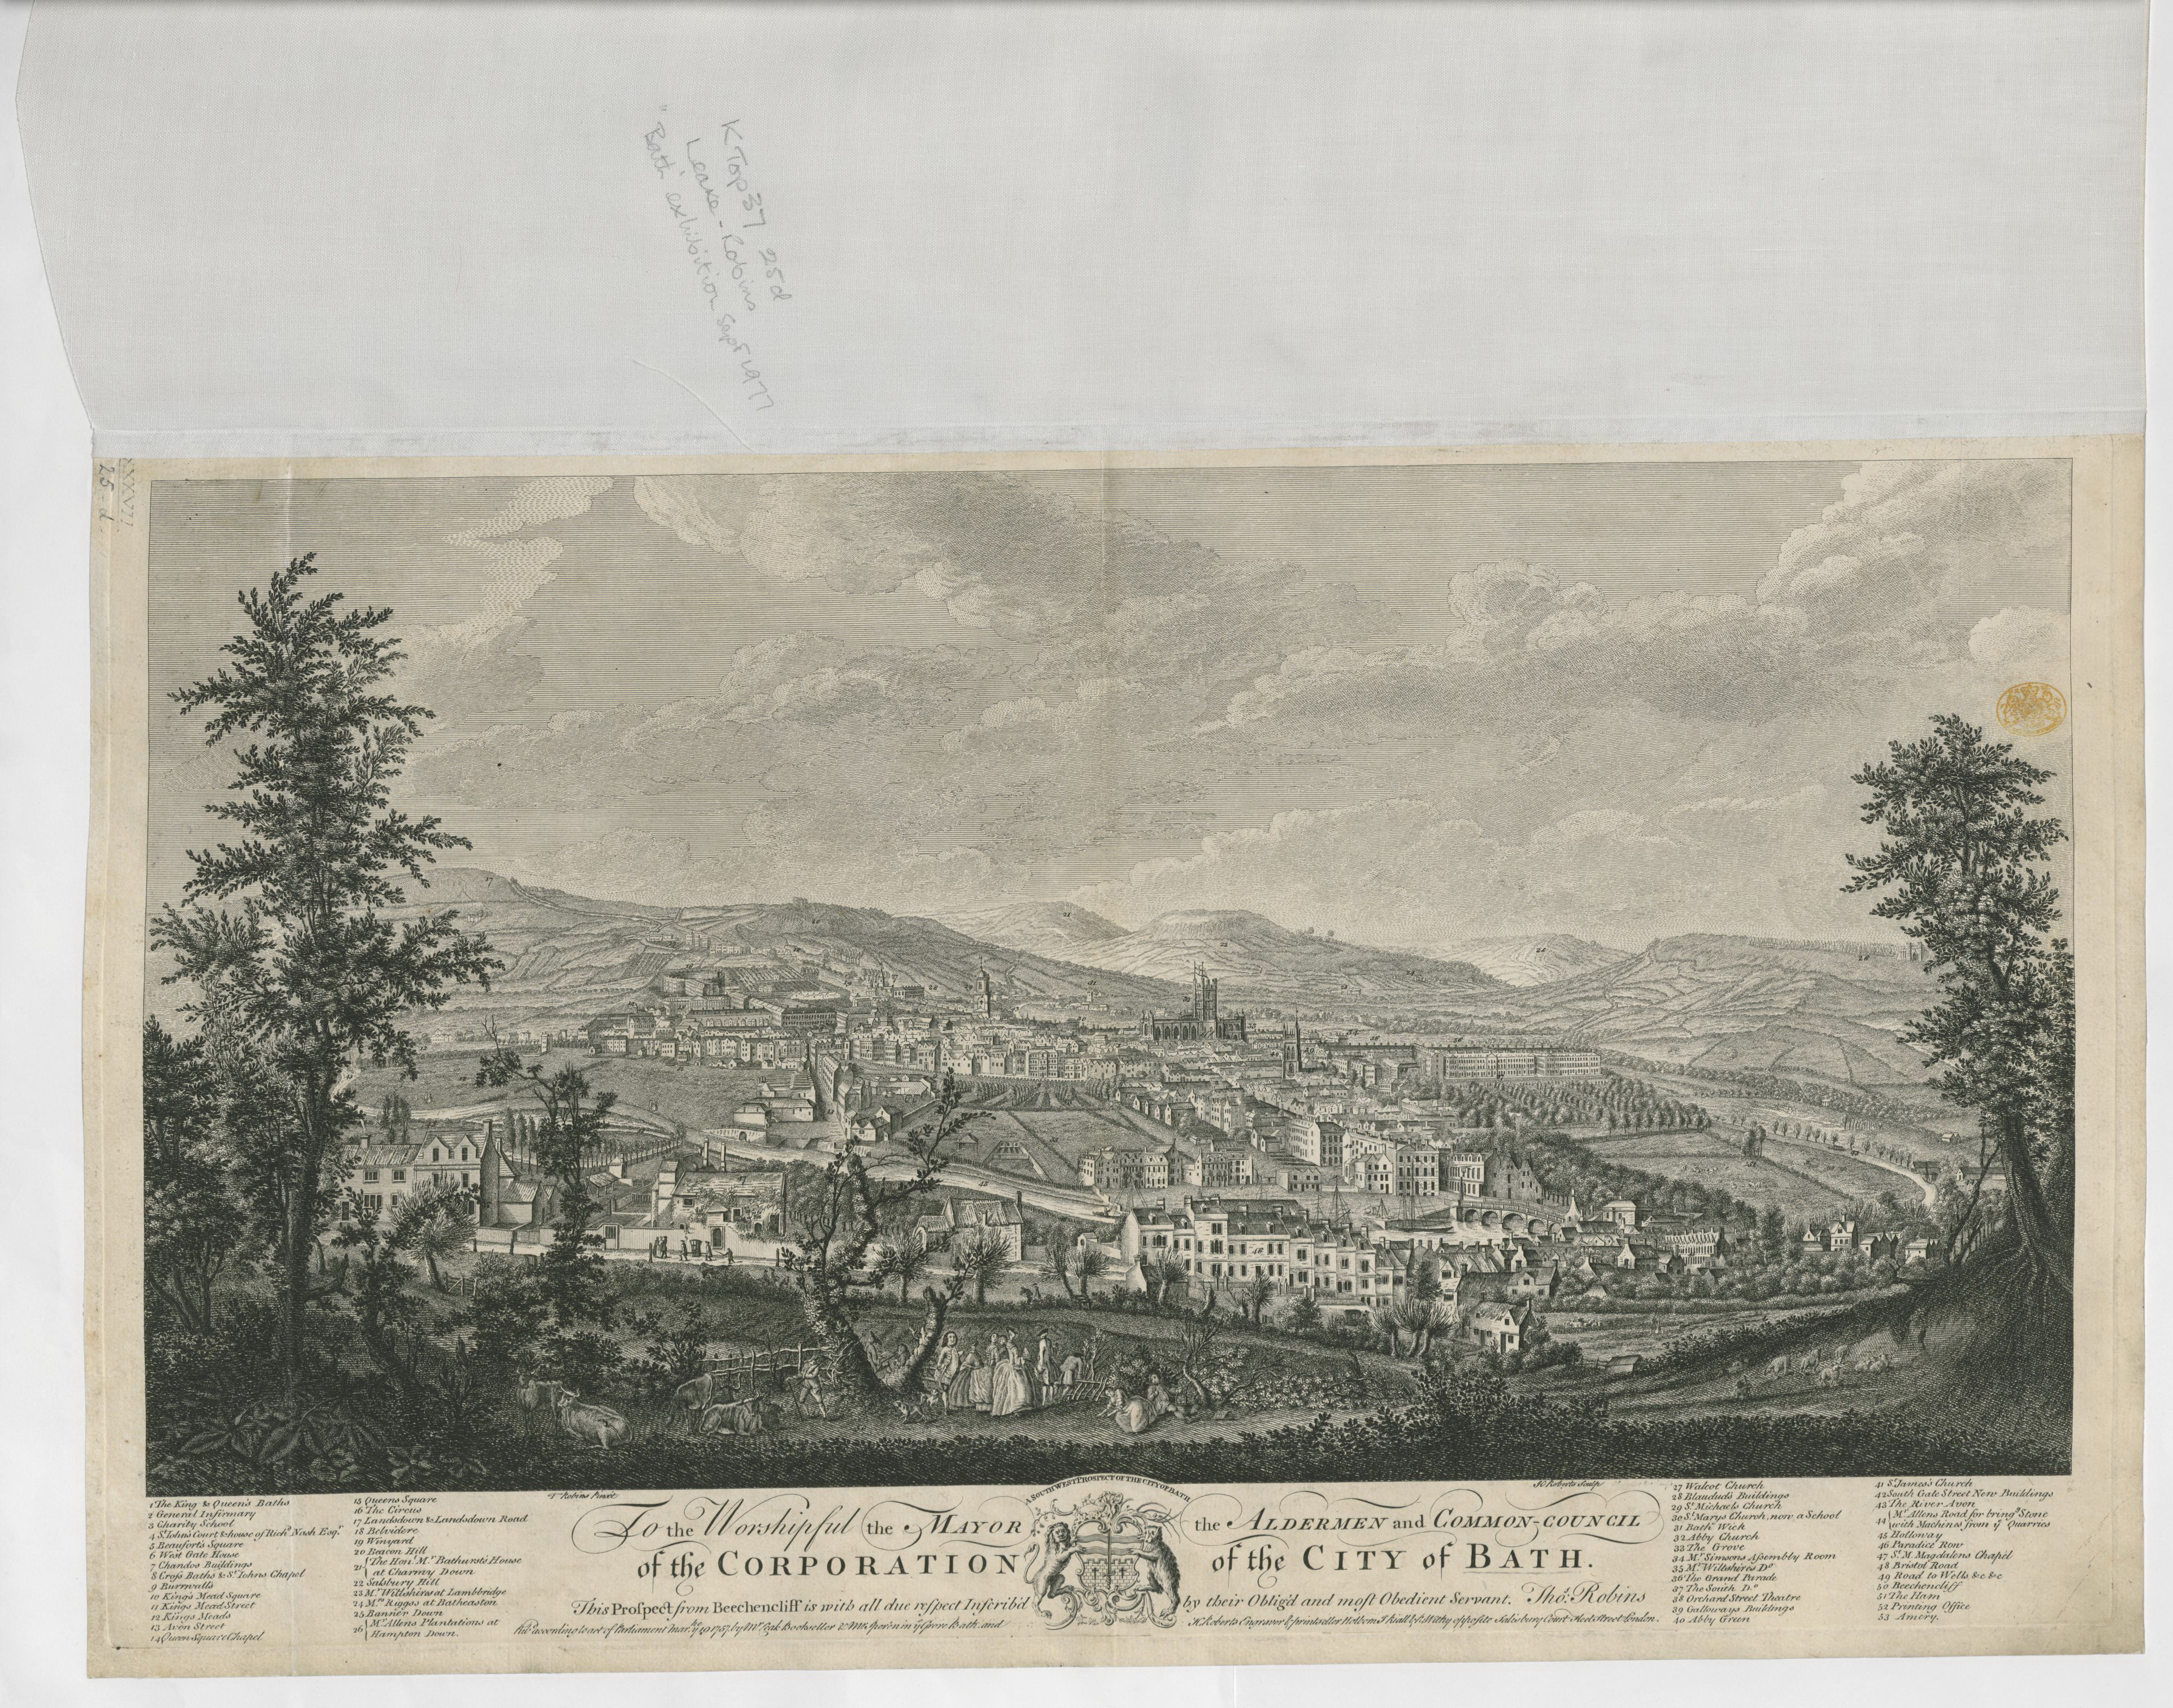


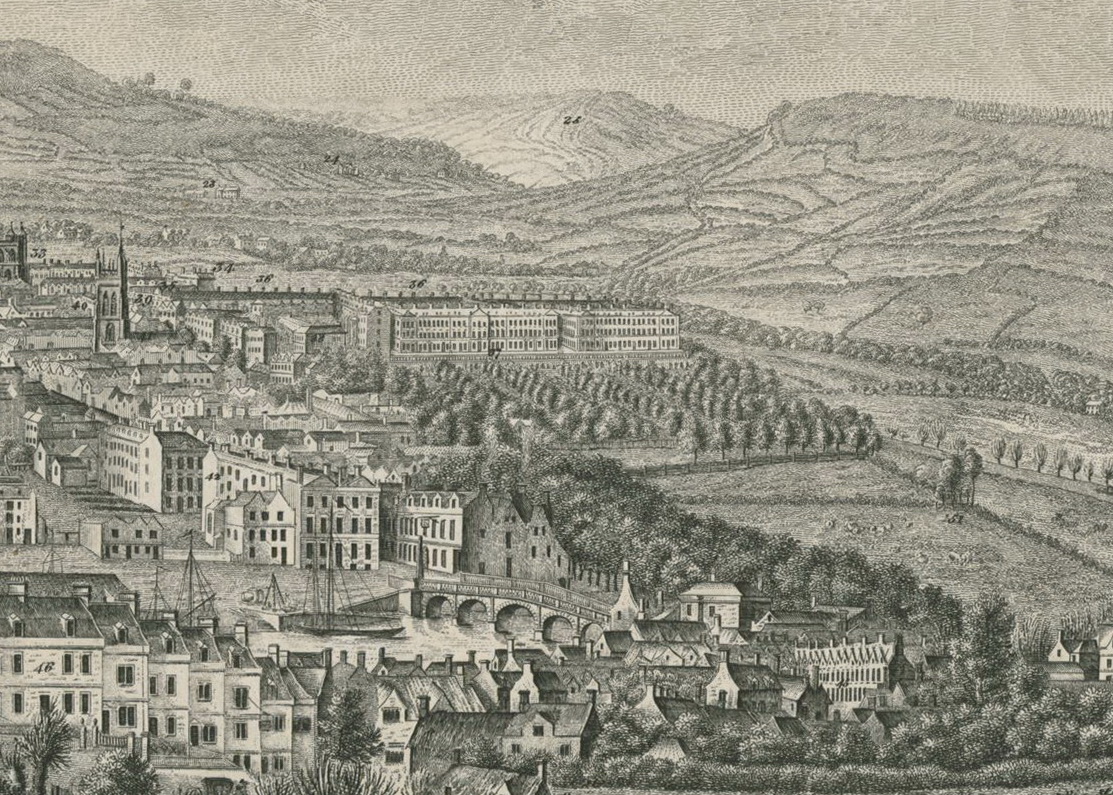

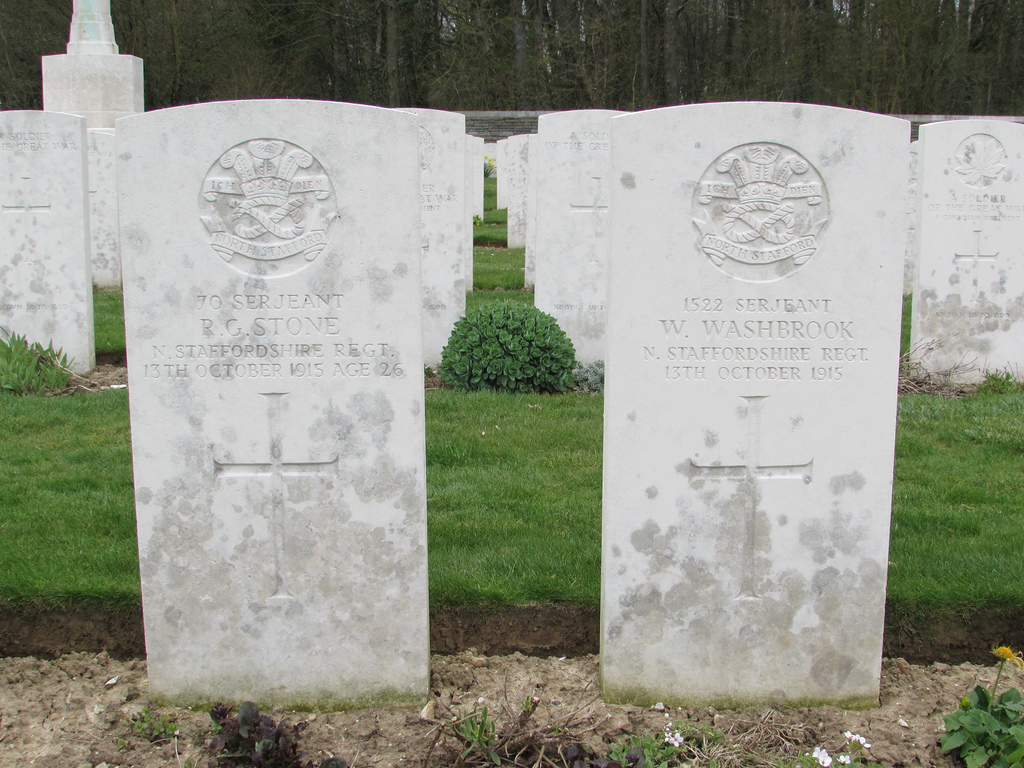

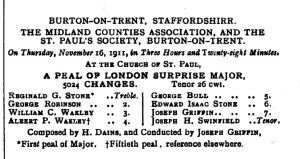
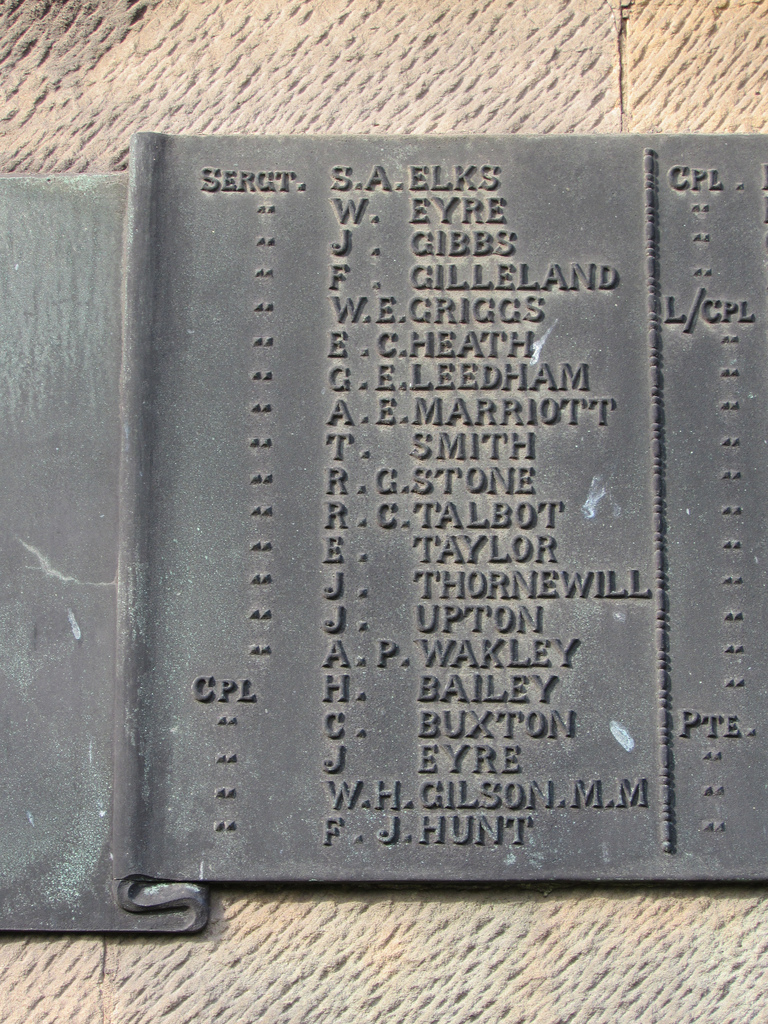


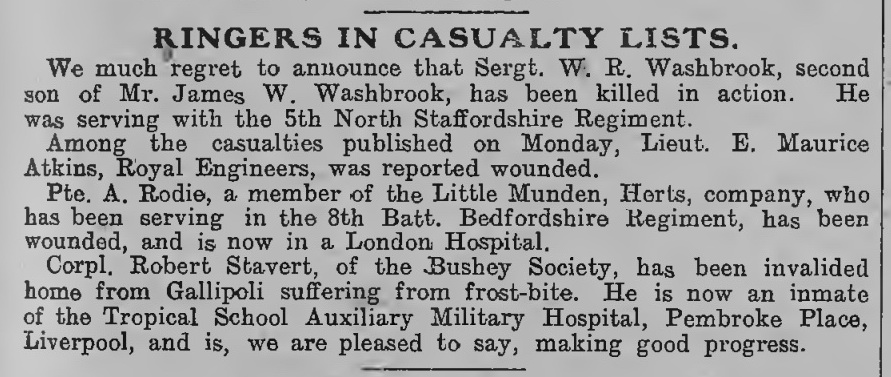
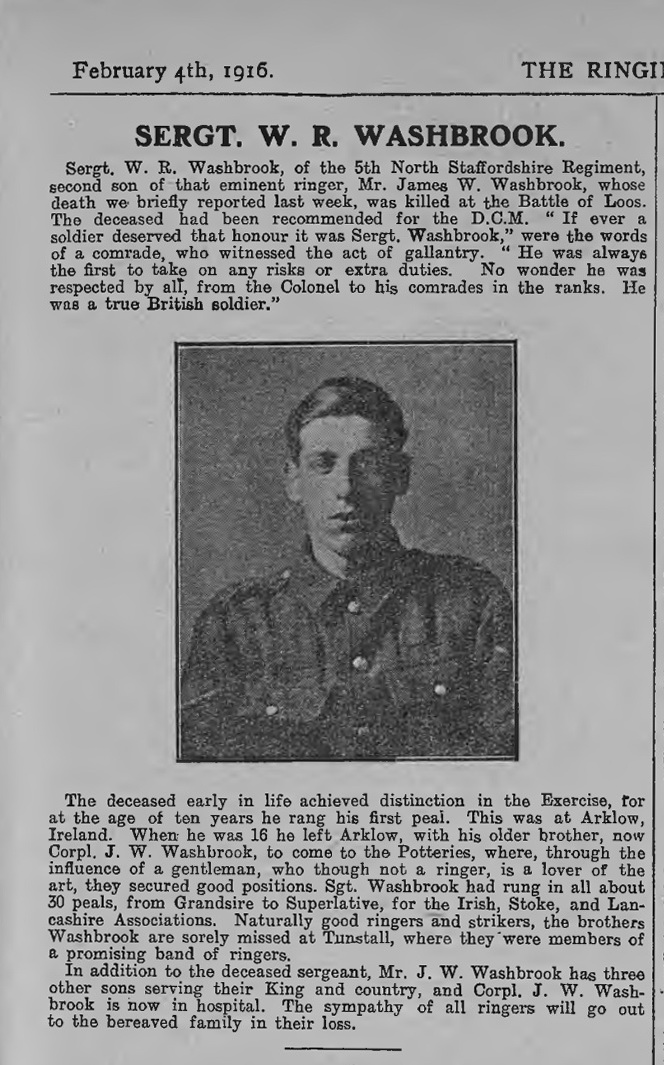
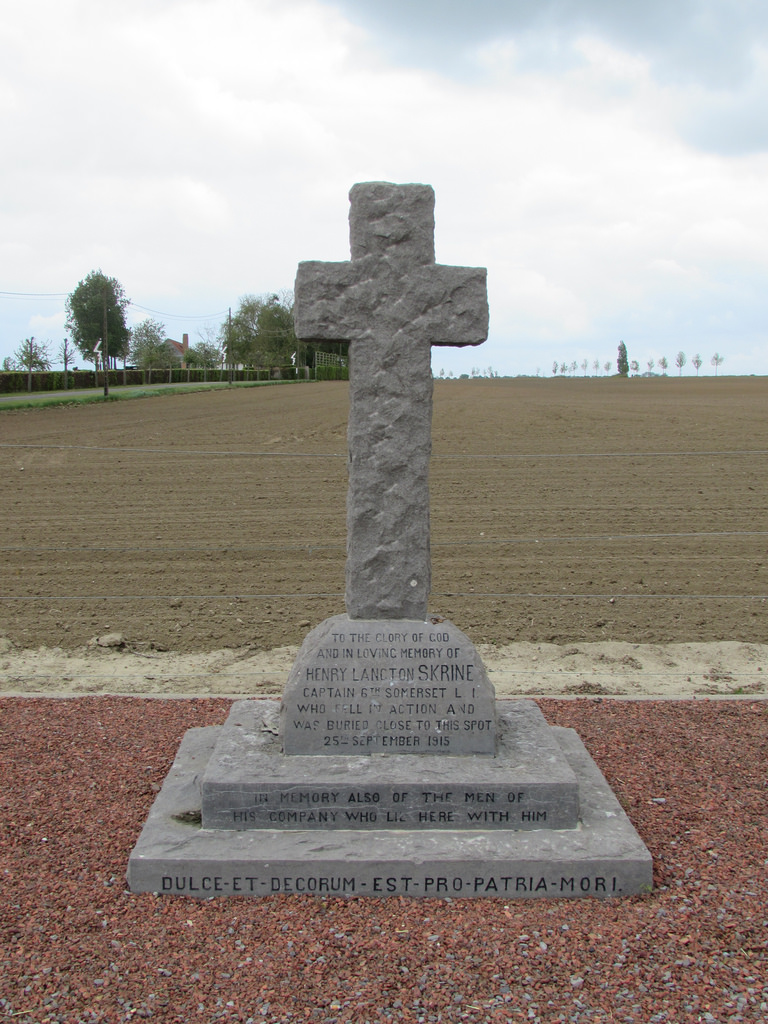


![Sketch Map of Trenches Held by 6 Som. L.I., Sept. 25-28 [1915]. Source: WO 95/1909/1, 6th Battalion, Somerset Light Infantry War Diary](https://opusculum.wordpress.com/wp-content/uploads/2019/09/wo-95-1909-1-map-crop.jpg)
![Secret Orders, 6 Som. L.I., Sept 23rd, [1915]. Source: WO 95/1909/1, 6th Battalion, Somerset Light Infantry War Diary](https://opusculum.wordpress.com/wp-content/uploads/2019/09/wo-95-1909-1-orders-crop-5x7-1.jpg)