Posted by: michaeldaybath | August 10, 2020

Private Arthur James Merritt, 5th Battalion, Wiltshire Regiment

Bishops Cannings: Church of St Mary the Virgin (Wiltshire)

Bishops Cannings: Church of St Mary the Virgin (Wiltshire). Source: Flickr: https://www.flickr.com/photos/13706945@N00/11575587224

11398 Private Arthur James Merritt of the 5th Battalion, Wiltshire Regiment was killed in action at Gallipoli on the 10th August 1915, aged 18. Private Merritt was also a bellringer at St Mary’s Church, Bishops Cannings (Wiltshire) and a member of the Salisbury Diocesan Guild of Ringers (SDGR) [1].

Arthur James Merritt had been born at Bishops Cannings in 1896, and was baptised there on the 27th September 1896. He was the youngest son of Thomas Merritt, a thatcher, and Sarah Ann Merritt (née Walker). At the time of both the 1901 and 1911 Censuses, the family were recorded living at Church Walk, Bishops Cannings. In 1911, Arthur was fourteen years old and was helping his father in the thatching business. His mother Sarah had died in 1908, aged 44.

Colerne: Record of July 1914 peal in the Church of St John the Baptist (Wiltshire)

Colerne: Record of July 1914 peal in the Church of St John the Baptist (Wiltshire)

Arthur rang at least one peal: the treble to 5,040 changes Grandsire Triples at the Church of St. John the Baptist, Colerne (Wiltshire) on the 5th July 1914 [2].

The Ringing World, 10th July 1914, p. 14

The Ringing World, 10th July 1914, p. 14.

The Soldiers Died in the Great War database (available from Findmypast) states that Private Merritt enlisted at Devizes. Richard Broadhead [3] notes that he, strictly speaking, should not have been eligible to serve overseas until he was nineteen-years-old, although the Gallipoli roll of honour published in Paula Perry’s history of the 5th Wiltshires suggests that the battalion contained quite a few under-age recruits [4].

Arthur Merritt has no known grave and is commemorated on the Helles Memorial and on the war memorial at Bishops Cannings.

Bishops Cannings: War Memorial (Wiltshire)

Bishops Cannings: War Memorial (Wiltshire)

The 5th Wiltshire Regiment at Chunuk Bair

The 5th (Service) Battalion of the Wiltshire Regiment formed part of 40th Infantry Brigade in the 13th (Western) Division. The battalion was a New Army (K1) unit that had been formed at Devizes in August 1914 [5]. After training at Cirencester and Cowshot, the battalion embarked at Avonmouth on the 1st July 1915 for the Dardanelles. At Gallipoli, they landed first at Cape Helles on the 17th July, before moving (via Mudros) on to Anzac Cove on the 4th August. There, the 13th Division was supposed to operate in support of the attempt by the Australian and New Zealand Army Corps to break out of the Anzac perimeter and capture the high ground of the Sari Bair ridge, a key objective of the August Offensive at Gallipoli.

Detail from map of Koja Chemen Tepe. Mediterranean Expeditionary Force GHQ, ca. 1915

 Detail from map of Koja Chemen Tepe. Mediterranean Expeditionary Force GHQ, ca. 1915. Source: A collection of military maps of the Gallipoli Peninsula, G.H.Q. M.E.F, 1915; British Library, Digital Store Maps 43336.(21.), No. 40; Crown Copyright, contains public sector information licensed under the Open Government Licence v3.0.

The August Offensive was to have two main components. Firstly, there would be an attempt to break out of the pocket already established at Anzac to capture the Sari Bair ridge. This would be shielded by the landing of fresh troops from IX Corps at Suvla Bay, who would go on to capture the higher ground to the east and link-up with the breakout from Anzac. The landings at Suvla, which commenced on the evening of the 6th August, would be spearheaded by the 11th (Northern) Division. While part of IX Corps, the 13th Division would instead be directed to the Anzac sector, where they would support the attempted breakout there. While there would be diversionary attacks (mainly Australian) at Lone Pine, The Nek, Dead Man’s Ridge, and Turkish Quinn’s, the main attempt to capture the Sari Bair ridge would be led by the commander of the New Zealand and Australian Division, Major-General Alexander Godley. For this the Division was to be reinforced by the 29th (Indian) Brigade and the New Army battalions of the 13th Division.

The 5th Wiltshires, therefore, landed at Anzac Cove on the night of the 4th August 1915 and moved to White Valley. Landings were conducted at night in an attempt to conceal the build-up to the planned offensive from the Turks.

On the 6th August, the 5th Wiltshires and the 4th South Wales Borderers moved north as part of the “Left Covering Force” commanded by Brigadier-General J. H. du B. Travers (40 Brigade). The battalions moved north parallel to the coast, crossed the mouth of a valley called Aghyl Dere and occupied Damajelik Bair, taking a number of Turkish prisoners in the process. In the meantime, the New Zealand and Australian Division, supported by the 29th (Indian) Brigade, had managed to gain a tenuous hold near the summit plateau of Chunuk Bair.

On the 8th August, the 5th Wiltshires joined a composite brigade commanded by Brigadier-General Anthony Hugh Baldwin (38th Brigade), who had been ordered to spearhead another attempt to assault the Sari Bair ridge by capturing Hill Q, on the ridge-line north of Chunuk Bair. Baldwin’s brigade started moving up the Chailak Dere on the 8th August but their initial progress was slow. Then, rather than taking the already-well-established route to Chunuk Bair via The Apex, which had been used by the New Zealanders, the brigade diverted onto an unexplored route that led them into the Aghyl Dere, which led to additional delays. By the early morning of the 9th, the force was arriving just short of an enclosure known as The Farm. By the time that Baldwin’s brigade had arrived there, the linked flanking attacks on the Sari Bair ridge had already gone in and had been repulsed by the Turks. Without the flanking attacks, the main attempt to capture Hill Q also failed. Charles Bean, the Australian Official Historian, clearly regarded this attack as an opportunity lost [6]:

Thus in Godley’s third attempt upon Sari Bair the right (or New Zealand) “column” was throughout engaged in desperately resisting attack; the left (Gurkha and British) “column” reached the crest near “Q” with the enemy in full retreat, but was driven off by the shells of its own artillery; and Baldwin’s central column, which, if it had been on the crest when the bombardment ended, might have restored the position, had been diverted into the Aghyl Dere, through whose depths at the crucial moment it was still toiling.

The 6th Loyal North Lancashire Regiment (38th Brigade) had already moved up to The Apex to act as reserve to the New Zealand Brigade on Chunuk Bair. Needing a second battalion to take over positions on Chunuk Bair from the New Zealanders, Major-General F. C. Shaw (commanding 13th Division) chose the 5th Wiltshires. The battalion, less D Company and part of B Company, which seems to have remained in the area around The Farm, moved up towards Chunuk Bair on the night of the 9th/10th August, but arrived late. In the meantime, the New Zealand units in the front line had been withdrawn, leaving the positions on Chunuk Bair and The Pinnacle in the hands of the Loyals. Bean provides an account of the arrival of the 5th Wiltshires [7]:

Eventually, at about 2 o’clock two-and-a-half companies of the battalion reached The Apex, and were thence guided by a New Zealander to the position on Chunuk Bair. Here Colonel Carden met Colonel Levinge of the North Lancashire. As all the trenches on Chunuk Bair were shallow, and the rearmost full of wounded, it was decided that the 5th Wiltshire should not occupy them, but should remain lower down in the spoon-shaped hollow at the head of the Sazli, near the point where the wounded were mainly collected. Here, having been told by the guide that they were in shelter, the Wiltshire waited; but at dawn they found themselves under a sniping fire, and consequently took off their equipment and began to entrench.

The War Diary of the 5th Wiltshires quotes an officer describing their position as a “cup-shaped deformation at the head of the Gulley to the right and some distance in front of our salient” [8]. Stephen Chambers identifies this as a location at the head of the Sazli Beit Dere [9].

It was not long before everything changed. Under the guidance of Mustapha Kemal, the Turks had been preparing a massive counter-attack. At 4.30 am on the 10th August, they attacked in force, pushing the Loyals and Wiltshires off Chunuk Bair. A note in the battalion War Diary states that the Wiltshires were “overwhelmed in their bivouac before they could ‘stand to’ (no alarm had been given), but the division of Turks brought over from Asia who advanced down the slope in mass” [10]. The situation was eventually stabilised with the help of the New Zealand machine-gunners and naval artillery, but the counter-attack marked the end of Allied attempts to hold on to Chunuk Bair.

Many of the Wiltshires that had not been killed in the initial onslaught were pushed into the Sazli Beit Dere, from which there was no easy escape in daylight. Some were able to escape after dark. Chambers quotes Lieutenant Walter Evans of the 8th Welsh Regiment (13th Division pioneers) [111]:

They [the survivors] were obliged to abandon all their wounded and that is why there are so many missing. The wounded in the gully remained there all day, many dying, and in the evening, when it was dark, all who were able ran back over the hill to where our bivouac was on Saturday night.

Other survivors were effectively trapped in the zone between the lines, where some would remain for weeks. Peter Liddle comments on the situation of some of these [12]:

Perhaps the most pitiful fate was that of survivors of the 5th Wiltshires, who lay between the lines for a fortnight in the Sazli Beit Dere. Water was found from a spring but was apparently supplemented by some by sympathetic Turks who knew where they were but neither fired on them nor took them prisoner. In an attempt to escape, some were killed by the Australian who mistook them for the enemy, and others by the Turks, who had observed their dash. Two men managed to reach the New Zealanders and one, in his weakened position, was carried out to help to locate and rescue the five remaining survivors.

The War Diary of the 5th Wiltshires recorded the rescue of five men that had been missing for sixteen days, noting that others in their party had died of exhaustion or starvation [13].

Accounts of some of these rescues also made it into some newspaper. For example, the following story, published in the Kalgoorie Western Argus of the 4th January 1916, may be referring to the same incident [14]:

Lost for a Fortnight.
Private Humphries of the 5th Battalion Wiltshire Regiment, was one of a party who were lost outside our lines for over a fortnight at Chunuk Bair (Dardanelles). At the end of that time, although greatly exhausted and weakened by privation, he, with the greatest bravery made his way in, and so brought about the rescue of his comrades. In the course, of his return he was constantly exposed to heavy fire, and only succeeded with the utmost difficulty. He did not hesitate at once to return and act as guide to a relieving party.

Another story, this time about seventy members of the 5th Wiltshires being trapped in no man’s land, appeared twenty years afterwards in the “Unofficial History of the A.I.F.” column of the Sydney newspaper, Smith’s Weekly [15]:

The Lost Patrol
JUST at the time that Chunuk Bair looked like a soft snap, some of the 8th [Australian] Light Horse were posted on Camel’s Hump, at the foot of the Sazli Dere. A Body of Turks approached without any definite formation, and the troopers opened fire. The approaching troops turned and ran for it. While the Light Horsemen were puzzled, Lieut. Higgins told them that he could see through his glasses that these Turks were unarmed. Later, it transpired that seventy men of the 5th Wiltshires had been driven into the valley from Chunuk Bair, carrying with them a wounded major. Every attempt they made to communicate with other troops failed, and they lived there for a fortnight on iron rations from the haversacks of the dead, and water from a spring. The Turks knew about them, but refused to make them prisoners, and their patrols wouldn’t fire. In fact, one patrol handed over a tin of water to them. When their officer died, nearly all of the Wiltshires decided to make a break, and ran down the valley. It was they upon whom the Light Horse fired in pardonable error, and the Turks wiped the whole party out near Sniper’s Nest. Seven, who were too weak to take part, were later rescued by the New Zealanders from Rhododendron. — “Greenhide.”

A view of The Farm and Chunuk Bair from Table Top; one of a series of photographs taken on Gallipoli by the Australian War Records Section, 1919

A view of The Farm and Chunuk Bair from Table Top; one of a series of photographs taken on Gallipoli by the Australian War Records Section, 1919. Source: Australian War Memorial P07906.069 (Public Domain): https://www.awm.gov.au/collection/C1229063

Back at The Farm, those in D Company and part of B also got caught up in the same Turkish counter-attack that pushed their battalion comrades off Chunuk Bair. The War Diary of the 5th Wiltshires states that D Company relieved the Gurkhas with the (6th) Royal Irish Rifles in reserve: “position attacked at dawn on Tuesday (10th) morning and through the retirement of regiments on right and left, D company are left ‘in the air’” [p10]. The battalion retreated into a gully, from where they counter-attacked with great loss.  They eventually retired from the gully in the evening. Bean summarised the situation as follows [16]:

South of The Farm, until about 9 o’clock, eighty of the 10th Hampshire and 5th Wiltshire held to the slope below the Pinnacle, and at The Farm itself the Royal Irish Rifles were still clinging to the hillside at 10.30.

General Baldwin himself was killed during the fighting on the 10th, and the vacated Farm position was occupied by the Turks over subsequent days.

The casualties suffered by the 5th Wiltshires on the 10th August were horrendous. The roll of honour appended to the published battalion War Diary lists the names of 144 dead for that date alone, and there were many more that must have died during the wider operations at Anzac. The dead included the battalion’s commanding officer, Lieutenant-Colonel John Carden, CMG, a veteran of the Matabele Wars and the South African War. The War Diary itself lists twelve officer casualties (killed, missing, or wounded) and notes that the battalion afterwards only mustered around 420 on the beach, 76 of whom had lately arrived from Lemnos [17].

The War Diary account:

The War Diary of the 5th Wiltshires describes the main movements of the battalion after they left Mudros on the 3rd August. It is fragmentary, and partly reconstructed after-the-event, because the adjutant, Lieutenant Belcher, was killed on the 6th August, and the battalion lost most of its officers on the 10th August [18]:

3/8/1915 – Gallipoli.
At 11 a.m. the Battalion moved to the Egyptian Pier [Mudros] and embarked on H.M.T ‘Sania.’ Lt H.B.L. Braund and 2Lt J.P.M. Carpenter left at E. MUDROS in charge of details, composed chiefly of men suffering from dysentry [sic], of which there was a very considerable outbreak during their stay at Lemnos.

4/8/1915 – Anzac, Gallipoli.
The arrival at ANZAC during the early hours of this morning was quiet and unmolested and the Battalion immediately proceeded to quarters in WHITE VALLEY. Here they remained without incident, except occasional severe shelling, a few men being wounded, until the evening of Friday.

6/8/1915 – Gallipoli.
[6th-7th] On that evening (Friday) at 8 p.m. the Battalion moved from White Valley accompanied by the S.W.B’s [4th South Wales Borderers]. Route taken was through Rest Gulley and over the cliffs through the cutting, reaching the shore again beyond Ari Burnu. Thence they were sniped and encountered considerable shrapnel fire.
Finally a position was taken up on DAMAJELIK BEIR. A, B & C companies take up position from Track 92 N8 to KNOLL 92 O8-9 inclusive. D company in Bde reserve in Gulley S. of Pt. 40.
This position was taken with but slight opposition. Number of prisoners taken during the operation by the SWBs and WILTS is estimated at 250 (Reports agree that a number of the prisoners taken on this occasion were old men and very willing to fall into our hands. There was every indication of a hasty retirement of those previously occupying the ground. The fires in the cottages were warm and there were signs throughout of recent habitation. Excellent honey and water was found here. HBLB)
Officer casualties on march from ANZAC:
Lieut A.G.O. Wigmore R.A.M.C (wounded slightly)
Lieut A.C. Belcher (killed)
Reference: Gallipoli Map 1.20,000 KURIJA DERE

7/8/1915 – Amzac, Gallipoli.
Same as for 6.8.1915

8-9/8/1915 – Anzac, Gallipoli.
This line was held during Sunday – casualties:
Capt J.W. Greany (slightly wounded)
Lieut G.D. Bidwell (seriously wounded)
At 7 p.m. of Sunday evening this line was taken over by the 4th South Wales Borderers and the trenches begun by us during Sunday completed. We learn that they were attacked in this position on the following day and were completely successful in holding it.
Move into CHAILAK DERE and here remain until after dark. Then move into AGHYL DERE in rear of the HAMPSHIRE REGIMENT. At this period we were attached to 38th Bde. Casualty on march: Capt F. Spencer (wounded).

9/8/1915 – Anzac, Gallipoli.
Monday.
Remain behind Hampshire’s, in rear of the FARM position below crest of hill. Heavy fighting was in progress in front, and the Battalion was shelled. Capt R.W.F. Jesson (wounded).
During the day counter attacks by the Turks were expected but did not develop. Rations were drawn at 5.30 p.m. and rumours were current of 24 hours rest. It should be noted that the men had had no rest, and very little water and food since Friday evening and were consequently in a very exhausted condition.

10/8/1915 – Anzac, Gallipoli.
1 a.m. (01.00)
Battalion moves away in single file less D company and part of B company (The history of this party will be given separately as far as possible. H.B.L.B.). Order of march: C – Machine guns – A – B. Companies “Move by a steep and winding course to a cup-shaped deformation at the head of the Gulley to the right and some distance in front of our salient.” (Words of 2 Lieut R.W.M. Dewhurst one of the few officers on the march who subsequently survived). The Battalion was guided, as far as I am able to ascertain, by a New Zealand Officer. Here they arrived two hours before sunrise (circa 03.00) and the men were told to dig into dugouts and make themselves comfortable as the position was quite safe.
Men therefore removed equipment and rifles.
This position I take it to be just N. of the H in Chunuk Bair, and the march to it from the Aghyl Dere must have been via the APEX (Ref. Gallipoli Map 1.20,000 Koya Dere) (Circa) 4.30 a.m. As soon as it was light machine guns opened on the men lying in their dug outs. About 1/4 of an hour later there was a rush of Turks from both sides of the depression which drove the men, unarmed and unequipped down the gulley (SALZLI BEIT). The bottom of the gulley commanded by machine guns and so escape was cut off. Three courses were possible:–
1. To rush past the machine guns down the Sazli Beit, this was tried but in nearly all cases proved fatal.
2. To climb the northern slope of the ravine under fire and try to escape over the top. This was done in a few cases with success.
3. Hide in Gulley till night, this also was done with more success. (A party of 5 men was rescued from the Gulley having been there 16 days – i.e.:- from Aug 10 – Aug 26th. The reported numbers of men who were wounded, were unable to get away and died of exhaustion and starvation. H.B.L.B.)
Parties arrived on the Beach in fours, fives, and some carried bodies, during the 11th, 12th and 13th, unarmed, unequipped and demoralised.
The Battalion when mustered on the Beach mustered roughly 420 (This includes 76 men lately arrived as Details from Lemnos).
Officer casualties:- Lt Col. J. Carden (missing), 2nd Lieut J.E.R. Firmin (killed), 2nd Lt G. Gamman (missing), Maj. F. Ricketts (killed), 2nd Lieut W.Y. Radcliffe (killed), Lieut A.J. Hinxman (missing), Maj. W.S. Hern (killed), 2nd Lieut C.G.C Fisher-Brown (missing), Capt & Adj A.C. Belcher (killed), Lieut A.W. Huckett (missing), Lieut F.E. Hill (wounded), Lieut Brown (wounded – attached).
1 a.m. (0100)
After the Battalion had marched off (A, C and part of B). D company under Major Hern relieved the Gurkhas with the Royal Irish Rifles in reserve. The position was attacked at dawn on Tuesday (10th) morning and through the retirement of the regiments on right and left. D company were left ‘in the air’. Major Hern and Lieut J.E.R. Firmin killed, but remainder hold on until surrounded and are forced to retire into Gully. Here reorganised and sent up to a counter attack — unsuccessfully and with large loss. Lieut Gamman killed – several wanton attacks attempted with handfuls of men. At night men retire from Gully, some taking refuge with 38th Bde.
Tuesday August 10th – Sunday August 15th
Reorganisation of Regiment
Officers: Lt J.C. Bush, Lt R.W.M. Dewhurst, Lt H.B.L. Braund, Lt J.C. McDonnell, Lt J.H. Moore, Lt W.R. Wrigley. Joined as M.O. Capt C.V. Single (A.A.M.C).

11/8/1915 – Anzac, Gallipoli.
Casualties on Beach:
Lieut and Q.M. Rumsey (wounded)
2nd Lieut J.P.M. Carpenter (wounded)
Sick to Lemnos: Lieut J.C. McDonnell
Lieut J.C. Bush

Note: “H.B.L.B.” in the War Diary transcript refers to retrospective notes added by Lieutenant Henry Benedict Linthwaite Braund, who took over as adjutant from Lieutenant Belcher after the 10th August 1915.

Detail from: Panorama of Chanuk Bair from 3 miles south of Nibrunesi Point.

 Detail from: Panorama of Chunuk Bair from 3 miles south of Nibrunesi Point. Mediterranean Expeditionary Force GHQ. Source: A collection of military maps of the Gallipoli Peninsula, G.H.Q. M.E.F, 1915; British Library, Digital Store Maps 43336.(21.), No. 16; Crown Copyright, contains public sector information licensed under the Open Government Licence v3.0.

References:

[1] Robert Wellen, Salisbury Diocesan Guild of Ringers: Great War Memorial Booklet (2019), p. 7; for more information, see: https://sdgr.org.uk/great-war-memorial-booklet/

[2] The Ringing World, 10th July 1914, p. 14:
https://cccbr.org.uk/wp-content/uploads/2017/09/rw1914_b.pdf

[3] Richard Broadhead, The Great War: Devizes district soldiers (Hilmarton: O&B Services, 2011), pp. 73-74.

[4] Age data is not available for all casualties, but Paula Perry’s Gallipoli roll of honour (July 1915 to February 2016), which is based on data from the CWGC database, lists fifteen members of the 5th Wiltshires as having died at the age of eighteen or younger, and another twenty-three were just nineteen at the time of their deaths; see: Appendix 4 in: Paula Perry, A history of the 5th (Service) Battalion Wiltshire Regiment, 1914-1919 (Salisbury: The Rifles Wardrobe and Museum Trust, 2007), pp. 177-183

[5] The Duke of Edinburgh’s (Wiltshire Regiment), The Long, Long Trail website:
https://www.longlongtrail.co.uk/army/regiments-and-corps/the-british-infantry-regiments-of-1914-1918/the-duke-of-edinburghs-wiltshire-regiment/

[6] C. E. W. Bean, The Official History of Australia in the War of 1914-1918, Vol. II: The story of ANZAC from 4 May, 1915, to the evacuation of the Gallipoli peninsula, 11th ed. (Sydney, NSW: Angus and Robertson, 1941), pp. 699-700; digitised version of Chapter XXV available from the Australian War Memorial: https://www.awm.gov.au/collection/C1416629

[7] Bean, p. 708.

[8] 5th Battalion, Wiltshire Regiment War Diary, in: The Wiltshire Regiment in the First World War, 2nd ed. (Salisbury: The Rifles Wardrobe and Museum Trust, 2011), p. 10.

[9] Stephen Chambers, Battleground Europe: Gallipoli: Anzac — Sari Bair (Barnsley: Pen & Sword Military, 2014), p. 130.

[10] 5th Battalion, Wiltshire Regiment War Diary, p. 12.

[11] Quoted in Chambers, Gallipoli: Anzac — Sari Bair, p. 139.

[12] Peter Liddle, Men of Gallipoli: the Dardanelles and Gallipoli experience, August 1914 to January 1916 (Newton Abbot: David & Charles, 1988), pp. 214-215.

[13] 5th Battalion, Wiltshire Regiment War Diary, p. 10.

[14] Kalgoorie Western Argus (WA), 4 January 1916, p. 31; via TROVE Newspapers (National Library of Australia): https://trove.nla.gov.au/newspaper/article/33600529

[15] “Unofficial History of the A.I.F.,” Smith’s Weekly (Sydney, NSW), 7 March 1936, p. 16; via TROVE Newspapers (National Library of Australia):
https://trove.nla.gov.au/newspaper/article/235832530

[16] Bean, p. 711.

[17] 5th Battalion, Wiltshire Regiment War Diary, p. 10.

[18] 5th Battalion, Wiltshire Regiment War Diary, pp. 8-11; online transcript also available from The Rifles Berkshire and Wiltshire Museum:
https://www.thewardrobe.org.uk/research/war-diaries

Bishops Cannings: War Memorial (Wiltshire)

Bishops Cannings: War Memorial (Wiltshire)

Note:

A have compiled in another post some extracts from general accounts of the attack on Chunuk Bair, e.g. from newspapers, General Sir Ian Hamilton’s Final Despatch, and the Australian Official History.

Posted by: michaeldaybath | August 6, 2020

The August Offensive at Gallipoli: Chunuk Bair

A view of The Farm and Chunuk Bair from Table Top; one of a series of photographs taken on Gallipoli by the Australian War Records Section, 1919

A view of The Farm and Chunuk Bair from Table Top; one of a series of photographs taken on Gallipoli by the Australian War Records Section, 1919. Source: Australian War Memorial P07906.069 (Public Domain): https://www.awm.gov.au/collection/C1229063

This post provides transcripts of selected accounts of the attempt to capture Chunuk Bair during the August Offensive at Gallipoli in 1915. They have been compiled from various newspapers and books, and include:

  • A newspaper report from Ellis Ashmead-Bartlett, August/September 1915
  • An extract from General Sir Ian Hamilton’s Final Despatch, January 1916
  • Newspaper accounts from the Sunday Times (Perth, WA), August 1916 and December 1918
  • An extract from the Australian Official History by C. E. W. Bean

This post is intended to accompany posts on the 5th (Service) Battalion, Wiltshire Regiment (40th Infantry Brigade, 13th (Western) Division), who took part in the August Offensive at Anzac, e.g.: Private Arthur James Merritt, a bellringer from Bishops Cannings (Wiltshire).

1. Ashmead-Bartlett’s report, 19 August 1915

Ellis Ashmead-Bartlett was a British war correspondent whose reports from Gallipoli were often the first eyewitness accounts of the campaign to be published. As time went on, however, he became increasingly critical of the way the campaign was being conducted. Ashmead-Bartlett’s Wikipedia entry states that his “colourful prose, unrestrained by the pursuit of accuracy which hampered [the Australian correspondent Charles] Bean’s dispatches, was thick with praise for the Anzacs and went down well with Australian and New Zealand audiences.”

This account of the August Offensive at Anzac dated from the 19th August, although it was published in newspapers in early September. This version was published in the Sydney Morning Herald of the 4th September 1915:

DARDANELLES.
BATTLE OF GIANTS.
AUSTRALASIANS’ COURAGE.
ASHMEAD BARTLETT’S PRAISE.

LONDON, Sept. 2.

Mr. Ashmead Bartlett, in a report dated August 19, to the London newspapers says:– Since the greatest battle in Gallipoli closed on the 10th both armies have been busy consolidating their positions, replenishing their ammunition and re-organising the units intermingled on rugged mountainous country. I visited the ground where the Anzac corps advanced in desperate efforts for four days to reach the crest of Sari Bair, commanding the ridge and giving access to the highest peak, namely, Kojachemen, which is torn asunder by a giant ravine.

FOUGHT LIKE LIONS

The New Zealand Infantry Brigade, Gurkhas, and other battalions, almost reached the objective but were unable to hold through no fault of their own. A battalion of Gurkhas actually reached the crest of the plateau. At the same moment the Turks, advancing in confusion, counter attacked in great force, and drove back the Gurkhas to lower spurs. The survivors, who obtained views of the promised land, describe the waters of Dardanelles as lying beneath, with Turkish transports steaming southward. they also looked down the Narrows to Kilid Bahr.

There was bitter disappointment in having to relinquish the crest, when it was almost in our grasp after so many months but there was no alternative. The Anzac corps fought like lions, and accomplished a feat of arms almost without parallel climbing those heights. Although handicapped by the failure, another corps made good its positions in the Anafarta hills further north for the purpose of checking the enemy’s shellfire. When the details of these complicated operations are sifted, they will form one of the most fascinating pages of the war’s history. It was a combat of giants in giant country, the outstanding fact being the marvellous hardihood, tenacity, and reckless courage of the Australians and New Zealanders. Nor must we forget the part played by the division of the new English army. Unaccustomed to the novel conditions of mountain warfare and unacclimatised to marching, fighting and climbing in the heat, for hours without water, they nobly supported the colonials and suffered heavy losses unflinchingly. The Maoris skilfully crept forward over broken ground, cutting wires, and preparing the way for the advance. In order to enable the forces detailed for the main movement which had the ultimate object of the occupation of Sari Bair from Chunuk Bair to Kojachemen, it was necessary to attract the enemy’s attention towards the south and force him to keep his troops in front of our lines while our main forces debouched from Anzac. This was the reason for the Australian advance on August 6, and the desperate attack of Lone Pine plateau which is 400 feet, and of great strategic importance opening up the main line of communication between Anzac and Kilid Bahr plateau further south. The Turks fortified their position carefully. They had a veritable fortress of trenches roofed with huge pine logs, railway sleepers and immense teak planks, covered with earth, making the trenches impervious to shell, except from heavy howitzers.

The assault on the 6th was preceded by 15 minutes’ furious bombardment, which had little effect on the Turks, who were safely dug in. Therefore, forcing the position devolved on the Infantry. The Australians rushed forward in the assault with the fury of fanatics, little heeding the tremendous shrapnel fire and enfilading rifle-fire. The great difficulty was to force a way into the trenches. It required a mighty physical effort to remove the obstructions. Groups effected entrances at various points, and jumped in. The Turks were caught in a trap, and some surrendered. The majority chose to die fighting. There was a desperate hand-to-hand fight in every trench and dug-out. Four lines of trenches were captured in succession. Additional infantry came pouring in as the advancing lines were thinned by casualties. Bombs played an important role, and the Australians were only able to hold their positions through an unceasing supply.

The Turks massed their forces and counter attacked desperately for three days and nights. They frequently retook sections, only to be again driven out. This extraordinary struggle was almost entirely underground. Both sides fought with utter disregard for life. Wounded and dead choked the trenches almost to the top, and the survivors carried on the fight over heaps of corpses. Despite the most determined courage of the reinforced Turks, the Australians held their ground, and finally the Turks wearied of the struggle. Trenches were now merely battered shambles. The removal of the dead and wounded occupied days. The bodies of a thousand Turks and colonials were removed from the trenches, and hundreds more were outside. The Turkish losses in this section alone are estimated at 5000, and they were chiefly incurred in counter attacks.

NO FINER FEAT.

Although the capture of Lone Pine Ridge was the most desperate hand-to-hand fight that had yet occurred on the peninsula it was merely a diversion and a preliminary to the main movement northwards which commenced the same evening, under cover of darkness. There is no finer feat in the whole war than the manner in which the troops destined for the main movement against Sari Bair deployed for the attack. A direct attack was not attempted, as it would have entailed immense losses, and probably failure, because the Turks posted on the hills surrounding Anzac held the inner position in a vyce. Therefore attacks were made on Lone Pine, and sorties from Quinn’s Post, Russell’s Top, and Pope’s Post, north-eastward of Anzac, in order to hold the enemy in the trenches.

The Australians’ most advanced outpost was beyond Fisherman’s Hut. The intervening gap consisted of flat ground connected by a wide sap. It was impossible to cross in daylight, but millions of rounds of ammunition and thousands of shells were carried to the advanced posts along the sap in day time, or along the beach at night time. This operation, together with the arrival of strong Australian reinforcements, was kept a profound secret. Before the Australians could deploy over the wide front of spurs and ravines giving access to Sari Bair, it was necessary to take a number of outlying posts. This involved a preliminary move, due north over broken ground, in total darkness. Then they had to wheel due east for the purpose of assaulting the main ridge. As on previous nights a warship had cast her searchlight and bombarded the Turkish positions. The Turks did not suspect an infantry attack when the searchlights were playing on another position. The Australians dashed forward capturing a succession of outposts. At daybreak the whole force was slowly moving towards the main Sari Bair position in the face of great difficulties, harassed by snipers and checked by difficulties of the ground and scarcity of water.

At dawn on the 7th the left of our line had reached the Asmadere position. The Indians had advanced a long way towards, Chunuk Bair and reached a farm, whilst the New Zealanders had Rhododendron Spur Ridge. It was decided to postpone a further advance until nightfall. Turkish snipers everywhere harassed the lines throughout the day. The advance was resumed at 4 o’clock on the morning of the 8th. The Australian left advanced from Asmadere to Abdel Rahma Hair, whence it was hoped they could wheel to the right and attack Kojachemen. Little or no progress was possible with this attack. The Turks were in great strength, and at one time threatened to surround the force, which was withdrawn to its original position at Asmadere, where they held out the day long against determined attacks.

The New Zealanders determinedly assaulted Rhododendron Crest and gained the south-western slope of Chunuk Bair, the Indians advancing their left. Again exhaustion, scarcity of water, and numerous wounded compelled a cessation until nightfall. It was then planned that three columns of New Zealanders, Indians and another brigade should finally assault Chunuk Bair at daybreak on the 9th, preceded by a naval and land bombardment. The advance of the third column was delayed by broken ground and the enemy’s resistance. Meanwhile the Gurkhas gallantly swarmed over the slopes, and reached the crest and had a vision of the other side. Unfortunately, they were unable to retain the position in the face of the violent counter-attacks and shell-fire. Meanwhile a great Turkish force counter-attacked, and compelled the other brigade upon the left to withdraw to the lower slopes.

CAUGHT IN A TRAP.

Throughout the day and night the New Zealanders although thoroughly exhausted maintained their hold on Chunuk Bair. Two other regiments relieved them during the night. The Turks who had been strongly reinforced desperately attacked at dawn on the 10th from Chunuk Bair to Hill Q hurling themselves regardless of life against the two regiments who desperately resisted, but were driven by artillery-fire and sheer weight of numbers further down the slope. The Turks, following up their success charged right over the crest towards a gully to the south of Rhododendron Ridge with a view to penetrating between our lines and the Anzac position, but they reckoned without our artillery and ships guns.

The warships and land batteries plainly observed the great charge of four successive lines of infantry in close formation, and caught them in a trap. Their momentum downhill prevented them recoiling in time, and they were swept away by hundreds in a terrific storm of high explosive, shrapnel and common shells from ship guns, howitzers, and field pieces. Never since the commencement of the campaign had such a target delighted the hearts of our gunners; huge shells from the warships threw huge chunks of soil skywards, mingled with human bodies which fell deep into the ravines. Even this concentration of artillery might not have checked them, but 10 machine-guns rattled at short range until the guns smoked with the heat. Hardly a Turk reached the hills again. The lines got mixed up. Those seeking to retire clashed with others pressing forward. Some fled back over the crest towards safety trenches; others dashed downwards in the ravines, where shrapnel searched them out. The entire division was broken up in a few minutes. The Turks thus paid a terrible price for their success in regaining the crest.

Portions of the line on Rhododendron Hill were compelled to give ground. The Turks were fighting desperately, realising the precariousness of the position. The magnificent conduct of our officers saved the day. Generals and colonels fought with bayonets alongside privates. Nobody knew how a comrade fared amongst the scrub and many commanding officers were killed. Gradually our lost ground was regained, and at nightfall on the 10th the fighting died down through sheer exhaustion of both armies. The impossibility of further physical effort thus ended the most ferocious and sustained soldiers’ battle since Inkerman. That only lasted four hours, but here Englishmen, Australians, New Zealanders, Maoris, Gurkhas and Sikhs were engaged in a terrible combat on the bloodstained hills for four days and nights at a height of 900 feet, to where supplies had to be carried up paths which did not exist except on the map.

NOT DOWNHEARTED.

The operations resulted in the extension of the Anzac position. It was no longer a stifled feeling and the troops are not crowded in a restricted area. The line now runs northward until it links up with the corps before Anafarta. We hold the foothills on which we are established beneath the crest of Chunuk Bair, and are securely dug in on the summit of Rhododendron Ridge, awaiting events with the complacency characteristic of the colonial and British soldiers who are not downhearted, but are willing to have another try. The incompleteness of the success was not the fault of these troops advancing from Anzac. A little less deadweight of the Turkish numbers would have enabled the Anzac corps to consolidate the short, desperate grip they had on Chunuk Bair. A scene of desolation prevails between the lines. Masses of Turks lie where they fell. Many were thrown out of the trenches to make room for the living. At one point an Australian, Englishman, Maori, and Gurkha are lying side by side, marking the highest point the Imperial forces attained on the peninsula.

Source: Sydney Morning Herald, 4 September 1915, p. 13; via TROVE Newspapers (National Library of Australia):
https://trove.nla.gov.au/newspaper/article/15611612

2. General Sir Ian Hamilton’s Final Despatch:

The former Commander in Chief published his final Despatch on the Gallipoli campaign in January 1916 (Second Supplement to the London Gazette, No. 29429, 4 January 1916, pp. 285-308:
https://www.thegazette.co.uk/London/issue/29429/supplement/285

A list of those Mentioned in Despatches was published later the same month (Supplement to the London Gazette, No. 29455, 28 January 1916, pp 1195-1211:
https://www.thegazette.co.uk/London/issue/29455/supplement/1195

Many British and Australian newspapers printed the Despatch in full, as well as substantial commentary. It was also published in book form (George Newnes, 1916). The following extract was first printed on pages 297-298 of the London Gazette, although the version used here (with added sub-headings) is from the book published by Newnes:

Three days and nights fighting

During the night of the 9th-10th, the New Zealand and New Army troops on Chunuk Bair were relieved. For three days and three nights they had been ceaselessly fighting. They were half-dead with fatigue. Their lines of communication, started from sea level, ran across trackless ridges and ravines to an altitude of 800 ft., and were exposed all the way to snipers’ fire and artillery bombardment. It had become imperative, therefore, to get them enough food, water, and rest; and for this purpose it was imperative also to withdraw them. Chunuk Bair, which they had so magnificently held, was now handed over to two battalions of the 13th Division, which were connected by the 10th Hampshire Regiment with the troops at the farm. General Sir William Birdwood is emphatic on the point that the nature of the ground is such that there was no room on the crest for more than this body of 800 to 1,000 rifles.

Strengthening the Defences

The two battalions of the New Army chosen to hold Chunuk Bair were the 6th Loyal North Lancashire Regiment and the 5th Wiltshire Regiment. The first of these arrived in good time and occupied the trenches.

Even in the darkness their commanding officer, Lieutenant-Colonel Levinge, recognised how dangerously these trenches were sited, and he began at once to dig observation posts on the actual crest and to strengthen the defences where he could. But he had not time given him to do much. The second battalion, the Wiltshires, were delayed by the intricate country. They did not reach the edge of the entrenchment until 4 a.m., and were then told to lie down in what was believed, erroneously, to be a covered position.

At daybreak on Tuesday, 10th August, the Turks delivered a grand attack from the line Chunuk Bair — Hill Q against these two battalions, already weakened in numbers, though not in spirit, by previous fighting. First our men were shelled by every enemy gun, and then, at 5.30 a.m., were assaulted by a huge column, consisting of no less than a full division plus a regiment of three battalions.

North Lancashires Overwhelmed

The North Lancashire men were simply overwhelmed in their shallow trenches by sheer weight of numbers, whilst the Wilts, who were caught out in the open, were literally almost annihilated. The ponderous mass of the enemy swept over the crest, turned the right flank of our line below, swarmed round the Hampshires and General Baldwin’s column, which had to give ground, and were only extricated with great difficulty and very heavy losses.

The Chance of a Lifetime

Now it was our turn. The warships and the New Zealand and Australian Artillery, the Indian Mountain Artillery Brigade, and the 69th Brigade Royal Field Artillery were getting the chance of a lifetime. As the successive solid lines of Turks topped the crest of the ridge gaps were torn through their formation, and an iron rain fell on them as they tried to re-form in the gullies.

Not here only did the Turks pay dearly for their recapture of the vital crest. Enemy reinforcements continued to move up Battleship Hill under heavy and accurate fire from our guns, and still they kept topping the ridges and pouring down the western slopes of the Chunuk Bair as if determined to regain everything they had lost. But once they were over the crest they became exposed not only to the full blast of the guns, naval and military, but also to a battery of ten machine-guns belonging to the New Zealand Infantry Brigade, which played upon their serried ranks at close range until the barrels were red hot. Enormous losses were inflicted, especially by these ten machine-guns; and, of the swarms which had once fairly crossed the crest-line, only the merest handful ever straggled back to their own side of Chunuk Bair.

At this same time strong forces of the enemy forces (which I had reckoned would have been held back to meet our advance from Suvla Bay) were hurled against the Farm and the spurs to the north-east, where there arose a conflict so deadly that it may be considered as the climax of the four days’ fighting for the ridge.

“Caught One Another by the Throat”

Portions of our line were pierced, and the troops driven clean down the hill. At the foot of the hill the men were rallied by Staff-Captain Street, who was there supervising the transport of food and water. Without a word, unhesitatingly, they followed him back to the Farm, where they plunged again into the midst of that series of struggles in which generals fought in the ranks and men dropped their scientific weapons and caught one another by the throat. So desperate a battle cannot be described.

Died Where They Stood

The Turks came on again and again, fighting magnificently, calling upon the name of God. Our men stood to it, and maintained, by many a deed of daring, the old traditions of their race. There was no flinching. They died in the ranks where they stood. Here Generals Cayley, Baldwin, and Cooper and all their gallant men achieved great glory. On this bloody field fell Brigadier-General Baldwin, who earned his first laurels on Cassar’s Camp at Ladysmith. There, too, fell Brigadier-General Cooper, badly wounded; and there, too, fell Lieutenant-Colonel M. H. Nunn, commanding the 9th Worcestershire Regiment; Lieutenant-Colonel H. G. Levinge, commanding the 6th Loyal North Lancashire Regiment; and Lieutenant-Colonel J. Carden, commanding the 5th Wiltshire Regiment.

“The Last Two Battalions”

Towards this supreme struggle the absolute last two battalions from the General Reserve were now hurried, but by 10.0 a.m. the effort of the enemy was spent. Soon their shattered remnants began to trickle back, leaving a track of corpses behind them, and by night, except prisoners or wounded, no live Turk was left upon our side of the slope.

That same day, 10th August, two attacks, one in the morning and the other in the afternoon, were delivered on our positions along the Asmak Dere and Damakjelik Bair. Both were repulsed with heavy loss by the 4th Australian Brigade and the 4th South Wales Borderers, the men of the New Army showing all the steadiness of veterans. Sad to say, the Borderers lost their intrepid leader, Lieutenant-Colonel Gillespie, in the course of this affair.

Heavy Losses

By evening the total casualties of General Birdwood’s force had reached 12,000, and included a very large proportion of officers. The 13th Division of the New Army, under Major-General Shaw, had alone lost 6,000 out of a grand total of 10,500. Baldwin was gone, and all his staff. Ten commanding officers out of thirteen had disappeared from the fighting effectives. The Warwicks and the Worcesters had lost literally every single officer. The old German notion that no unit would stand a loss of more than 25 per cent, had been completely falsified.

The 13th Division and the 29th Brigade of the 10th (Irish) Division had lost more than twice that proportion, and, in spirit, were game for as much more fighting as might be required. But physically, though Birdwood’s forces were prepared to hold all they had got, they were now too exhausted to attack — at least until they had rested and reorganised.

So far they had held on to all they had gained, excepting only the footholds on the ridge between Chunuk Bair and Hill Q, momentarily carried by the Gurkhas, and the salient of Chunuk Bair itself, which they had retained for forty-eight hours. Unfortunately, these two pieces of ground, small and worthless as they seemed, were worth, according to the ethics of war, 10,000 lives, for by their loss or retention they just marked the difference between an important success and a signal victory.

Source: Ian Hamilton’s Final Despatch (London: George Newnes, 1916), pp. 69-75; via the Internet Archive (University of Toronto):
https://archive.org/details/finaldespatchthe00hami/page/68/

3. Extracts from accounts in Australian newspapers:

3.1 The Sunday Times (Perth, WA), 1916:

The Sunday Times, a Perth Newspaper, published an account of the August Offensive at Anzac to mark the 1st anniversary of the battle. The article, written by someone calling themselves “Crosscut,” was in part based on Hamilton’s Despatch, but it was deliberately aimed more to reflect the experiences of the troops involved. While the article concentrated on the actions of Australian units, it also paid full tribute to the courage of those from other nations.

War is truly a wonderful thing. It took Sir Ian Hamilton 23 columns of the London “Times” to cover a despatch which described only 14 days of lighting along a narrow front, and still leaves lacking any incident embracing less than a whole brigade of men. How, then, can one hope to describe, or one hope to realise, the splendid horrors of a great battle? “Birdwood’s troops came up on the right;” “the 4th Brigade assaulted on the left;” “the New Zealanders did good work on Chunuk- Bair” and so on ad infinitum. But does it paint the picture of individual suffering and daring, the self-sacrifice of common men who, without an aitch in their vocabulary, will give their lives for their friends; the torture of thirst, the redness of the blood, the severance of limbs, and the eyes that stare to heaven from white, dead faces?

No; these things would not become a mighty general to recount, nor probably do they come before his immediate notice. Sir Ian Hamilton remarks: “At 9.30 a.m. the two assaulting columns (August 7) pressed forward, whilst our guns pounded the enemy moving along Battleship Hill’s spurs. But in spite of all their efforts their increasing exhaustion as opposed to the gathering strength of tile enemy’s fresh troops began to tell — they had shot their bolt. So all day long they clung to what they had captured and strove to make ready for the night. All had suffered very heavily, and all were very tired. . . . Our aims had not been fully attained, and THE HELP WE HAD HOPED FOR FROM SUVLA WAS NOT FORTHCOMING. Yet I fully endorse the words of General Birdwood when he says: ‘The troops had performed a feat which is without parallel’!”

Is it to he wondered that the troops were “very tired?” They, in most cases, had not slept since the night of the fifth (two nights previously), had fought on the day in question without water, and were preparing for another attack on the same evening. This was duly carried out and was “continued,” after a strenuous night march over country which no infantry corps in training in peace time would think of attempting, the following morning. At 4.15 a.m. the three columns attacked. As the first, rosy shafts of light suffused the grey of early dawn the men of the Wellington Battalion, the Auckland Mounted Rifles, and the Maori Contingent, supported by two battalions of Old Country troops — “Tommies,” as we of Australia know them — were rushing up the slope of Chunuk Bair. Gallantly as the Turks fought in defence of their native hills, nothing could stop the furious rush of our own fierce troops, and ere the sun had shown its rim above the crest of the lowest ridge on Gallipoli the height was in our hands. The previous day we had been stopped within one short quarter, of a mile of victory. On the following morning, worn out, thirsty, and terribly reduced in numbers, we had won the fight.

In this phase of the battle the New Zealanders bore most of the brunt, though well supported by the centre and left columns under Majors Gerard and Cox. These consisted of the 21st Indian Mountain Battery, 4th Australian Brigade (13th, 14th, 15th and 16th Battalions, A.I.F.), 39th Infantry, 6th South Lancashires, and 29th Indian Infantry Brigade (including the dashing Gurkhas), and this column advanced towards the crest of Sari Bair, but, owing to the murderous fire and the impossible country to be traversed, no great progress could be made. And in the meantime the unlucky 4th Brigade, which was so accustomed to drawing fire that its support was not always welcomed by more fortunate battalions, were moving along the gullies from the Asmak Dere against the slopes of Abdul Bair, with the hope of wheeling in the direction of the New Zealanders, and getting on-to the main spur of Sari Bair. But again their luck was not in the ascendant. Machine guns and infantry fire hurled death amongst them and prevented them from advancing. It must be borne in mind that theirs was no ordinary rush from trench to trench across a hundred yards or so of No Man’s Land. It was an advance through gullies and gorges branching to all directions in unexpected quarters, bristling in parts with machine guns, swarming with an invisible enemy, and lined on every hand with disastrous hills from which the sniper could fire with practical impunity. And then came the moment when, almost entirely surrounded, wearied with three days’ of continuous fighting and with more than a thousand of their number stricken down by the merciless Turkish bullet, they were ordered to retire to their original position. They “retired,” says the caviller. Well, so they did, but they retired fighting! Next morning (the ninth) a fresh attack took place after a furious bombardment. It may give some indication of the character of the country fought over to say that General Baldwin’s column, which was moving to the assistance of Nos. 1 and 2 columns, became entirely “bushed” in the darkness, and, just as the Gurkhas swarmed like flies upon the height of Sari Bair and came within sight of the Asiatic shore, a delivery of heavy shells (no matter where they came from) burst among them. Baldwin’s reinforcing column was not in sight, and the Gurkhas and an English regiment were forced back from the crest they had fought so splendidly to conquer. There is where the lack of men was felt. General Baldwin was a brave man, and was. I believe, killed on August 10, the whole of his gallant staff being struck down by shell or bullet. Peace to their ashes.

And all the while the Australian Division was holding its own on the right and Lone Pine — glorious, bloody Lone Pine — was fighting furiously. Figures talk. Out of a total of of 2900 the First Australian Brigade now totted up to a bare 1000 — the 4th Brigade had lost 1200 out of 2800, and the total casualties up to 8 o’clock on the 9th of August were 8500. A terrific attack was made by the Turkish army on the following morning, every gun available being brought into requisition. It started at daybreak, and lusted until near midday. It wiped out whole companies of our English comrades; a division .of the enemy, hurled itself against our enfeebled fronts; it surged wave after wave over the ridges, like rollers on a reef — and. like them, it fell in shattered fragments on the rocks. It met the full force of our battleships in the bay; it crumpled before the infuriated fire of New Zealand machine guns; it withered in the blast of the Australian artillery, and the 69th Brigade Royal Field Artillery sent over their Iron Rations until their bores were flaming hot. Before midday their bolt was shot, — but some distance on the left our line was pierced, and we were driven down the hill. Here men fought with their fists, and generals fought in the ranks with privates, and before night it might be said that the battle was over. Unless wounded or a prisoner merely no enemy breathed upon the crimsoned ground that our troops had won. It was only four days’ fighting, but the total of Birdwood’s losses in killed and wounded was 12,000. Figures talk!

These lines were intended to be written in a reminiscent rather than an historical vein. The anniversary of so great a fight and one upon which so much depended is surely an excuse for bringing before the public the memory of those fine-deeds which have rendered Australia famous. But it is not to be supposed that Australia alone did gallant deeds on the peninsula of Gallipoli. The Indian troops fought so nobly as to rank second to none in the history of nations, and where could braver, sturdier souls be found than those which animated the English soldier from general to private? Wherever was [a] finer stand made than that by the 5th Battalion Wiltshires? Or the South Wales Borderers? Or the South Lancashires? Or the 7th Gloucestershires? What need to mention names like the Connaught Rangers, the Welsh Pioneers, or the ever famous 39th Brigade? And what about the 28th, the 29th, and the 40th Brigades? History will record their deeds upon an imperishable roll of glory, and part of the satisfaction and pride of Australian soldiers who took part in the Battle of Sari Bair is because they were honoured to be able to fight alongside of such sterling fellows and privileged to call them mates.

The author also reflected on the reasons for failure, which focused on the lack of progress at Suvla:

And how much of our ultimate failure was due to the loss of reinforcements on the 7th and to General Stopford’s refusal to come to our aid on the 8th? The truth will probably never be known, but this much is a fact. The general, with 22,000 fresh men, landed at Suvla Bay unopposed on August 8. He expected to command three full divisions and the infantry of two Territorial Divisions, but found himself in charge of two divisions only. It may have been a case of ill-judgment, or it may have been simple pique at being relegated to the command of a relatively small number of men, but, whatever the cause, he declined to move to our assistance on the morning of the 8th after two divisional commanders had reported their inability to move owing to the exhausting efforts of the nights of August 6 and 7, and the fighting on the latter date without water. Ostensibly the reason given was that it was useless to waste life in reinforcing troops that were too exhausted to fight, but, as Sir Ian Hamilton pointed out, the Turks must liave been in an equally exhausted condition, and the addition or influx oí more than 20,000 fresh men upon the scene would probably have worked in an inverse ratio upon the enemy by discouraging them while putting heart into our own tired soldiers. And as — well, he didn’t come, and we couldn’t come again, and the chance of cutting the Turks’ main communications was lost to us for ever. General Stopford was upon H.M.S. Jonquil in Suvla Bay when visited on the 8th by Sir Ian Hamilton, who superseded him for General De Lisle seven days later. As all of these facts were mentioned bi the C.-in-C.’s despatch to the War Office 12 months ago it can work no possible harm to reproduce them here.

Source: “A year ago in Anzac: an in memoriam screed,” The Sunday Times (Perth, WA), 13 August 1916, p. 11; via TROVE Newspapers (National Library of Australia):
https://trove.nla.gov.au/newspaper/article/58016366

3.2 The Sunday Times (Perth), 1918:

A lengthy account of the August Offensive at Gallipoli was also published in the Sunday Times just after the end of the war. Again, this quotes extensively from Hamilton’s Despatch, while also coming to many of the same conclusions as Bean, especially with regard to the lack of urgency shown at Suvla, and the performance of the New Army Divisions at both Anzac and Suvla.

The following extract provides an overview of the battle for Chunuk Bair and its ultimate failure. The article is critical of General Hamilton, especially with regard to the use of the untested New Army units:

By this time [June 1915] General Hamilton had decided to stake everything on a grand offensive in August, when the new divisions should arrive from Britain. “Place and date having shaped themselves, he writes, “the intervening period had to be filled in with as much fighting as possible. Firstly to gain ground; secondly, to maintain the moral ascendency [sic] which my troops had by this time established; thirdly, to keep the enemy’s eyes fixed rather upon Helles than Anzac.” And then the unfortunate General confides that he had just enough high explosive shell to deliver “one serious attack per each period of three weeks.” The “one serious attack” in July took place south of Krithia on the 12th and 13th; two lines of trenches were taken, with 529 prisoners, at a cost to the British of 3000 casualties and to the French of several hundreds, their losses including General Masnou, a divisional commander who received a mortal wound. The most spirited event at Anzac during July was an attack carried out by the 11th (W.A.) Battalion on a Turkish trench which threatened a work called Tasmania Post, on the Australian right. Four columns, each of 50 men, delivered the assault, which was brilliantly successful. “The four assaulting parties dashed forward at once, crossed our barbed wire on planks, and were into the craters before the whole of the debris had fallen. Total casualties: 31 killed and 74 wounded, Turkish killed, 100.” A dashing exploit, and one that emphasised the superiority of our troops in the elements of intelligence and courage, but unfortunately for the Allied cause they never had the requisite superiority in material and men. Three months of strenuous campaigning had caused them heavy losses, and the losses had never been adequately replaced. By the end of July British and Australian casualties numbered nearly 50,000, and the French had lost 15,000 or more. The enervating Aegean summer added to the hardships of the troops. There was a plague of flies which bred paratyphoid and dysentery, there was always a scarcity of water, and from the incessant shelling, so trying to the nervous system, the soldiers could get no rest.

THE AUGUST ADVENTURE.

This was the situation when the five new divisions arrived from England, and Ian Hamilton prepared to play what he fondly hoped would be his trump card. Having found it impossible to carry the Narrows forts from the southern tip he had evolved a new strategical conception which was, in his own words:–
(1) To break out with a rush from Anzac and cut oft the bulk of the Turkish army from land communication with Constantinople;
(2) To gain such a command for the artillery as to cut off the bulk of the Turkish army from sea traffic, whether with Constantinople or with Asia;
(3) To secure Suvla Bay as a winter base for Anzac and all the troops operating in the northern theatre.
Silently and secretly reinforcements (mostly of the 13th British Division) were landed at Anzac until General Birdwood had 37,000 rifles and 72 guns under his command. To provide water for this large body of men a high level reservoir with a holding capacity of 30,000 gallons had been built, and kerosene tins with a carrying capacity of 80,000 gallons provided, but accidents prevented the full realisation of these plans, and when the battle was at its height all ranks at Anzac were reduced to one pint a day — and this in midsummer. Shortage of water was to no small extent responsible for the failure of the British strategical scheme. However, the Anzacs worked like beavers to prepare concealed bivouacs, make interior communications, and store water and supplies for the campaign. “All the work,” says Hamilton, “was done by Australian and New Zealand soldiers almost entirely by night, and the uncomplaining efforts of those much-tried troops in preparation are in a sense as much to their credit as their heroism in the battles that followed.” Operations began at Anzac with the glorious episode known as the attack on the Lone Pine. This strong work, which was entangled with wire and provided with an overhead cover of stout pine beams, was stormed by the 2nd, 3rd and 4th Australian Battalions, with some support from the 12th. The storming battalions captured 134 prisoners, seven machine guns and a large quantity of ammunition and equipment, and the losses on both sides were severe – so much so that after the fight 1000 corpses, Australian and Turkish, were dragged out of the dark galleries in which Anglo-Saxon and Turanian had fought with bayonets to the death. But Lone Pine was, in essence, a feint by the right wing. The attack of the Australian Light Horse in the centre — i.e., in the region of Walker’s Ridge — was also a feint, but an ill-starred one. It never had a chance of success. In a quarter of an hour 400 magnificent men, chiefly Victorians and West Australians of the Third Brigade, met their fate in “a storm of fire in which no mortal could live.” The plan was that the Light Horse should attack the Turkish centre up the slope of a ridge seamed with trenches – eight deep in some places — with help on their left — i.e., northern flank — but the help never came. Nevertheless the Third Brigade of Light Horse was ordered to attack in four lines of 150 each, the first and second lines being Victorians (8th L.H.) and the third and fourth West Australians (10th L.H.). Says Bean:– “The colonel of the 8th, Lieut.-Colonel A. H. White, insisted on leading his regiment. Ten minutes before the start he walked into the brigade office and held out his hand to the brigade-major. ‘Good-bye,’ he said. A couple of minutes later he was at his place on the parapet with his men. They were over the parapet like a flash, the colonel amongst them, the officers in line with the men. I shall never forget that moment. I was making my way along a path from the left of the area, and was passing not very far away when that tremendous fusilade broke out. It rose from a fierce crackle into a roar, in which you could distinguish neither rifle nor machine-gun, but just one continuous roaring tempest. One could not help in involuntary shiver — God help anyone that was out in that tornado! But one knew very well that men were out in it — the Light Horse were making their charge. There were no British rifles in all that fire — it was the greeting of the Turkish rifles and machine-guns as the Light Horse cleared the Australian parapet.” Two lines of Victorians went into this hell of fire, and then, “as straight and as quick as the others,” the third line of West Australians. “The attack,” says Captain Bean, “was fortunately stopped in time to prevent a small part of this third line from reaching the fire zone. Rightly or wrongly, Colonel Tom Todd, of Midland Junction, is credited with issuing the order which put a period to the useless butchery of brave men. The First Light Horse Brigade, attacking from Quinn’s Post, had an experience equally terrible. The first line of the 2nd regiment was wiped out, and of the 1st regiment only one in six came back unwounded. Nearly 300 dead were added here to the 400 slaughtered at Walker’s Ridge. Some day the Australian people will demand an account of the thousands of lives that were flung away in the war.

THE MAIN ATTACK AT ANZAC.

The main attack at Anzac was delivered by the left wing. It consisted of the New Zealand and Australian Division, less the 1st and 3rd Light Horse brigades, the 13th British Division less five battalions, and the 29th Indian Infantry Brigade, divided into two covering columns and two columns of assault. During the night of August 6 one of the covering columns, New Zealanders, marched north from Anzac and seized two hills known as the Little and Big Table Tops; and the other, mostly Welsh and Wiltshires, pushed still farther north and captured a height called Damakjelek Bair. Then the assaulting columns got to work. The New Zealanders on the right carried the hogsback called Rhododendron Ridge west of one of the most commanding features on the peninsula, Chunuk Bair. It was intended that they should be supported on the left by the 4th Australian Brigade and the 29th Indians, but it was a day of blistering heat, the troops had marched all night and part of the day, and in the wilderness of scrub-covered hills and gullies the column split into two sections. The result was that Chunuk Bair could not be carried on August 7, and neither did the 4th Australian Brigade and the 14th Sikhs succeed in accomplishing an almost impossible task entrusted to them — i.e., to carry the great height of Koja Chemen Tepe, north-east of Chunuk Bair. On April 8 the 4th Brigade made an heroic attempt to storm Koja Chemen Tepe, but surrounded by superior forces, and having lost over 1000 men, they withdrew to their original position. “Here,” says Hamilton, “they stood at bay, and although the men were by now half-dead with thirst and with fatigue they bloodily repulsed attack after attack delivered by heavy columns of Turks.” On this day the New Zealanders gallantly carried the south-western slopes and the crest of Chunuk Bair. With this position as a pivot a great attempt was made on August 9 to seize all the highlands, and the 6th Gurkhas and some of the 6th South Lancashires actually reached the crest of the ridge of Sari Bair, and “viewed far beneath them the waters of the Hellespont, viewed the Asiatic shores along which motor transport was bringing supplies for the lighters.” But unfortunately they were driven from the crest because a column of the New Army which should have supported them lost its way. During the night the New Zealand and New Army troops on Chunuk Bair were relieved by Lancashires and Wiltshires of the New Army. These battalions were on the morning of the 16th overwhelmed by a huge column of Turks and lost the crest. The enemy swept down the ridge and turned the flank of the British column which had failed to turn up on the previous day, and which was only extricated with great difficulty and very heavy losses,” its general (Baldwin) being killed. But the artillery made the Turks pay dearly for their recapture of the crest, and only a few hundreds scrambled back up the slope. Having by this time lost 12,000 of his effectives — 12,000 out of 37,000 — and thrown in his last reserves General Birdwood broke off the battle. Of the 10,500 men with which the 13th division of the New Army went into the fight 6000 had fallen. The 7th Gloucesters the 6th Loyal North Lancashires, and the 5th Wiltshires were practically annihilated. The Warwicks and the Worcesters were without officers. The 29th Brigade of the 10th (Irish) Division lost half its numbers; the 1st Australian Brigade TWO-THIRDS. Such was the Battle of Anzac, August 6-10, 1915, in which there was great heroism and great blundering. In the retrospect it would seem that the British were badly handled. “The task of holding the existing Anzac position and of making frontal assaults therefrom,” says Hamilton, was assigned to the Australian Division plus the 1st and 3rd Light Horse brigades. In other words, he assigned a subordinate role to his veteran Anzac troops, who had so clearly demonstrated their superiority over the Turk, while the major task of assaulting the ridges, both at Anzac and Suvla Bay, was entrusted in great part to raw soldiers from Britain, ignorant of the lie of the land, deficient in bushcraft, unused to the pitiless heat and to the pangs of thirst — game enough, truly, but deplorably green. Had the Light Horsemen, butchered at Walker’s Ridge, or the First Brigade, devoted to the useless glory of Lone Pine, been on hand at the crisis of the battle instead of a brigade that lost its way, the summit ridge might have been held. But at least two brigades of proved Anzacs were sacrificed in costly feints, whereas raw troops straight from England were given a task beyond their powers.

But the main cause of the failure at Anzac, which was so nearly a success, was the chapter of blunders at Suvla Bay.

Source: “Four years of war: the battles of May and June, 1915 – the great attack at Anzac – great heroism and great blundering,” The Sunday Times (Perth, WA), 22 December 1918, p. 13; via TROVE Newspapers (National Library of Australia):
https://trove.nla.gov.au/newspaper/article/57998741

4. The Australian Official History:

Charles Bean was an Australian war correspondent who was at Anzac and who, after the war, wrote several volumes of the Official History of Australia in the War of 1914-1918. His account of the August Offensive at Chunuk Bair appear in Volume II, Chapters XXIV and XXV. The following extracts come from Chapter XXV of the Official History and cover the events of the 9th and 10th August (pp. 706-708):

Meanwhile at the brigade and divisional headquarters arrangements had to be made to relieve at nightfall both the troops upon Chunuk Bair and the Auckland infantry, which was still holding the advanced support-line at the Pinnacle. Upon inquiry from General [Frederick] Shaw [the commander of 13th Division] in the afternoon, [Lieutenant-Colonel William] Meldrum [of the Wellington Mounted Rifles, commanding the New Zealand forces holding the summit plateau] stated that “two battalions” would be required for holding the position at Chunuk Bair when the New Zealanders left it. This was about double his own original strength, and therefore the difficulty, if any, would be to find place for that number in the narrow holding. During the night, however, they would have time to entrench. The two battalions which could most conveniently have been sent were the 6th Loyal North Lancashire (who had been in reserve all day at The Apex) and the 6th Leinster, which had been brought up the Chailak Dere at midday. By [General] Godley’s orders, however, the Leinster, being the one fresh reserved battalion, was not to be thrown into the fight if it was possible to avoid doing so. Shaw accordingly chose as the second relieving battalion the 5th Wiltshire, one of [General] Baldwin’s five, which, though it had been marching a great part of the previous day and night, had only been slightly engaged.

The relief was to begin at 8 o’clock, immediately after dusk. But at that hour General Johnston, hearing that the Wiltshire, which had to come from the Aghyl Dere, could not arrive until 1 a.m. asked leave to use the 6th Leinster, which had already reached him. Permission was, however, refused. The 6th Loyal North Lancashire, under Lieutenant Colonel [Henry George] Levinge, was therefore sent forward alone. This caused no present anxiety in the matter of numbers, since the battalion was stronger than the combined New Zealand units had been upon the previous night. It was nevertheless desirable that the second battalion should be there in time to dig itself trenches before dawn. As before, upon the fall of night, water, ammunition, medical officers, stretcher-bearers, all began to arrive at the advanced position, and about 11 o’clock all the New Zealand units were withdrawn both from Chunuk Bair and the Pinnacle. The Otago infantry had by this time lost 17 officers and 309 men. The Wellington Mounted Rifles, 183 strong the night before, now mustered 73. The Auckland infantry from the Pinnacle had lost 12 officers and 308 others. The New Zealand Infantry and Mounted Rifles Brigades, which on August 6th had marched out some 3,000 and 1,549 strong (exclusive of the Maoris) respectively now mustered 1,714 and 964. Both withdrew to the Chailak Dere.

That night the position at Chunuk Bair was entirely in the hands of the New Armv battalions. [Generals] Birdwood and Godley had by then given up the intention of renewing their assault on the following day, and the new garrison was for the moment to stand on the defensive. The Loyal North Lancashire held both the advanced foothold and the Auckland’s old half-way position at the Pinnacle. The 6th Leinster occupied The Apex. During two nights Auckland had been extending the trenches at the Pinnacle, and on this night a communication trench, though only two or three feet deep, was at last dug through from The Apex to the half-way position. A half-completed trench also led from the left of the Pinnacle down the steep slope of the Aghyl Dere towards the position of the 10th Hampshire near The Farm. The Pinnacle position was thus well on the way to become incorporated in the established line.

There was some anxiety after midnight in consequence of the non-arrival of the 5th Wiltshire. Eventually, at about 2 o’clock, two-and-a-half companies of the battalion reached The Apex, and were thence guided by a New Zealander to the position on Chunuk Bair. Here Colonel [John] Carden met Colonel Levinge of the North Lancashire. As all the trenches on Chunuk Bair were shallow, and the rearmost full of wounded, it was decided that the 5th Wiltshire should not occupy them, but should remain lower down in the spoon-shaped hollow at the head of the Sazli, near the point where the wounded were mainly collected. Here, having been told by the guide that they were in shelter, the Wiltshire waited; but at dawn they found themselves under a sniping fire, and consequently took off their equipment and began to entrench.

Although these new British battalions, one on the fringe of the summit and the other in rear in the Sazli, were waiting practically unmolested for the day-break, on the other side of the crest there was preparing a most formidable attack.

The attack came before daybreak (pp 709-711):

At about 3 or 3.30 a.m. on August 10th, after a quiet night, some bombing began both at Chunuk Bair and at The Farm, and also, a little later, at the advanced position of the 9th Worcester below the crest between Chunuk and “Q.” Probably a screen of the enemy’s bombers was engaging the British garrisons while his main attack was assembling behind the summit. As daylight increased, the enemy’s artillery shelled the position. There was a renewal of bombing, and the North Lancashire in the front trench at Chunuk Bair was firing sharply at the bomb-throwers, when over the crest came a line of Turkish infantry advancing with the hayonet. This was followed by other waves topping all parts of Chunuk Bair from its southern shoulder near Battleship Hill to its northern slope above The Farm.

No attack quite resembling this had yet been launched by either side in GallipoIi. The North Lancashire appear to have had no bombs with which to reply to the enemy’s preliminary bomb-attack; but the New Zealanders camped in the Chailak heard a tremendous outburst of British rifle-fire. Then the North Lancashire broke, both at Chunuk Bair and at the Pinnacle. A remnant appears to have stayed, and to have been bayoneted by the enemy. When the 5th Wiltshire, who had been digging, saw the Turkish line descending upon their right, they also ran back, down the Sazli Dere. Four or five lines of the enemy, each following closely upon the other, had begun moving down the slope when the warships opened upon them, firing broadsides, the four or five shells from each ship bursting almost simultaneously on the seaward face of the hill. At the same time the Anzac batteries were heavily shelling the inland slope.

With even more deadliness ten machine-guns of the New Zealand brigade, carefully posted about The Apex by captain Wallingford, caught the Turkish lines as they swept down towards The Farm. Under this tremendous fire, from front and rear, the oncoming waves were broken into fragments But, as on April 26th and 27th, the Turkish infantry exhibited admirable persistence. The attack is said to have been led to the crest by Mustafa Kemal himself, who received a shot through his coat, and the movement over the crest itself continued long after 6 o’clock, detachments of a dozen at a time rushing across the sky-line and dropping down the slope towards The Farm.

The Turkish counter-attack was broken up, but it was successful in dislodging the  tenuous hold upon Chunuk Bair. It thus marked the end of any chance of success at Anzac.

Source: C. E. W. Bean, The Official History of Australia in the War of 1914–1918, Vol. II: The Story of ANZAC from 4 May, 1915, to the evacuation of the Gallipoli Peninsula, 11th ed., (Sydney: Angus and Robertson, 1941), pp 706-708; digitised version available from the Australian War Memorial: https://www.awm.gov.au/collection/C1416629

Bean concludes that the outcome of the August Offensive at Anzac may have been different if the simultaneous assault at Suvla had been pressed harder (p. 715):

Had that other — the offensive from Suvla-been conducted with even moderate energy, the heights of Kavak and Tekke Tepe, the “W” Hills, and Kamm Tepe overlooking Ejelnier Bay would unquestionably have been occupied. The plight of the enemy, already fighting for his life against the New Zealanders on Chunuk Bair, must then have become desperate.

Bean was also critical of British leadership and the quality of the British New Army formations, contrasting it with his (perhaps idealised) view of Australian and New Zealand troops (pp. 715-716):

But an enterprise such as that of Suvla demanded more than the ability to follow; it required that each man, or at least a high proportion of the force, should be able to lead; and the necessary quality of decision, which even a few years’ emancipation from the social restrictions of the Old World appeared to have bred in the emigrant, was — to colonial eyes — lacking in the Suvla troops.

A sane appraisal of the “lost opportunity” thesis can be found in: Robin Prior, Gallipoli: the end of the myth (New Haven, CT: Yale University Press, 2009), e.g. pp. 185-189 for the August Offensive at Anzac.

“To-day I found in Mametz Wood
A certain cure for lust of blood.”

From: Robert Graves, “A Dead Boche.” in: Fairies and Fusiliers (London: William Heinemann, 1917), p. 33 [1].

Drawing by Muirhead Bone entitled: Ruined Trenches in Mametz Wood

; Muirhead Bone, Ruined Trenches in Mametz Wood, from: The Western Front, drawings by Muirhead Bone, Pt. III (Garden City, N.Y.: Doubleday, Page, & Co., 1917), no. VII. Source: HathiTrust Digital Library, via Yale University: https://hdl.handle.net/2027/ yale.39002013479150

Last month I was intrigued by something included in one of Paul Reed’s excellent The Old Front Line podcasts [2]. At the end of his June 6th episode on “Walking the Somme: Mametz Wood,” Paul talked about a wartime photograph of  Mametz Wood mounted on card, one of a collection that he had discovered in a junk shop in Littlehampton [3]. The photographs were of places the Welsh Division had fought during the First World War and had been taken by an officer of the Royal Welsh Fusiliers. Paul didn’t know that much about the photograph, except that the equipment used must have have been a proper, full-frame camera, and that the back of the card read: “Mametz Wood, before the attack,”  with the name of D. J. Davies of Lampeter (who he knew had produced postcards). A copy of the photograph formed part of the gallery of images accompanying the podcast, and had been previously published in Reed’s book on Walking the Somme [4].

While I knew that I would be unlikely to shed any light on the origins of this specific photograph, I did wonder how easy it might be to find information on a Lampeter-based photographer named D. J. Davies. I was a student in Lampeter in the 1980s, and assumed that a town of its size would probably not have been overloaded with professional photographers in the first decades of the twentieth century. My initial thought was to look in Welsh Newspapers, a collection of digitised newspapers made freely available by the National Library of Wales [5]. The collection includes newspapers in both Welsh and English published up until 1919, so I thought that there would be a good chance that Mr Davies might be mentioned somewhere there.

Sure enough, the newspapers contained several mentions of a D. J. Davies, photographer (or D. J. Davies, Studio), of College Street, Lampeter. The newspaper reports indicated that Mr Davies had been responsible for giving occasional lantern presentations to various Lampeter societies before the war. These meetings seem to have mostly been held at Capel Soar, a large Congregational chapel. The following selected extracts show that the topics of the talks varied quite widely (and did not always involve lantern slides):

The Carmarthen Journal and South Wales Weekly Advertiser, 5 March 1909 [6]:

CHRISTIAN ENDEAVOUR SOCIETY. — On Friday evening last Mr. D. J. Davies, photographer, of this town, gave an interesting entertainment to the members of this Society, at Soar, by means of the lantern. He had obtained from the London Missionary Society about 60 slides depicting Oriental customs and habits, and these he exhibited on the screen.

Welsh Gazette and West Wales Advertiser, 10th March 1910 [7]:

“Central Africa” — At the weekly meeting of the Soar C.E.S. on Friday evening, the Rev. E. Evans presiding, Mr. D. J. Davies, College-street, gave an illustrated lecture on “Central Africa.”

The Cambrian News and Merioneth Standard, 11th March 1910 [8]:

Soar Chapel. — A meeting of the Christian Endeavour Society was held on Friday with the Rev G. Evans in the chair. Mr D. J. Davies, photographer, gave illustrations by means of the lantern of the work of the Lwamba Mission in north-east Rhodesia under the London Missionary Society. Mr E. D. Rees explained the pictures as they were thrown on the screen.

The Carmarthen Journal and South Wales Weekly Advertiser, 28th February 1913 [9]:

CHRISTIAN ENDEAVOUR SOCIETY. — At the weekly meeting of this society at Soar on Friday evening last, Mr. John Evans, of Bettws Bledrws School, read an interesting and exhaustive paper on Welsh customs and manners.” Mr. D. J. Davies. photographer. College-street, presided, and an interesting discussion followed.

The Cambrian News and Merioneth Standard, 20 March 1914 [10]:

The Institute. On Friday evening an interesting lecture was delivered at the Institute by Capt. B. Davies-Evans, Peterwell, on “Salmon and Eels and their Ways.” The lecture was illustrated by lantern views, the lantern being manipulated by Mr. D. J. Davies, photographer, and was listened to with rapt attention. The president, Mr. A. R T. Jones, J.P., occupied the chair.

The Carmarthen Journal and South Wales Weekly Advertiser, 20th March 1914 [11]:

LECTURE. — The first of a series of lectures, arranged by the Men’s Institute Literary Committee, was given on Friday evening, when Mr. B. Davies-Evans, Peterwell, delivered an interesting lecture on “Salmon. Eels, and their habits.” The lecture, illustrated by lantern views, under the manipulation of Mr. D. J. Davies, Studio, was thoroughly enjoyed by the large number present. At the close Mr. Davies-Evans answered several questions submitted by local anglers, and showed salmon scales by means of a microscope and lens. On the proposition of Mr. A G. Harries, seconded by Mr. A. R. T. Jones, a hearty vote of thanks was passed to, and acknowledged by the lecturer. We hope to have the pleasure of listening to another lecture on “Natural History” by Mr. Davies-Evans, who is an acknowledged expert on the subject.

The Cambrian News and Merioneth Standard, 20th November 1914 [12]:

Recruiting Meetlng. — On Thursday evening of last week, Mr. H. Lancaster (late provincial, secretary of the Primrose League), delivered an address at Victoria Hall on ”Why we Went to War.” The lecture was illustrated by means of lantern slides shown by Mr. D. J. Davies, photographer. In the course of a few remarks, Alderman Walter Davies, who presided, said it was the first occasion he had appeared in public in the role of mayor. He promised to do all he could to further recruiting in the town and also to alleviate distress caused by the war. Songs were sung by Miss Annie Hughes, Miss M. J. Jones, and Miss May Richards, Mr Ivor C. Jones accompanying on the piano. A vote of thanks to the speaker was passed on the proposition of Principal Bebb [of St David’s College], seconded by Professor A. W. Scott. A vote of thanks to the artistes was accorded on the proposition of Dr. Walker, seconded by Councillor D. F. Lloyd. A similar compliment was paid to the Chairman, and the meeting concluded with the singing of the National Anthem.

The Carmarthen Journal and South Wales Weekly Advertiser, 11th December 1914 [13]:

SOAR. — The weekly meeting of the Mutual Improvement Society was held on Friday evening, when an instructive paper was read by Mr. Evan Price on “The Chacteristics [sic] of the Age.” Mr. D. J. Davies. photographer, occupied the chair. The following also spoke, viz.: — Messrs. J. C. Davies, Tom Davies. J. T. James. J. T. Richards. D. M. Davies, Timothy Richards, E. D. Rees and Mrs. Rees, Bee Hive.

Perhaps the most interesting mention of D. J. Davies, photographer, discovered in Welsh Newspapers, however, was a reference in the Carmarthen Journal and South Wales Weekly Advertiser of the 4th July 1919 to a talk given by a Captain E. Evans, M.C. at the vestry room at Shiloh (a Welsh Calvinist Methodist chapel), a talk that included an exhibition of lantern slides [14]:

LAMPETER.
[…]
On Wednesday, June 25th, the congregation at Shiloh was entertained at the vestry room by Mr. Matthews, of Ffosyffin, near Lampeter. The tea was followed by an exhibition of lantern slides kindly given by Capt. E. Evans, M.C. They illustrated various scenes and episodes in the Great War on the French front, such as trenches, dug-outs, shelled cathedrals, ruined villages and homesteads. &c. The pictures were explained in an interesting manner by Capt. Evans himself, and the lantern was excellently manipulated by Mr. D. J. Davies. photographer, Lampeter, one of the captain’s orderlies in France. Votes of thanks were proposed by the chairman (the Rev. W. Llewelyn Davies) and seconded by the Rev. Oswald Williams, B.A., after which the National Anthem was sung.

One is left wondering whether that photograph of Mametz Wood may have featured in that lantern presentation!

The report from the Shiloh meeting also provided a few more things to follow up. Firstly, it showed that D. J. Davies had served in the Army in some capacity during the war. Secondly, with a little bit of digging around, it was possible to match Captain E. Evans, MC with the Medical Officer of the 11th Battalion, South Wales Borderers, who had been awarded the Military Cross for his actions at Mametz Wood [15].

A quick search of the genealogical records on Findmypast [16] showed that some of the service records of 11/22590 Lance Corporal David Jones Davies of Lampeter were available in the WO 363 ‘Burnt Documents’ series [17]. The surviving records mostly relate to Lance Corporal Davies’s medical and discharge records, but they still provided  insight into his military career.

Service history:

David Jones Davies enlisted, aged thirty-eight, at Llandudno on the 7th January 1915, at first joining the 15th (Service) Battalion (1st London Welsh), Royal Welsh Fusiliers (Service No. 22729). He afterwards transferred to the 11th (Service) Battalion (2nd Gwent), South Wales Borderers (Service No. 11/22590).

Private Davies seems to have first served with ‘A’ Company of the 11th South Wales Borderers (SWB), which became part of 115th Brigade in the 38th (Welsh) Division. He embarked for France at Southampton on the 3rd December 1915. However, from the 26th April 1916, Davies seemed to suffer from a long series of illnesses. His “Casualty Form – Active Service” (Army Form B. 103) is full of information about various admissions to field ambulances and hospitals. For example, he was admitted to 130 Field Ambulance twice in April and May 1916 suffering from influenza, then twice again to 11th CRS in May. He seems to have survived the 38th Division’s brief, but intense, spell on the Somme at Mametz Wood in July 1916, but was granted leave from the 22nd September to the 1st October 1916. He was then promoted Lance Corporal on the October 1916.

Lance Corporal Davies was admitted to No. 10 Stationary Hospital at St Omer on the 27th January 1917. The detail on the Casualty Form is illegible, but other documents in the service records relating to demobilisation and pension entitlements suggest that he may have been suffering from exposure (the winter of 1916/17 was an exceptionally cold one). At the end of February 1917, he was admitted to 131 Field Ambulance, once again suffering from influenza.

Davies returned to duty in March 1917, but seemed to be then mainly based at divisional headquarters, dealing with baths and laundry. In May 1917 he was admitted again to 131 Field Ambulance, with a not yet diagnosed (NYD) condition, then in June to 129 Field Ambulance with debility. He re-joined divisional HQ in July 1917 and seems to have remained there until he was once again granted leave from the 21st December 1917 to the 4th January 1918. On the 6th February 1918, Lance Corporal Davies was posted to the 10th SWB, presumably because the 11th SWB were to be disbanded as part of the divisional reorganisations of February 1918.

In early 1919, Lance Corporal Davies was transferred to England (Chisledon) for demobilization, reverting to the rank of Private. He was demobilised on the 13th March 1919, formally being transferred to Class “Z” of the Army Reserve.

David Jones Davies was aged forty-two at the time of his discharge. His service records contain additional paperwork from a Medical Board conducted after his discharge, which seems to have related to pension entitlements. The completed forms assert that Davies had suffered repeated attacks of “trench fever” since April 1916, and that this had affected his health — “man complains of palpitations and breathlessness on exertion since having trench fever in France.” After medical examinations, the board accepted Davies’s claims, which were attributed to active service, although the board concluded that the illness was “now in a very quiescent state.”

These documents are important because they confirm the statement in the Shiloh meeting report that David Jones Davies had served for a time as a doctor’s orderly, as well as his role in divisional baths and laundry.

Personal and family life:

With access to some of Lance Corporal Davies’s service records, it was possible to fill in some other details of his life from the other genealogical records available from Findmypast.

David Jones Davies was born at Lampeter on the 1st January 1877, the son of Benjamin and Elizabeth Davies. He was baptised at Lampeter on the 29th April 1877, where the register records his father’s occupation as a coal and timber merchant [18]. While there was far more than one Benjamin Davies in late-nineteenth-century Lampeter, correlation with the entry in the baptismal register and with census records suggests that he was the Benjamin Davies (a merchant) that married Elizabeth Jones at Llanifihangel Ystrad (Ystrad Aeron) on the 9th October 1872 [19].

David Jones Davies featured in the 1881 Census, when the family were living at Harford Square, Lampeter. At that time, Benjamin Davies was thirty-seven years old and working as a manager of a coal merchants, while his wife Elizabeth was thirty-two. David Jones Davies was five-years-old and still at school. He had an older sister, Mary Ann, who was aged eight, and a younger brother, John Christmas (spelled “Xmas” in the census return), who was aged four. The household also had a servant, Ann Davies, an eighteen-year-old general domestic, who had been born at nearby Cellan.

At the time of the 1891 Census, the family were living at 23, Bridge Street, Lampeter. Benjamin Davies seems to have been elsewhere, but his wife Elizabeth was aged forty-one. There were four children: Mary Anne (aged 17, a pupil-teacher), Thomas (15, a college attendant), David (14, like Mary Ann, a pupil-teacher), and John Christmas (13, a printer’s apprentice). The occupation “pupil-teacher” seems to refer to an apprentice system for teachers.

By the time of the 1901 Census, David Jones and John Christmas Davies were living at 46, Bridge Street, the household of their older sister, Mary Anne Davies. It’s difficult to disambiguate without additional information, but their mother may have been the Elizabeth Davies that died at Lampeter in 1893, aged 43. In 1901, Mary Ann Davies was twenty-seven, and working as an assistant teacher at a board school. John Christmas Davies was twenty-three and working as a printer’s compositor. David Jones Davies himself was twenty-four years old and working as a solicitor’s clerk (Lance Corporal Davies’s service records stated that his previous employer had been Winter & Bothamley, (i.e. Messrs Winter, Bothamley, and Co.), solicitors, of 16 Bedford Row, London, W.C.).

Things had changed yet again by the time of the 1911 Census. David Jones Davies was thirty-four years old and working as a photographer. He was still part of the household of his older sister, who was now living at Talsarn House, College Street, Lampeter. Since the 1901 Census, Mary Anne had been both married and widowed, so she was now Mary Anne Evans, aged thirty-seven, a fancy goods dealer. She also had two young children: Elizabeth Myfanwy (aged six) and Margaret Dorothy (aged 4). Also living at Talsarn House was Mary Anne and David Jones’s father, Benjamin Davies, a sixty-seven-year-old farm labourer. The 1911 Census also records Mary Ann and David’s younger brother, John Christmas Davies, living at 37, Bridge Street, part of the household of his widowed father-in-law, John Jones.

The death of Mary Anne Evans’s husband was extremely tragic. Mary Anne Davies had married Thomas Evans at Lampeter on the 4th December 1901. He died around five years afterwards, as reported on in the Welsh Gazette and West Wales Advertiser of the 27th December 1906 [20]:

TRADESMAN’S TRAGIC END. A painful sensation was caused in the town on Wednesday afternoon week, when it became known that Mr. Thomas Evans, butcher, College-street, had been found dead in a stable loft at the back of his house. Deceased, who was only 31 years of age, opened business at Lampeter some six or seven years ago. He was a son of Mr. Evan Evans, Red Lion, Talsarn, and leaves a widow and two children. An inquest touching the death was conducted by Dr. Abel Evans, district coroner, on Thursday afternoon, before a jury consisting of the following: — Messrs. Walter Davies (foreman), T. J. Megicks, Corner Shop; Richard John, borough surveyor; E. D. Rees, station-terrace; Rees Davies, saddler; Tom Jones, draper; D. Emlyn Davies, tailor; John Jones, College-street; William Davies, saddler; William Janes, Bryn road; J. S. Parry; and Evan Evans, cabinet maker.

Mrs. Mary Ann Evans, the widow, said she last saw her husband alive about 12 noon on the previous day, the 19th inst. She knew he was in trouble about money matters, and he was very despondent. A gentleman from Aberystwyth called to see him on Wednesday morning, and she sent a servant man to look for him at Davies, the saddler. He returned, and said he could not find his master. Then she sent her brother to Dulas Hall to look for him, and then she saw people rushing to the yard at the back.

Rhys Hughes, draper, said his premises were next door to those of the deceased. Between 12.30 and 1 o’clock on Wednesday, George Gittens, in the deceased’s employ, asked him if he had seen his master. He said no. Gittens then said. “The door of the hay loft above the stable is fast, and I cannot get in there. I am afraid he is inside.” They both tried the door again, hut failed to open it; it being fastened on the inside. He went down into the stable, and found a hatchet there, with which he broke three bars from the hayrack, and through the opening climbed into the loft. There he found the deceased hanging from a beam by a rope round his neck. Having opened the door for the servant man to enter, they both cut him down. Artificial respiration was tried, but without success. He had had a conversation with the deceased about his affairs om Wednesday morning. He was very despondent, but expressed no intention of doing away with himself.

George Gittens, said his master told him about nine oclock [sic] on Wednesday morning to return a beast to Parkneuadd, Llanfair-Clydogau. When he came back he was told by Mrs. Evans to look for his master. He went, but failed to find him. Then he went to the stable loft to get a feed for the pony, but failed to get in as the door was fastened on the inside. They then broke into the loft as described by Mr. Hughes, and there found the deceased.

A verdict of “Suicide whilst temporarily insane’ was returned. The jury returned their fees to the widow.

The funeral took place on Saturday, and was largely-attended, the interment taking place at the Parish Churchyard. Deep sympathy is felt with Mrs. Evans and her family.

It seems that after the end of the war, David Jones Davies returned to his photography business in Lampeter. Internet searches for “D. J. Davies Lampeter” retrieve many images of postcards that he produced, which include many topographical views of Wales [21]. His photographs were also occasionally published in newspapers like the Western Mail and in books.

The 1939 Register (available via Findmypast) records that David J. Davies, photographer, was still living at Talsarn House in College Street, with his niece Elizabeth M. Evans, who was by that point a head teacher.

David Jones Davies died in 1947, aged 70, and was buried at Lampeter on the 31st January 1947.

Captain Evan Evans, MC, Royal Army Medical Corps:

We have already noted that the Captain Evans that gave the talk at Shiloh in 1919 had formerly been Medical Officer of the 11th SWB. This was Captain Evan Evans, MC of the Royal Army Medical Corps. Dr Evans also had a very strong connection with Lampeter.

Evan Evans is a fairly common name in Wales, which made researching Dr Evans’s life and background quite challenging. However, using clues from the Welsh Newspapers archive, it was possible to track his general progress through the census and other records (again using Findmypast).

Evan Evans was born at Llanwenog (some records state Aberaeron) on the 10th August 1874, the son of Captain John Evans and Anne Evans. By the time of the 1881 Census, the family were living at 5 Cadwgan Place, Aberaeron (the building was also known as Milford House; it is now Listed Grade II, and featured in 1970 on a postage stamp, part of a set of commemoratives on rural architecture). In 1881, the household included: John Evans (aged 37), a merchant, and his wife Anne Evans (30). Evan D. Evans (aged 6) was the eldest of three children, followed by John G. (5), and David G. (3). Also part of the household was Thomas Davies (23), a clerk, and Hannah Thomas (16), a general servant.

The family were still resident at Cadwgan Place, Henfynyw (Aberaeron) at the time of the following census in 1891. The occupation of John Evans, the head of household, was specified in the census return as a corn merchant. Evan, John, and David had been joined by Thomas G. (aged 8). There were also two general servants and a domestic servant: Daniel Jones (23), Arthur J. Driver (19), and Anne Jones (22).

John and Anne Evans were still living at 5, Cadwgan Place at the time of the 1901 Census. John (57) had extended his role to be a grain and timber merchant. Of their children, Evan and John were living elsewhere, leaving David (aged 23) with his eight-year-old brother, Jenkin A. There were also four servants, all of whom seem to have been part of John Evans’s business: Evan Jones (aged 21, a commercial clerk), John Evans (20, a corn miller), Evan Davies (16, a warehouseman), and David E. Owens (15, a carter).

That same census recorded the twenty-six-year-old Evan Evans lodging at 19, Water Lane, Lambeth (London), a resident medical officer. He was living back in Cardiganshire by the time of the 1911 Census, lodging at 11, College Street, Lampeter, now a thirty-six-year-old medical practitioner. The census return also noted that he was capable of speaking both Welsh and English.

Evan Evans and three of his brothers served in the Army during the First World War. A glowing tribute to the family (complete with photographs) appeared in the Cambrian News of the 9th November 1917 [22]:

Distinguished Aberayron Family.
Captain Evan Evans, M.C., M.D.; Major David Evans; Lieutenant Albert Evans, M.C.; sitting, Mr. John Evans, F.C.I., public analyst of Sheffield, York, and Cardiganshire; inset, Capt. Garfield Evans, M.D. These are the five sons of Captain and Mrs. Evans, Milford House, Aberayron. Four are in the army. Two have won the M.C. in France. Dr. E. Evans was medical practitioner at Lampeter; Major David Evans before the war was county valuer for Cardiganshire and Pembrokeshire; Mr. John Evans is public analyst for Sheffield and Cardiganshire; Captain Garfield Evans, M.D., before the war had commenced practice at Port Talbot. He is attached to the Welsh Hospital and is now in India. Mr. Albert Evans was medical student at Guy’s when he joined the colours. The record is an extraordinary one for more than one reason.

Captain Evan Evans  was awarded the Military Cross for his actions at Mametz Wood, when (as we have noted) he was Medical Officer of the 11th SWB,. The public announcement in the Edinburgh Gazette of the 1st January 1917 included his name in a long list of award recipients with no citations [23]. However, a footnote in Atkinson’s history of the South Wales Borderers, notes that Captain Evans was awarded the MC for “his gallantry and devotion to duty in this action [Mametz Wood]; he did splendid work and ran repeated risks in getting to the wounded and succouring them” [24]. The War Diary of the 11th SWB also recorded the award (and a few others) on the 6th January 1917 [25]:

Battalion Orders for this day contained the following announcement:

The Commanding Officer has great pleasure in announcing the following and hearty congratulates the recipients.
London Gazette, January 2nd 1916 [sic]
Capt Evan Evans, RAMC, attd. 11th SWB – Military Cross, for gallantly attending to wounded under continuous heavy fire at Mametz Wood July 7th 16
11/21561 Sgt Edwards A Coy 11th SWB – Distinguished Conduct Medal
Capt C. E. Browning B Coy 11th SWB – Mentioned in Despatches

Atkinson’s footnote also provided a list of persons serving in the 10th and 11th SWB that had been “brought to notice by the Brigadier for good work.” For the 11th Battalion, the names include a Private D. J. Davies, although, without service numbers, it is not possible to ascertain whether this person might have been the David Jones Davies that has been the main subject of this post.

After Mametz Wood, Captain Evans continued to be attached to the 11th SWB. The Cambrian News of the 26th January 1917 noted that he had recently been visiting Lampeter on leave [26]:

LAMPETER.
PERSONAL. — Dr. Evan Evans, M.B.B.S., is home on leave. He looks well and was heartily congratulated by his many friends upon his winning the military cross.

The MBBS is a reference to Dr Evans’s medical qualifications: Bachelor of Medicine and Bachelor of Surgery.

Captain Evans was wounded later that year. On the 31st July 1917, the 38th Division were involved the Battle of Pilckem Ridge, the opening offensive of the 3rd Battle of Ypres. Captain Evans’s name appears in a long list of casualties noted in the War Diary of the 11th SWB [27]. The Cambrian News of the 10th August 1917 reported his wounding in a long list of Lampeter casualties [28]:

LAMPETER.
[…]
A big list of casualties at the front has been received in this district during the present week. Pte. W. J. Davies, Welsh Guards, of Aberdauddwr Farm, near Lampeter, has been killed. He was formerly a policeman at Burry Port. Among those wounded are Surgeon-Captain Evan Evans, M.C., but it is understood that his wounds are not serious; Lieut. J. T. James, Compton House, who was caught by a German bomb when leading a raiding party; Lieut. D. Jones, Coedmorfach; Corpl. Tom Lewis, Bwlchffin, Cwmanne, who had been previously wounded at Loos; Corpl. Tom Morgan Davies, Wesley House, Barley Mow: and Pte. Wentworth Megicks, The Laurels, Bridge-street. Sapper Alfred Davies. College-street, has been gassed.

After the end of the war, Dr Evans returned to his medical practice in Lampeter, eventually becoming medical officer for the borough and a Justice of the Peace. At least once he attended a reunion dinner of the 11th SWB [29]:

GWENT S.W.B. REUNION
The sixth annual reunion dinner of the 11th Battalion South Wales Borderers (2nd Gwents) was held at Newport on Saturday. Capt. J. Richards (Swansea) presided, and guests of honour included Capt. H. M. Salmon (Cardiff City Battalion), Capt. W. S. Edwards (Newport), Capt. J. E. Mills (Llanidloes), Dr. Evan Evans (Lampeter), and Capt. W. T. Harris.

It seems that he never married. The 1939 Register records him living at Mayfield, Lampeter with a housekeeper, Rachel Mathews. After the Second World War, he was awarded the freedom of the borough of Lampeter [30]:

LAMPETER’S TWO NEW FREEMEN
LAMPETER on Thursday conferred the freedom of the borough on Councillor William Lewis, J.P., and Dr. Evan Evans, J.P., medical officer for the borough. There was a large gathering at the Town-hall, presided over by the Mayor (Alderman O. Saunders Davies).
[…]
HONOURING EX-SERVICE MEN
The Rev. T. Oswald Williams proposed the admission of Dr. Evan Evans and spoke of his good work as medical practitioner at Lampeter for 40 years and said he had held the post of medical officer of health with distinction. He was president of the local branch of the British Legion, and through him they would be honouring the ex-Service men. Mr. W. R. Bowen seconded.

In 1956, Dr Evans was 82 years old and described in the Western Mail as the “oldest [medical] practitioner in Cardiganshire” [31].

The 38th (Welsh) Division at Mametz Wood:

The 10th and 11th South Wales Borderers (SWB) were both New Army units formed by the Welsh National Executive Committee after the outbreak of the war [32]. The 10th (Service) Battalion (1st Gwent) was formed first, at Brecon in October 1914, the 11th (Service) Battalion (2nd Gwent) following on the 5th December. For most of the duration of the war, the 10th and 11th SWB formed part of 115th Brigade in the 38th (Welsh) Division [33]. From the time of the Division’s arrival in France up until the divisional reorganisations of February 1918, the other infantry units in the 115th Brigade were the 16th Battalion (Cardiff City), Welsh Regiment and the 17th Battalion (2nd North Wales), Royal Welsh Fusiliers.

The 38th Division had arrived in France in early December 1915. By the end of the year, the 10th SWB had moved to trenches in the Laventie sector, attached to the Guards Division for instruction in trench warfare. At the same time, the 11th SWB were based in trenches around Richebourg. The battalions would stay in French Flanders for many months, alternating between billets and front-line trenches — e.g. at Pont du Hem (La Gorgue), Neuve-Chapelle, Festubert, Givenchy-lès-la-Bassée, and Fauquissart — with occasional spells spent training.

In mid-June, the 10th and 11th SWB moved to the divisional training area around Tincques, where the 38th Division was assembling and conducting manoeuvres. From the 26th June, they and the rest of 115th Brigade started moving towards the Somme front, via Gézaincourt, Toutencourt, Acheux-en-Amiénois, and Buire-sur-l’Ancre. During this time, the “Big Push” on the Somme had got underway. On the 5th July, the 10th and 11th SWB marched to bivouacs near Mametz and Carnoy. There, the 38th Division would join Lieutenant-General Sir Henry Horne’s XV Corps, relieving the 7th Division in trenches to the south of Mametz Wood [34].

On the 1st July 1916, the British XV Corps (7th and 21st Divisions) had managed to capture Mametz village, and had spent the following few days pushing forward, and consolidating just short of Mametz Wood. The plan for the following stage of the offensive was for the 38th Division to assault the wood from the south, while the 17th (Northern) Division would attack towards Quadrangle Support Trench further north. The pause in operations enabled the German defenders to turn Mametz Wood into a formidable obstacle. Facing the 38th was a long, thin extension of the wood shaped like a hammer, and known as the Hammerhead.

Contalmaison, Mametz Wood, Bazentin-le-Petit, and Montauban. Detail from: Map of the Somme area (December 1916)

Contalmaison, Mametz Wood, Bazentin-le-Petit. and Montauban. Detail from: Map of the Somme area; Scale: 1:40,000; Edition: 2; Published: December 1916: https://maps.nls.uk/view/101723165

Bad weather caused some delays, but the 38th Division attack finally went in at 8.30 am on the 7th July 1916. The 115th Brigade had been chosen to lead the attack, with the 11th SWB on the left and the 16th Welsh Regiment on the right. The 10th SWB was in reserve in Montauban Valley. The attack was a complete failure.

The 11th SWB War Diary (WO 95/2562/2) tends to be succinct to the point of terseness. For example, the entry for the 7th July 1916 reads in its entirety [35]:

[Carnoy]. 7. Attacked Mametz Wood at 8.42 AM in conjunction with Cardiff (City 16th Welsh), attack failed. Battalions reformed and made a second attack at about 11 AM, this attack also failed. Casualties: killed, Lt Hamer actg adjt; wounded, Capt Monteith, Capt Browning, 2nd Lt Lowe, 2nd Lt Woodcock, 2nd Lt Whittaker, 2nd Lt. Salathiel, 2nd Lt Carrington, 2nd Lt Ackerley and 120 O.R.

The 10th SWB were in reserve for the 7th July attack, and their War Diary (WO 95/2562/1) is, if anything, even less informative [36]:

MAMETZ, Sht AMIENS 17 [a map reference]. 6.7.16. Battalion at Bivouac &afterwards marched to trenches as reserves to 16th Welch Regt & 11th S.W.B.’s attack on MAMETZ WOOD.
TRENCHES. 7.7.16. Battalion in Trenches in reserve to 16th Welch Regt & 11th S.W.B.’s attack on MAMETZ Wood. Casualties: 1 Officer (Lt. Col.  S. J. Wilkinson, D.S.O., commanding battn.) killed & 20 ORs wounded & 2 killed.
TRENCHES. 8.7.16. Battalion in Trenches till 1 AM & returned to Bivouac between MAMETZ & CARNOY.

In order to get a fuller picture of the failed 7th July attack, it is necessary, therefore, to consult other sources. The regimental history, C. T. Atkinson’s The History of the South Wales Borderers, 1914-1918, does helpfully contain a more detailed account [37]:

The attack had as its first objective a line just inside the Eastern edge of the wood. This secured, the attackers were to push on North and West and endeavour to reach a ride running North and South about midway across the wood. Starting at 8.30 a.m. the attack at once encountered a heavy fire from rifles and machine guns, while the German guns which had already replied vigorously to our bombardment redoubled their fire. The 11th [SWB] pushed forward well nevertheless, but before long machine guns from Bazentin-le-Grand Wood and from Sabot and Flatiron Copses caught them in flank, inflicting many casualties, and brought the attack to a standstill. On the right the leading men were within 200 yards of their objective, on the left they were nearly double that distance off. Satisfactory observation and registration had been impossible and in consequence the British bombardment had been neither sufficiently accurate or effective. A second attack was ordered for 11.15 a.m., but the half an hour’s fresh bombardment again proved inadequate. The machine guns were not subdued, and this advance also was soon held up.

By this time the 10th S.W.B. had received orders to support the attack and Colonel Wilkinson had come forward to reconnoitre. When the second advance failed, A and D Companies under Captain Galsworthy were ordered up to reinforce the firing line, followed an hour later by the remaining two under the C.O. Setting out from their bivouac near Mametz the 10th advanced across a maze of battered trenches, progress being much impeded by heavy rain and the consequent mud, and eventually arrived at the point of deployment just before 3 p.m. At 3.15 p.m. A, B and D also attacked, but with no better success than before. The machine guns were still in action and their fire made progress virtually impossible. Colonel Wilkinson was killed in bringing forward the second wave and the advance soon faded away.

Divisional Headquarters were keen for another assault to take place on the 7th and had planned another supporting barrage, but the commander of 115th Brigade, Brigadier-General Horatio James Evans, eventually  cancelled the attack. The account of this episode in Llewellyn Wyn Griffith’s Up to Mametz provides a good example of the vagaries of battlefield communication at this stage of the war [38].

As the war diary extracts suggest, the 11th SWB in particular suffered many casualties. Some of those reported wounded in the War Diary would later die of wounds [39]. For example, Second Lieutenant Ewart Gladstone Salathiel of the 11th died on the 17th July, being buried at Rogerstone. His family placed a notice in Y Goleuad on the 28th July 1916, noting that he had been a teacher at the Council School at Cwmffrwdoer, Pontypool [40]:

SALATHIEL. — Ar faes y frwydr, Lifftenant Ewart Salathiel, South Wales Borderers, Risca. Bu’n athraw yn Ysgol y Cyngor, Cwmffrwdoer, gei Pontypwl.

After the failed attack of the 7th July, the 115th Brigade returned to their bivouacs at Mametz and Carnoy, while other units in the 38th Division prepared the ground for another assault on the wood. The 10th and 11th SWB would start moving to new positions on the 9th July, in preparation for renewing the attack on the 10th July.

Things were also changing at a higher level. The commanding officer of the 38th Division, Major-General Ivor Philipps, was sacked on the 9th July and, on the advice of the Commander in Chief, temporarily replaced by Major-General Herbert Edward Watts, the commander of 7th Division. While Brigadier-General Evans had been restricted by XV Corps regarding the timing and size of 115th Brigade’s attack on the 7th July, General Watts was given a much freer hand and, for the attack on the 10th, he decided on a much heavier assault, to be led by four battalions [41].

The War Diary of the 11th SWB continued to use as few words as possible to describe progress on days subsequent to the 7th July attack [42]:

8. Relieved by 113rd Brigade at 3 AM.
9. Resting in Bivouac till 8 AM when D and C Co’s went up to Catterpillar [sic] Wood and Marlboro Wood and relieved the 10th Welsh 114 Bdge. A & B Co went to Mametz Wood to reinforce 113th Bdge.
10. C & D held Caterpillar and Marlboro Wood, and A & B attacked in Mametz Wood.
11. C & D still in the two woods and were relived by 8th Devons at 12 PM.
A & B were relieved in Mametz Wood by two Cos from the 7th Division.
Casualties: Capt Lewis and 2nd Lt Fletcher killed; 2nd Lt Travis, 2nd Lt Heppel, wounded; 2nd Lt Miller-Hallett missing.
Carnoy. July 12. Bivouac all day, resting.

The War Diary of the 10th SWB contained a fraction more detail, but not that much [43]:

MAMETZ, Bivoucac, Sht. AMIENS 17. 10/7/16 & 11/7/16. Battalion at Bivouac until 12. Noon when it departed for Trenches to take part in attack on MAMETZ Wood by 38th Division. Attack carried out, portion of wood captured. 3 Field Guns & 2 Heavy Guns taken by Bn & marked 10th S.W.B. Casualties: Killed: 2nd Lt M. J. Everton & 2nd Lt R. P. Taylor & 21 O Ranks; wounded: Major C. W. Harvey, Capt. Galsworthy, (both at Duty), Lieuts Gill & Parry R.B., 2nd Lts Davenport H.H., Davies, D.C.; missing total 6. D. 10/20189 Pte. Griffiths T., D., 10/03170 Pte Lavender J.A., B. 10/24172 Pte Bishop H., B. 10/21329 Evans D., B. 10/20526 Pte Hughes F., B. 10/20974 Pte Davies J. The Battalion suffered an intense bombardment during the night of 11-12 of July 1916.
MAMETZ WOOD, Sht AMIENS 17. 12/7/16. Battalion at MAMETZ WOOD & returned to Bivouac at 9 AM & stayed at Bivouac for the day.

“Attack carried out, portion of wood captured” was an extremely succinct description of the work undertaken in Mametz Wood during the attack of the 10th and 11th July 1916.

The Cambria Daily Leader of the 27th September 1916 managed to get a fuller account from a officer in one of the Welsh Regiment battalions involved in the attack [44]:

HOW MAMETZ WAS CAPTURED.
Work of a Welsh Regiment.
In an account of the gallant part played by the Welsh Regiment in the capture of Mametz Wood, one of the Battalion officers who is at present in Swansea remarked to a “Leader” reporter that it would be difficult to imagine a tougher proposition than the task set the lads.
The Battalion went into action on July 10th before dawn. They were occupying a position known as White Trench — an old German trench — where they had spent two nights. Their objective was a strip of the wood, 1,000 yards in length, deviating to the north, and the country in between was of a difficult character.

Map of Mametz Wood, published in Cambria Daily Leader, 27 September 1916

“Our advance,” the officer remarked, “was preceded by a heavy bombardment by our artillery from 3.30 to 4.15 a.m. We left the trench for the attack at five minutes past four, having 1,000 yards to go before reaching the wood. We had ten minutes to cover that distance. We had to go down a steep bank into the valley and then up again to the wood. The barrage was so beautifully timed that it only lifted five seconds before our company got in. We had advanced in eight waves, two platoons in each wave. We got into the wood and pushed right through our portion to the other end, a, distance of about a mile. As we advanced stage by stage to the cross-roads the barrage kept on lifting. We held the wood with comparatively small numbers, supported by other brigades on the right and left, until four o’clock the next, morning, when we were relieved. A battalion supported us very, well.”
Describing the ordeal the Battalions went through in the advance, our informant remarked that what with our own and the enemy’s barrage, the wood was a mass of artillery fire. Hand-to-hand fighting and bombing took place right throughout the wood. The wood was extraordinarily thick, the Germans had tied the branches of the trees together, and it was extremely difficult to force a passage through. Moreover, there were concealed machine-guns in the coppices on either side of the front of the wood.

For the attack of the 10th July, the 115th Brigade was initially held in reserve. Atkinson’s regimental history contains an account of how both the 10th and 11th SWB started to get drawn into the battle during the afternoon of the 10th July [45]:

Gradually the [initial] attacking brigades used up their reserves, and about midday the 10th S.W.B. were ordered forward. Moving off about 1 p.m. the 10th reached the Eastern edge of Mametz Wood without many casualties, despite the heavy shelling which greeted them. Here Major Harvey had just deployed his men when he received orders to postpone his attack in order to allow of a fresh bombardment. At 4 p.m. he was to clear the Eastern corner of the wood.

Attacking with great vigour and dash the 10th made excellent progress at first, taking several prisoners and driving the surviving defenders out into the open, where in bolting towards Sabot and Flatiron Copses they gave targets to the rifles and machine guns of the 11th S.W.B. holding Caterpillar and Marlborough Woods. But opposition became more serious as the advance progressed; much trouble was experienced with dealing with machine guns, bombers who tried to work along a trench on the edge of the wood met stubborn resistance and had many casualties, and the 10th were held up a little short of their objective, though two bombing attacks which Sergeant Edwards led with much courage and initiative gained not a little ground. Elsewhere the attack was less successful. Detachments fought their way forward despite savage opposition to within about three hundred yards of the Northern edge, but the portion of the wood West of the railway remained untaken. In the end an irregular line was formed, the 10th S.W.B. lining the Eastern edge S.W. of Flatiron Copse with their left thrown back at right angles towards the middle ride.

Before this the 115th Brigade had received orders to relieve the other brigades, now quite exhausted. Half of it was already in action in the wood and the two companies of the 11th S.W.B. could not be moved from Caterpillar and Marlborough Woods, but the relief was at length carried out and the other half-battalion of the 11th came in between the 10th and the central ride, with the 17th R.W.F. and 16th Welch beyond it. The night was disturbed by much firing and many alarms, but no real counter-attack. Shortly before dawn Major Harvey made a fresh effort to secure his objectives, attacking them simultaneously from both flanks. This was most successful and by 5 a.m. the disputed points were in the hands of the 10th, who captured several more prisoners and in clearing up the captured position took possession of several guns and howitzers; Sergeant J. H. Williams, who distinguished himself by his courage and skill, led his men with great dash and good work was done by many others. General Watts [the commander of 7th Division, temporarily in charge of the 38th] meanwhile had given orders for a fresh effort to clear the untaken portion. This eventually got going at 3.15 p.m., and earlier start having been delayed by a barrage which our guns put down. The R.W.F. and Welch met very stubborn resistance and could make little progress, but the 11th S.W.B. fared better and fought their way to the N.E. corner of the wood, despite heavy machine-gun fire and strong opposition, only to find their left completely “in the air.” This was about 5.30 p.m. and for some time Colonel Gaussen and his men managed to maintain their ground, though German reinforcements prevented them pushing West along the Northern edge. The Brigadier called on the other battalions to advance again and reduce the pressure on the 11th, but after gaining a little ground they were again driven back and about 9 p.m. the 11th had to fall back to a line about three hundred yards short of the Northern edge. Here they remained till early next morning (July 12th), when the Twenty-First Division took over the greater part of Mametz Wood, the Seventh coming in on their right and relieving the 11th S.W.B. in Caterpillar and Marlborough Woods.

Mametz Wood was the 38th Division’s first experience of a full-scale attack on the Western Front. Hard fighting in woodland in bad weather must have been a brutal introduction to the Battle of the Somme. After their relief, the 10th and 11th SWB were at first transferred to the northern part of the Somme front (around Hébuterne and Courcelles-au-Bois), before moving to the Yser front via Candas and Saint-Omer by the end of the month. The 38th Division would not return to the Somme that year.

Mametz Wood, however, was now in the hands of the British. That summer, other Allied units would fight their way through the woodland and copses of that part of the Somme front, working their way through Bernafay and Trônes Wood, Bazentin Ridge, Longueval and Delville Wood, with the eventual capture of High Wood (Bois des Fourcaux) during the Battle of Flers-Courcelette on the 15th September 1916.

The War Diary extracts provide an indication of the overall casualties of the 10th and 11th SWB during the Mametz Wood operations in early July 1916. Atkinson commented that neither had, “all things considered, suffered very heavily” [46]. Despite that, the commanding officer of the 10th (Lieutenant-Colonel Sidney John Wilkinson) was killed [47], and two subalterns and 29 other ranks were killed or missing, with another nine officers and 140 other ranks wounded. The 11th SWB lost even more. Atkinson doesn’t provide exact numbers, but he records that around fourteen officers were killed or missing, with ten wounded, plus what must have amounted to around 200 other ranks killed, missing or wounded.

Drawing by Muirhead Bone entitled: Welsh Soldiers

Muirhead Bone, Welsh Soldiers, from: The Western Front, drawings by Muirhead Bone, Pt. III (Garden City, N.Y.: Doubleday, Page, & Co., 1917), no. LVII. Source: HathiTrust Digital Library, via Yale University: https://hdl.handle.net/2027/yale.39002013479150

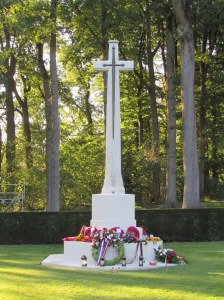
There is a memorial to the 38th Division inside the church at Mametz. In 1987, another memorial, one that incorporates a very striking sculpture of a red dragon, was placed in the valley facing Mametz Wood [48].

And here and there and huddled over, death-halsed to these, a Picton-five-feet-four paragon for the Line, from Newcastle Emlyn or Talgarth in Brycheiniog, lying disordered like discarded garments or crumpled chin to shin-bone like a Lambourne find.

From: David Jones, In parenthesis [49].

References:

[1] Robert Graves, “A Dead Boche.” in: Fairies and Fusiliers (London: William Heinemann, 1917), p. 33:
https://archive.org/details/fairiesfusiliers00gravuoft/page/32

[2] Paul Reed, The Old Front Line WW1 Podcast: https://oldfrontline.co.uk/

[3] Paul Reed, “Walking the Somme: Mametz Wood”:
https://oldfrontline.co.uk/2020/06/06/walking-the-somme-mametz-wood/

[4] Paul Reed, Walking the Somme: a walker’s guide to the 1916 Somme battlefields, 2nd ed. (Barnsley: Pen & Sword Military, 2011), p. 177.

[5] Welsh Newspapers: https://newspapers.library.wales/home

[6] The Carmarthen Journal and South Wales Weekly Advertiser, 5 March 1909, p. 8; via the National Library of Wales (Welsh Newspapers): https://newspapers.library.wales/view/3763905/3763913/75/

[7] Welsh Gazette and West Wales Advertiser, 10th March 1910, p. 4; via the National Library of Wales (Welsh Newspapers): https://newspapers.library.wales/view/3881242/3881246/31/

[8] The Cambrian News and Merioneth Standard, 11th March 1910, p. 3; via the National Library of Wales (Welsh Newspapers): https://newspapers.library.wales/view/3411723/3411726/34/

[9] The Carmarthen Journal and South Wales Weekly Advertiser, 28th February 1913, p. 5; via the National Library of Wales (Welsh Newspapers): https://newspapers.library.wales/view/3764857/3764862/49/

[10] The Cambrian News and Merioneth Standard, 20 March 1914, p. 3; via the National Library of Wales (Welsh Newspapers): https://newspapers.library.wales/view/3412212/3412215/22/

[11] The Carmarthen Journal and South Wales Weekly Advertiser, 20th March 1914, p. 5; via the National Library of Wales (Welsh Newspapers): https://newspapers.library.wales/view/3678127/3678132/54/

[12] The Cambrian News and Merioneth Standard, 20th November 1914, p. 5; via the National Library of Wales (Welsh Newspapers): https://newspapers.library.wales/view/3412563/3412568/46/

[13] The Carmarthen Journal and South Wales Weekly Advertiser, 11th December 1914, p. 7; via the National Library of Wales (Welsh Newspapers): https://newspapers.library.wales/view/3678462/3678469/73/

[14] The Carmarthen Journal and South Wales Weekly Advertiser, 4 July 1919, p. 3; via the National Library of Wales (Welsh Newspapers):
https://newspapers.library.wales/view/3679429/3679432/44/

[15] C. T. Atkinson, The history of the South Wales Borderers, 1914-1918 (London: Medici Society, 1931), Naval and Military Press reprint, p. 247.

[16] Findmypast: https://www.findmypast.co.uk/

[17] WO 363, British Army WW1 Service Records, 1914-1920, ‘Burnt Documents,’ The National Archives; via Findmypast.

[18] Cardiganshire Baptisms, 1856-1891, Carmarthenshire Record Office, Welsh Archive Services; via Findmypast.

[19] Cardiganshire Marriages And Banns, 1837-1919, Welsh Archive Services; via Findmypast.

[20] Welsh Gazette and West Wales Advertiser, 27th December 1906, p. 4; via the National Library of Wales (Welsh Newspapers):
https://newspapers.library.wales/view/3866866/3866870/38/

[21] An example would be the view of Hafod published in: “Some puzzling pictures of Hafod,” Letter from Aberystwyth, 15 November 2017:
https://www.letterfromaberystwyth.co.uk/some-puzzling-pictures-of-hafod/

[22] The Cambrian News and Merioneth Standard, 9th November 1917, p. 3; via the National Library of Wales (Welsh Newspapers): https://newspapers.library.wales/view/3413978/3413981

[23] The Edinburgh Gazette, Supplement, No. 13033, 1 January 1917, p. 33; via the National Library of Wales (Welsh Newspapers): https://www.thegazette.co.uk/Edinburgh/issue/13033/page/33

[24] Atkinson, op cit., p. 247.

[25] WO 95/2562/2, War Diary, 11th Battalion, South Wales Borderers, The National Archives, Kew.

[26] The Cambrian News and Merionethshire Standard, 26 January 1917, p 3; via the National Library of Wales (Welsh Newspapers): https://newspapers.library.wales/view/3413609/3413617/100/

[27] WO 95/2562/2

[28] The Cambrian News and Merionethshire Standard, 10 August 1917, p. 5; via the National Library of Wales (Welsh Newspapers): https://papuraunewydd.llyfrgell.cymru/view/3413861/3413866/62

[29] Western Mail, 21 November 1938, p. 8; via British Newspaper Archive.

[30] Western Mail, 26 April 1946, p. 3; via British Newspaper Archive.

[31] Western Mail , 17 August 1956, p. 4; via British Newspaper Archive.

[32] The Long, Long Trail: South Wales Borderers:
https://www.longlongtrail.co.uk/army/regiments-and-corps/the-british-infantry-regiments-of-1914-1918/south-wales-borderers/

[33] The Long, Long Trail: 38th (Welsh) Division:
https://www.longlongtrail.co.uk/army/order-of-battle-of-divisions/38th-welsh-division/

[34] Siegfried Sassoon describes the relief of the 1st Battalion, Royal Welsh Fusiliers by units of the 38th Division in his Memoirs of an infantry officer (London: Faber and Faber, 1965), pp. 61-62: “Visualising that forlorn crowd of khaki figures under the twilight of the trees, I can believe that I saw then, for the first time, how blindly war destroys its victims.” Sassoon is sympathetic, but some of his comments, e.g., “I understood the doomed condition of these half trained civilians,” also seem a little condescending.

[35] WO 95/2562/2

[36] WO 95/2562/1, War Diary, 10th Battalion, South Wales Borderers, The National Archives, Kew.

[37] Atkinson, op. cit., pp. 242-244.

[38] Llewellyn Wyn Griffith, Up to Mametz (London: Faber and Faber, 1931); short extracts printed in John Richards (ed.), Wales on the Western Front (Cardiff: University of Wales Press, 1994), pp.78-91.

[39] Atkinson, op. cit., p. 244.

[40] Y Goleuad, 28 July 1916, p. 13; via the National Library of Wales (Welsh Newspapers):
https://newspapers.library.wales/view/3494491/3494504/42/

[41] Michael Renshaw, Mametz Wood, Battleground Europe (Barnsley: Pen & Sword Military, 1999), pp. 77, 91.

[42] WO 95/2562/2

[43] WO 95/2562/1

[44] Cambria Daily Leader, 27 September 1916, p. 2; via the National Library of Wales (Welsh Newspapers):
https://newspapers.library.wales/view/4102273/4102275/28/

[45] Atkinson, op. cit., pp. 245-246.

[46] Ibid., p. 247.

[47] Pam and Ken Linge, Missing but not forgotten: men of the Thiepval Memorial, Somme (Barnsley: Pen & Sword Military, 2015), p. 61.

[48] Wikipedia, Mametz Wood Memorial:
https://en.wikipedia.org/wiki/Mametz_Wood_Memorial

[49] David Jones, In parenthesis (London: Faber and Faber, 1937), p. 182.

Further reading:

Steven John, Welsh at war: the grinding war: the Somme and Arras (Barnsley: Pen & Sword Military, 2018).

David Jones, In parenthesis: seinnyessit e gludyf ym penn mameu (London: Faber and Faber, 1937) — an amazing work, concluding with an account of the assault on Mametz Wood by someone who was there.

Michael Renshaw, Mametz Wood, Battleground Europe (Barnsley: Pen & Sword Military, 1999) — an account that doesn’t forget the efforts of the 17th Division.

Update July 10th, 2023:

I thought that it would be worth trying to find David Jones Davies in the 1921 Census. The census return recorded that he was forty-four years old, a photographer working on his own account. He was living at Talsarn House, Lampeter, which was the household of his sister Mary Anne Evans (aged 46, an elementary school teacher, working for the Cardigan Educational Authority at Silian Church of England School). The household also included Mary Anne’s daughters – Elizabeth Myfanwy Evans (aged 16, a student elementary school teacher, also working for the Cardiganshire Educational Authority, but at the Council School at Gartheli) and Margaret Dorothy Evans (aged 14) – and her and David Jones Davies’s father (Benjamin Davies, aged 76, a retired coal merchant).

Authuille: The grave marker of Private W. G. Ricketts in Thiepval Anglo-French Cemetery (Somme)

Authuille: The grave marker of Private W. G. Ricketts in Thiepval Anglo-French Cemetery (Somme)

Last October, I spent a couple of days walking around the 1916 Somme battlefields east of the town of Albert in France. My final stop, before heading back to the Gare d’Albert and my train to Lille Flandres, was the Thiepval Memorial to the Missing of the Somme. I didn’t have very much time there, but I did manage to locate the name of Private Alfred George Webber of the 2nd Battalion, Devonshire Regiment on the memorial and visit a few of the graves in the adjacent Thiepval Anglo-French Cemetery.

Paul Reed in his book on Walking the Somme has explained that this cemetery contains “an equal number of British and French burials to symbolise the joint effort of the Anglo-French forces on the Somme in 1916” [1]. The decision to incorporate a cemetery into the Thiepval Memorial complex came relatively late, the decision to have a small mixed cemetery being made in the winter of 1931-32, “to represent the loss of both the French and Commonwealth nations” [2]. Reed has noted how this timing influenced the types of burials contained in the cemetery [3]:

The vast majority of the 300 Tommies and 300 Poilus in this cemetery are unknowns,; the British burials were all isolated graves found in the early 1930s. They come from a wide area on the Somme battlefield, and several from as far away as Loos and Arras. The majority of the  French burials are those who died around Thiepval in 1914/15.

One of the grave markers that I particularly wanted to find in the cemetery was that of 19558 Private Walter George Ricketts of the 6th Battalion, Dorsetshire Regiment, who came from Winterborne Stickland in Dorset. Private Ricketts was killed in action on the 24th May 1917, aged 22.

CWGC Concentration of Graves record. Source: CWGC.

CWGC Concentration of Graves record. Source: CWGC.

The Concentration of Graves Burial Return form (which seems to be dated the 29th January 1932) states that the body of Private Ricketts had been exhumed from Map Reference 51b.I.7.c.05.50 [4].

CWGC Concentration of Graves record. Source: CWGC.

CWGC Concentration of Graves record. Source: CWGC.

That reference indicates a location many miles north of Thiepval, in fact in the valley of the River Scarpe east of Arras. The exact place on the map can be found a little to the west of the Gavrelle road (rue de Gavrelle) as it runs north of Roeux station, which is now very close to the sprawling junction of the autoroute du Nord (A1) and the autoroute des Anglais (A26). In May 1917, running parallel to the rue de Gavrelle, there were several lines of trenches, leading up to Greenland Hill to the east.

Roeux:

The capture of Roeux and its chemical works had been an objective for the British from the beginning of the Arras offensive on the 9th April 1917. In his book on the Battle of Arras, Jonathan Nicholls has described the village as a natural fortress that had been turned by the Germans into a formidable defensive position [5]:

High on the wooded northern bank of  the River Scarpe, standing over a system of deep caves. Roeux was protected on its southern flank by the river and its lakes and marshes, while to the north the embankment of the Arras-Douai railway provided a man-made barrier. But the Germans were not content to rely on natural defences alone. Cleverly concealed amidst the outbuildings of an old château, they had built one of the largest concrete mebus (blockhouses) yet seen on the Western Front. Moreover, near the railway station, a derelict dye factory had been fortified and connected to the château blockhouse by tunnels. The jumble of old vathouses, engine sheds and chimney stacks — the Chemical Works, as it was known, soon became all too familiar to British soldiers — overlooked an open plain to the west; evidently fearing attack from this direction the defenders further dug deep trenches in two small copses, Roeux Wood and Mount Pleasant Wood. And on Balloon Hill (Greenland Hill to the British) they raised several observation balloons.

Gerald Gliddon described Roeux as, “probably the most heavily defended German village to feature in the battle of Arras in 1917” [6].

The 4th Division had first attacked the village on the 11th April 1917, but Roeux remained in German hands until the 11th May, when a attack by the 4th Division (again), supported by 152nd Brigade from the 51st (Highland) Division and two companies of the 6th Dorsets (50th Brigade, 17th Division), finally managed to take the village and chemical works [7].

For the attack on the 11th May 1917, the companies from the 6th Dorsets were attached to the 11th Brigade on the left, and they managed to successfully capture a redoubt on the north side of the Douai-Arras railway. At the château, the 1st Hampshires discovered the concrete blockhouse that had caused so much trouble to the attacking forces over previous weeks [8]. A second attack was launched the following morning by the 11th Brigade (4th Division), with the 17th Division on its left. The British Official History noted that the 50th Brigade “was successful on it right, but not wholly so on its left” [9]:

The left reached its first objective, but was driven out within half an hour. Further efforts by the 50th Brigade broke down., and the net result was an advance on a front of 500 yards north of the Fampoux-Plouvain road, on the right to a trench (Cupid Trench) which was a continuation of that captured by the 4th Division and 700 yards east of the station cross-roads.

Over the following few days, the 51st and 17th Divisions held the front line, resisting several German counter attacks. Private Walter George Ricketts was killed-in-action when the 6th Dorsets were in the line between the 22-26 May 1917.

The 6th Battalion, Dorsetshire Regiment:

The 6th (Service) Battalion of the Dorsetshire Regiment was formed at Dorchester in September 1914 and attached to the 17th (Northern) Division for training in the area around Wareham and Bovington. In March 1915, the battalion was transferred to 50th Infantry Brigade in the same division [10]. The other infantry battalions in 50th Brigade were the 10th West Yorkshire Regiment, the 7th East Yorkshire Regiment, and the 7th Yorkshire Regiment (7th Green Howards) [11]. The 17th Division moved to France in July 1915, the 6th Dorsets themselves landing at Boulogne on the 14 July 1915 [12]. 

The 50th Brigade on the Somme: the 1st July 1916:

After their arrival in France and Belgium, the 6th Dorsets spent some months in the Ypres sector, before moving down to the Somme in March 1916. On the 1st July 1916, the 17th Division were part of General Henry Horne’s XV Corps, facing the villages of Fricourt and Mametz. The plan of attack was for the 21st and 7th Divisions to attack both sides of the Fricourt salient at Zero hour, while the 50th Brigade (from 17th Division) would follow up with a frontal attack on the village itself in the afternoon. The 10th West Yorks attacked to the right of the 21st Division in the morning of the 1st July, while the two other Yorkshire battalions in the 50th Brigade attacked at 2.30 pm. All suffered horrendous casualties. The regimental history of the Dorsets tries to give an indication of the scale of the losses [13]:

The casualties in the three Yorkshire battalions in the space of a few hours were one-eighth of the total casualties of the Brigade for the whole war. The West Yorks alone lost seven hundred and thirty-three officers and men.

Many casualties from the 10th West Yorks are now buried in Fricourt New Military Cemetery. These include their commanding officer, Lieutenant Colonel Arthur Dickson, who had been attached from the 1st Battalion, South Lancashire Regiment (Grave Ref: C. 12.). The CWGC records that the cemetery is mostly made up of four mass graves, noting that it was first established by “the 10th West Yorkshire Regiment after the capture of Fricourt in July 1916” [14]. The cemetery contains 210 burials, of which 26 are unidentified. 159 of the 210 burials belong to the 10th West Yorks, another 38 to the 7th East Yorks — all dating from the 1st July 1916. 

Ieper: The grave markers of Major J. L. Knott and Captain H. B. Knott in Ypres Reservoir Cemetery (West-Vlaanderen)

Ieper: The grave markers of Major J. L. Knott and Captain H. B. Knott in Ypres Reservoir Cemetery (West-Vlaanderen)

Unusually, one officer of the 10th West Yorks killed in action in this sector on the 1st July is buried in a completely different part of the Western Front. Major James Leadbitter Knott, DSO was reburied next to his younger brother, Captain Henry Basil Knott of the 9th Battalion, Northumberland Fusiliers, in Ypres Reservoir Cemetery in Ieper (Grave Refs: V. B. 15-16.). Both of their epitaphs read: ” Devoted in life, in death not divided.” After the war, their father, Sir James Knott, paid for the construction of the tower of St. George’s Memorial Church, Ypres; a family trust later also donated the clock bells in the brothers’ memory [15].

Bécordel-Bécourt and Fricourt. Detail from Trench Map 62D.NE

Bécordel-Bécourt and Fricourt. Detail from Trench Map 62D.NE; Scale: 1:20000; Edition: 2B; Published: 1916; Trenches corrected to 25 April 1916: https://maps.nls.uk/view/101465323 (Bonté Redoubt was near the number eight.) Reproduced with the permission of the National Library of Scotland (Creative Commons CC BY-NC-SA 4.0)

The 6th Dorsets remained in reserve throughout the 1st July. In the morning, at least two of their companies moved up from Méaulte to the Bonté Redoubt, east of Bécordel-Bécourt. The battalion was due to take up the attack at 5.30 pm [16], but by that point the failure of the 50th Brigade assault was clear for all to see.

The 6th Dorsets at the Battle of Arras:

After a long stint on the Somme, the 17th Division moved to the Arras sector in March 1917. The Battle of Arras began on Easter Monday, the 9th April 1917. While the Canadian Corps attacked the high ground of Vimy Ridge further north, the British 12th and 3rd Divisions attacked east and south of Arras, towards Feuchy and Tilloy-lès-Mofflaines. The 17th Division were not involved in this initial attack, but the 50th Brigade (including the 6th Dorsets) relieved the 44th Brigade (part of 15th (Scottish) Division) in trenches south of the Scarpe on the night of the 11th/12th April.

Orange Hil and Lone Copse. Detail from Trench Map 51B.NW

Orange Hil and Lone Copse. Detail from Trench Map 51B.NW; Scale: 1:20000; Edition: 7A; Published: June 1917; Trenches corrected to 25 May 1917: https://maps.nls.uk/view/101465065 Reproduced with the permission of the National Library of Scotland (Creative Commons CC BY-NC-SA 4.0)

The 6th Dorsets then took part in a badly planned and executed attack near Lone Copse late on the 12th April, suffering heavy losses [17]. After a short period of rest, the battalion moved into support lines on Orange Hill late on the 22nd April, in preparation for another attack in the same area. The regimental history of the Dorsets describes that attack as “disappointing.” Casualties were again heavy — six officers and 104 other ranks were killed, wounded or missing [18].

After another period of rest, the 6th Dorsets went back into the line on the night of the 10th/11th May, this time north of the Scarpe near Roeux. The village had withheld capture for over a month. On the 11th May, two Companies of the battalion were lent to the 11th Brigade (part of 4th Division) for an attack on the chemical works and station at Roeux. This attack was far more successful than the earlier attacks [19]:

The whole operation was over by 4.30 a.m. on the 12th, an admirable performance and by its complete success a welcome fillip.

Charlie, Curly, and Cupid Trenches. Detail from Trench Map 51B.NW

Charlie, Curly, and Cupid Trenches. Detail from Trench Map 51B.NW; Scale: 1:20000; Edition: 7A; Published: June 1917: Trenches corrected to 25 May 1917: https://maps.nls.uk/view/101465065 Reproduced with the permission of the National Library of Scotland (Creative Commons CC BY-NC-SA 4.0)

The other two Companies of the 6th Battalion were to take part in another attack the following morning. The context has been sketched by Gliddon [20]:

On the 12th [May], the 52nd Brigade of the 17th (Northern) Division attacked the trench line known on the maps as ‘Charlie’; on the right the 50th Brigade had as its objectives the the lines known as Curly and Cupid, to the north of the Arras-Douai railway. The 7th Green Howards were on the right of the 50th Brigade attack. The day dawned bright and sunny, and any chance of making a surprise attack was spoilt by observant German aeroplanes making low flights over the British front.

The British artillery opened fire and was quickly answered by the German guns; a dense fog of smoke and dust settled over the lines of the British advance. The attacks against Charlie and Curly Trenches were a failure but the 7th Green Howards, close to the railway line, managed to enter Cupid Trench; once there they attempted to bomb their way to the left into Curly Trench. It was at this point that [Private Tom] Dresser won his VC. Overall, the fighting had been inconclusive and after the wounded from both sides were recovered, the Green Howards established a post at around 10.00 p.m. at the junction of Cupid and Curly Trenches. There was to be little progress by the British on this front for the next few weeks.

The 6th Dorsets relieved the 7th Yorkshires on the night of the 13th/14th May, and they remained there until the 15th. A strong German counter attack came as the battalion’s relief was underway, but the 6th Dorsets and the 8th South Staffords (in 51st Brigade) managed to hold the line [21].

Clarke Trench. Rotated detail from Trench Map 51B.NW

Clarke Trench. Rotated detail from Trench Map 51B.NW; Scale: 1:20000; Edition: 7A; Published: June 1917: Trenches corrected to 25 May 1917: https://maps.nls.uk/view/101465065 Reproduced with the permission of the National Library of Scotland (Creative Commons CC BY-NC-SA 4.0)

The 6th Dorsets were then restructured, with ‘A’ and ‘D’ Companies forming ‘Y’ Company, and ‘B’ and ‘C’ forming ‘Z’ Company. The battalion was back in the line again from the 22nd to the 26th May 1917. It seems that it was during this spell that Private Ricketts was killed-in-action. He was not the only casualty on the 24th May [22]:

On the 24th a bursting shell killed Major [Albert Ernest] Barton [the acting C.O.] as he was walking round the front line at mid-day. He had commanded the Battalion with great distinction during Lieut.-Colonel Moulton-Barrett’s absence through ill-health. The Adjutant, Lieut. A. H. Mitchell, was also wounded at the same time.

Major Barton was buried in Faubourg d’Amiens Cemetery in Arras (Grave Reference V. F. 23.). By contrast, it seems that Private Ricketts’s burial place was unknown (or lost), but presumably was then rediscovered some time after the end of the war.

British Officer's grave near Roeux, October 27, 1917, by Geoffrey K. Rose

British Officer’s grave near Roeux, October 27, 1917, by Geoffrey K. Rose © IWM (Art.IWM ART 4911). Source: Imperial War Museums: https://www.iwm.org.uk/collections/ item/object/23240

Walter George Ricketts:

Walter George Ricketts was born at Quarelston, Winterborne Stickland (Dorset) in the fourth quarter of 1895, the son of William James Ricketts and Jane Ricketts (née Woolridge). He also had a twin brother, Ernest William Ricketts. At the time of the 1901 Census, Walter Geo. and Ernest Wm. Ricketts were five years old and living with their parents and three brothers at Quarelston Farm, Stickland. Walter’s father, William Ricketts, was forty years old and working as an agricultural labourer, while his mother was thirty-nine. Walter and Ernest’s three brothers were: Arthur Henry (aged 9), Reuben James (7), and Harry Edgar (2).

By the time of the 1911 Census, Walter and Ernest Ricketts were fifteen-years old and still living with the family at Stickland, although the census return does not specify exactly where. Walter was working as a butcher’s errand boy, while Ernest was a farm carter boy. Jane Ricketts, Walter and Ernest’s mother, had died in 1903, aged 41, so William Ricketts was a widower; in 1911 he was fifty years old and still working as a farm labourer. Walter and Ernest’s three brothers were still resident at the family home: Arthur (aged 19, a farm carter), Reuben (17, a farm carter boy),  and Harry (12, still at school). The census return specified that all five sons had been born at Quarelston, which is on the road south of Stickland leading to Winterborne Clenston.

Winterborne Stickland: Church of St Mary (Dorset)

Winterborne Stickland: Church of St Mary (Dorset)

Walter G. Ricketts married Eva Vater in the Blandford registration district in the first quarter of 1917. Eva Beatrice Vater had been born at Little Bathampton, near Steeple Langford (Wiltshire) in the second quarter of 1893. She was the daughter of William and Ellen Vater, who had both been born in Dorset (respectively at Ibberton and Ansty), but whose children had been born in various places across Dorset and Wiltshire (Hilton, Buckland Newton, Burcombe, Little Bathampton, and Winterborne Whitechurch). At the time of the 1901 Census, the family were living at Winterborne Whitechurch, where William Vater was working as a shepherd on farm. By the time of the 1911 Census, Eva was 18 years old and working as a kitchen maid in the household of the sisters Anna Lilian Pike and Katherine Lewis Pike at East Down House, Winterborne Whitechurch (the sisters were the daughters of William Joseph Pike, one of the Pike Brothers that built a narrow-gauge railway linking the Pike’s ball clay pits at Furzebrook to Poole Harbour) . Eva Beatrice Ricketts died on the 1 February 1977, and is buried in Blandford St Mary churchyard.

Winterborne Stickland: War Memorial (Dorset)

Winterborne Stickland: War Memorial (Dorset)

Not that much is known about the service history of Private Walter George Ricketts. The Soldiers Died in the Great War database (available via Findmypast) includes the information that he enlisted at Dorchester and was killed in action, but it doesn’t really provide any other information that is not in his CWGC record. The name of Walter Ricketts features on the war memorial cross at Winterborne Stickland, as well as on a framed memorial inside the Church of St. Mary.

I have not been able to discover whether any of Walter Rickett’s brothers also served during the war. Walter’s twin briefly featured in the Western Gazette of the 29 September 1916 (p. 7) in a report from the Dorset Tribunal, which was sitting at Blandford [23]. The appeal of Ernest Ricketts, a cowman from Stickland, was dismissed from the 30th September. It seems likely, therefore, that Ernest did serve during the war in some capacity.

The family seem to have mostly remained in the Winterborne valley. In the 1939 Register (available via Findmypast), William Ricketts (Walter’s father) and Ernest Ricketts (his twin) were recorded living at 4, The Bungalow Clenston Road. Both were described as agricultural labourers, although William was by then retired. The death of Ernest William Ricketts was registered at Poole (district) in the second quarter of 1981.

References:

[1] Paul Reed, Walking the Somme: a walker’s guide to the 1916 Somme battlefields, 2nd ed. (Barnsley: Pen & Sword Military, 2011), p. 83.

[2] CWGC, Thiepval Anglo-French Cemetery:
https://www.cwgc.org/find-a-cemetery/cemetery/67300/thiepval-anglo-french-cemetery/

[3] Reed, op cit., p. 83.

[4] CWGC, Private Walter George Ricketts:
https://www.cwgc.org/find-war-dead/casualty/2001141/ricketts,-walter-george/

[5] Jonathan Nicholls, Cheerful sacrifice: the Battle of Arras 1917 (Barnsley: Pen & Sword Military, 2005), pp. 22-23.

[6] Gerald Gliddon, VCs of the First World War: Arras and Messines 1917 (Stroud: History Press, 2012), p. 185.

[7] Paul Reed, Walking Arras: a guide to the 1917 Arras battlefields (Barnsley: Pen & Sword Military, 2007), p. 194.

[8] Cyril Falls, Military operations: France and Belgium, 1917, Vol. 1, History of the Great War based on official documents (London: Macmillan, 1940), p. 512.

[9] Ibid., pp. 512-513.

[10] The Long, Long Trail, Dorsetshire Regiment:
https://www.longlongtrail.co.uk/army/regiments-and-corps/the-british-infantry-regiments-of-1914-1918/dorsetshire-regiment/

[11] The Long, Long Trail, 17th (Northern) Division:
https://www.longlongtrail.co.uk/army/order-of-battle-of-divisions/17th-northern-division/

[12] G. O’Hanlon, “History of the 6th Battalion, The Dorset Regiment, 1914-1919,” in: History of the Dorsetshire Regiment, 1914-1919, Part III, The Service Battalions (Dorchester: Henry Ling; London: Simpkin Marshall, 1932), p. 108

[13] Ibid., p. 118

[14] CWGC, Fricourt New Military Cemetery, Somme, France:
https://www.cwgc.org/find-a-cemetery/cemetery/60404/fricourt-new-military-cemetery/

[15] Sir James Knott Trust, The Battle of the Somme:
http://knott-trust.co.uk/knott-family-history/battle-of-the-somme

[16] O’Hanlon, op. cit., p. 119.

[17] Ibid., p. 130.

[18] Ibid, pp. 131-132.

[19] Ibid., p. 133.

[20] Gliddon, op. cit., pp. 185-186.

[21] O’Hanlon, op. cit., p. 134.

[22] Ibid., p. 134.

[23] Western Gazette, 29 September 1916, p. 7; via British Newspaper Archive.

Posted by: michaeldaybath | May 8, 2020

Bellringing for VE Day in 1945

Label from 78 rpm record: "His Master's Voice" B.9417

“His Master’s Voice” B.9417

On the 75th Anniversary of Victory in Europe day, I thought that it might be appropriate to share the following link from Soundcloud, derived from a 78 rpm HMV recording (B.9417) of bells rung on VE Day in 1945 for broadcast to the world. The recording includes the bells of: Westminster Abbey, York Minster, Coventry Cathedral (being chimed), Bath Abbey, and St Mary’s Church, Puddletown:

Shipton Gorge: Church of St Martin (Dorset)

Shipton Gorge: Church of St Martin (Dorset); via Flickr: https://www.flickr.com/photos/13706945@N00/17101443836

3/6614 Private Alexander William Sanders of the 1st Battalion, Dorsetshire Regiment died on the 2nd May 1915, aged 21, the result of a gas attack at Hill 60, near Ypres (Ieper). Will Sanders was also a bellringer at the Church of St Martin, Shipton Gorge (Dorset).

A framed memorial in the Church of St Martin provides some more detail on his life and military service:

Private Alexander William Sanders, 1st Battalion Dorsetshire Regiment
Alexander William Sanders (known as Will) lived at Vine Cottage in Cuckoo Lane, Shipton Gorge with his twin brother Harry. After the declaration of war, Will enlisted as a volunteer in the Dorsetshire Regiment. He was a keen bellringer here at St Martin’s and joined in the ringing on the last Sunday he was in England before being sent overseas in December 1914 to Ypres in Belgium. He endured several months of trench warfare but died at Hill 60 on 2 May 1915, aged 21, as the result of a gas attack mounted by the Germans. Will’s name appears on the Menin Gate at Ypres, a memorial to over 54,000 officers and men who died in the Ypres Salient in World War I and have no known grave.

Alexander William Sanders, known as Will, was born at Shipton Gorge on the 11th December 1894, the son of William Sanders and Sarah Sanders (née Matthews). He had a twin brother, Joseph Henry Sanders, who was apparently known as Harry. Sadly, their mother died either in childbirth or very shortly afterwards, and was buried at Shipton on the 14th December 1894.

At the time of the 1901 Census, the widowed William Sanders was still living at Shipton Gorge. He was fifty-seven years old and working as an agricultural labourer. At that time, both Alexander W. Sanders and Joseph H. Sanders were six-years old and living at Shipton with their aunt, Sabrina Matthews (a fifty-year-old net braider). By the time of the 1901 Census, William Alexander and Henry Joseph Sanders were both sixteen years old and living at Chapel Street, Shipton. They were now part of the household of their uncle and aunt, Henry Alfred Matthews and Alice Eliza Jane Matthews. At that time, the twins were both working as twine manufacturers. Their father was living elsewhere at Shipton (Brook Street), and working as a farm labourer.

The name of Private A. W. Sanders on panel 37 of the Ypres (Menin Gate) Memorial to the Missing (West-Vlaanderen)

The name of Private A. W. Sanders on panel 37 of the Ypres (Menin Gate) Memorial to the Missing (West-Vlaanderen)

William Sanders, Will’s father, had been born at London in around 1850. Sarah Julia Matthews, his mother, had been born at Shipton Gorge in the third quarter of 1863, the daughter of Henry and Sarah Matthews. Sarah was baptised at Shipton Gorge on the 29th November 1863. It has not been that easy to track down exactly when William and Sarah were married. The closest match in the transcript from England & Wales Marriages 1837-2005 (available from Findmypast) records that a Sarah Julia Matthews married a William Saunders at Weymouth registration district in the first quarter of 1891. As we have already noted, Sarah Sanders died in 1894, aged 31; William Sanders died in 1923, aged 75.

Joseph Henry Sanders, Royal Marine Light Infantry:

Will’s twin brother Harry served with the Royal Marines. His one-page service record (ADM 159/190/16489, Royal Marines: Registers of Service; available via Findmypast) provides quite a lot of information about him. It gives his place and date of birth (Shipton Gorge, 11th December 1894), his trade (mason’s labourer), and his religion (Wesleyan). It confirms that his father was William Sanders of Brook Street, Shipton. 16489 Harry enlisted in the Royal Marines at Exeter on the 19th September 1912, when he was seventeen years old. Private Joseph Henry Sanders was initially based at the depot at Deal, but he joined the Portsmouth Division in July 1913. Between January 1914 and September 1917, Private Sanders served on HMS Zealandia, before returning to the Portsmouth Division. At the time that Private Sanders was serving on the Zealandia, she formed part of the 3rd Battle Squadron, which was initially based at Rosyth as part of the Grand Fleet and then, after a brief spell in the Mediterranean operating in support of the Dardanelles campaign, at Sheerness as part of the Nore Command (undergoing a refit at Chatham Dockyard between December 1916 and June 1917 [9]). In November 1917, Private Sanders joined the 1st (Reserve) RMLI Battalion, and then served in France with the 1st Royal Marine Battalion (part of the 63rd (Royal Naval) Division) from the 9th April to the 19th October 1918. He was wounded on the 22nd August 1918 (gun-shot wound, left leg). The Western Gazette of the 13th September 1918 reported [12]:

SHIPTON GORGE.
WOUNDED PROGRESSING. – Lance-Corporal Sanders, R.M.L.I., who was wounded in the leg on August 22nd, and is now at the Convalescent Rest Camp in France, is making good progress. His cousin, Private Fred Swaffield, of the Dorsets, has also been wounded in the right hand. He has been fortunate enough to get a transfer to England.

Private Sanders rejoined the Portsmouth Division on the 20th October 1918, and after the war continued to serve with the Royal Marines. He was discharged on the 24th June 1922. At some point he married a woman named Florence, possibly the Florence Gale that married a Joseph H. Sanders at Beaminster registration district in the second quarter of 1919. The couple afterwards lived at Loders (Dorset). Joseph Henry Sanders died on the 23rd September 1969, aged 74; Florence on the 18th September 1978, aged 84. Both are buried in St Mary’s Churchyard at Loders.

HMS New Zealand. Source: Library of Congress Prints and Photographs Division (Bain News Service, ggbain 16722):

HMS New Zealand. Source: Library of Congress Prints and Photographs Division (Bain News Service, ggbain 16722): http://loc.gov/pictures/resource/ggbain.16722/

The 1st Dorsetshire Regiment at Hill 60:

On the 1st May 1915, the 1st Battalion, Dorsetshire Regiment were in the front line at “Hill 60,” near Ypres (Ieper). The hill, which provided good observation over Ypres and its surrounding villages, had been captured by the Germans towards the end of 1914, but the crest had been recaptured in mid-April by 13th Infantry Brigade. Earlier in April, the Germans had used poison gas (chlorine) for the first time on the Western Front in an attempt to break through on the Gravenstafel Ridge. On the evening of the 1st May, they 

Hill 60. Detail from Trench Map 28.NW

Hill 60. Detail from Trench Map 28.NW; scale: 1:20,000; edition 1; 1914. Source: McMaster University, Chasseaud Collection (Research Collections; Fonds: WW1 Trench Maps: France; Box number: PC04; envelope_number: 90; license: Creative Commons CC BY-NC 2.5 CA: http://digitalarchive.mcmaster.ca/islandora/object/macrepo%3A70097

The first German attack was a failure, dismissed by a single paragraph Hussey and Inman’s history’s of The Fifth Division in the Great War [2]:

On 1st May gas clouds were launched by the Germans against the Dorsets, who were holding the position; this battalion suffered heavily from the gas, losing some 300 men, but gallantly maintained their line.

The 1st Dorsets certainly did suffer heavily. In his diary, Company Sergeant Major Ernest Shephard described the aftermath of the attack on the 2nd May as “the bitterest Sunday I have known or ever wish to know” [3].

Map of Hill 60

Map of Hill 60. Source: A. H. Hussey and D. S. Inman, The Fifth Division in the Great War (London: Nisbet, 1921); via British Library: http://access.bl.uk/item/viewer/ark:/81055/vdc_100022533739.0x000002

The account given in the War Diary of the 1st Dorsets (WO 95/1572/2) is rather matter of fact [4]:

YPRES. 30th April 1915. Bn was disposed in dugouts in close support to [1st] Devons who were holding Hill 60 and trenches on either flank of it.
1.15 am Relief of Camerons [2nd Queen’s Own Cameron Highlanders, from 27th Division] completed
Bn remained in support throughout day.
All quiet except for shelling of railway cutting at intervals.
Casualties 3 wounded

YPRES. HILL 60. 1st May 1915. Bn remained in trenches on Hill 60 – with Devons in close support.
7 pm Enemy commenced bombardment of supporting area of Hill 60.
7.15 pm Enemy turned on asphyxiating gas from 3 nozzles in front of 38 trench and from 2 in front of 43 to 45 trenches. And also probably from others in front of 60.
The direction of the wind saved the garrison of 38, but the garrisons of 60, 43, 45 and 46 got the full benefit of the gas.
The situation became critical but was saved by the prompt action of Captain Batten, senior officer on the spot, and by the equally prompt despatch of reinforcements from O.C. 1st Devons.
The telephones were not working well, but on receipt of a message that an attack on 60 was taking place, Major Cowie Cmndg. Dorsets went into trenches, and took up his position on Hill 60 as being the key of the position. Note: the trench on Hill 60 is known as “60” trench and is referred to as 60.
Trenches 43, 45, & 46 were suffering severely from the gas The enemy in addition to using gas and shelling supporting area heavily with different types of guns, opened heavy rifle and machine gun fire on Hill 60 and endeavoured to bomb the flanks of this trench.
Beyond sending some bomb throwers up a communications trench the enemy apparently made no attempt to cross the open.
10 pm. The situation now became practically normal and the firing had much abated.
Casualties: one killed, one wounded.
Killed by gas poisoning: Lieut C. G. Butcher, 52 other ranks.
Admitted to Fd Ambulance suffering from gas poisoning: Capt. A. E. Hawkins, 2/Lt J. H. C. Roberts (since died), 2/Lt J. Hodgson, 2/Lt J. Sampson, 3rd Dorsets, 2/Lt J. R. Weston-Stevens, 3rd Dorsets, and 200 other ranks.
Missing: 32 other ranks.

Another account of the attack was published in the Western Gazette of the 21st May 1915. This was based on a letter sent by Second Lieutenant Henry Morton Mansel-Pleydell to his mother, [5]:

BROADSTONE.
DORSETS “GASSED” AT HILL 60.
LIEUTENANT H. G. MANSEL-PLEYDELL’S TERRIBLE STORY.
Mrs. Mansel-Pleydell, of Croft House, Botley, has received the following letter from her son, Lieutenant H. G. Mansel-Pleydell, of the 1st Dorsets (who is reported wounded), giving an account of the fight at Hill 60 in which the Dorsets suffered so severely, and the terrible effects of the German “gassing” methods:–
“I expect that you have heard how the Germans on this “Hill 60” played us the dirtiest trick that any British Regiment has yet had to put up with. The Canadians did not have it like we did; they had it from 400 to 500 yards away, whereas our trenches are at the most 40 yards from the Germans. I saw more of the affair than anyone else, so I can tell you exactly what happened. At about seven-o’clock I came out of my dug-out and saw a hose sticking over the German parapet which was just starting to spout out a thick yellow cloud with a tinge of green in it. The gas came out with a hiss that you could hear quite plainly. I at once shouted to my men to put on respirators (bits of flannel); then I got mine and went and warned my captain, who did not know yet. Then the Huns began a terrible bombardment, not so much at us, but at our supports and our dressing station. Now either they had miscalculated the direction of the wind or else it had changed, for the gas did not come directly towards us, but went slantwise; then, our trench being so close, the gas went into part of the German trenches as well as ours. They bolted from theirs when they got a whiff of the filthy stuff. A few of our men staggered away down the hill, some got into a wood behind it and died there, as the ground was low and the gas followed them. Others only got so far as the mine head and communication trenches. The Company in support on my left moved up into the firing line, as did also half of my platoon, consequently I was left with only a few men to do all of the rescue work. My men were splendid; they all came with me into the gas except the ones I ordered to stay behind, and we must have saved scores of lives. The men in most cases were lying insensible in the bottom of the trenches, and quite a number were in the mine head, which was the worst possible place. The best place after the first rush of gas was the firing line, being the highest point. I was the only officer not in the firing line. I can’t understand how it was I was not knocked out; it must have been the work I had to do. I was simply mad with rage seeing strong men drop to the ground and die in this way. They were in agonies. I had to argue with many of them as to whether they were dead or not. Why we got it so hot was because of the closeness of our trenches to the Germans; and the affair does away with the idea that it is not deadly. I saw two men staggering over a field in our rear last night, and when I went and looked for them this morning they were both dead. I am absolutely sickened. Clean killing is at least comprehensible; but this murder by slow agony absolutely knocks me. The whole civilised world ought to rise up and exterminate those swine across the hill!”

Zillebeke: Hill 60 (West-Vlaanderen)

Zillebeke: Remains of a bunker at Hill 60 in 2007 (West-Vlaanderen); via Flickr: https://www.flickr.com/photos/13706945@N00/9313981391

References:

[1] Western Gazette, 13th September 1918; via British Newspaper Archive.

[2] A. H. Hussey and D. S. Inman, The Fifth Division in the Great War (London: Nisbet & Co, 1921; Naval & Military Press reprint), p. 60.

[3] Ernest Shephard, From Hill 60 to the Somme, ed. Bruce Rossor (Ramsbury: Crowood Press, 1987), p. 40.

[4] WO 95/1572/2, 1st Battalion, Dorsetshire Regiment War Diary, The National Archives, Kew.

[5] Western Gazette, 21st May 1915; via British Newspaper Archive.

Notes:

This post has been adapted from a post on Hill 60 first published on the 1 May 2019.

Genealogical information from Findmypast: http://www.findmypast.co.uk

Posted by: michaeldaybath | December 17, 2019

Captain Philip Ernest Viney, 2nd Battalion, Leicestershire Regiment

IWM HU 125486: Captain Philip Ernest Viney, the second son of Dr. J. Ernest Viney and Mrs. B. L. Viney, of Cintra, Swanage, Dorset

IWM HU 125486: Captain Philip Ernest Viney, the second son of Dr. J. Ernest Viney and Mrs. B. L. Viney, of Cintra, Swanage, Dorset. Copyright: © IWM. Original Source: http://www.iwm.org.uk/collections/item/object/205390161

In the Church of St Mary at Swanage (Dorset) is a memorial tablet commemorating Captain Philip Ernest Viney of the Leicestershire Regiment, who died at Bailleul on the 17th December 1914, aged 26.

Swanage: Memorial for Philip Ernest Viney in the Church of St Mary (Dorset)

Swanage: Memorial for Philip Ernest Viney in the Church of St Mary (Dorset); via Flickr: https://www.flickr.com/photos/13706945@N00/22261906909

The birth of Philip Ernest Viney was registered at Chertsey (Surrey) in the second quarter of 1888. He was the son of Dr Josiah Ernest Viney, a general practitioner, and Bessie Louisa Viney (née Creasy). The 1891 Census recorded the two-year-old Philip Ernest living at Harcourts, London Street, Chertsey with his parents, five siblings, a visitor, and nine servants. At the time of the 1901 Census, Philip was attending Aldenham School, near Watford. Unusually, the 1911 Census recorded Lieutenant Viney as resident simultaneously on two continents! Philip Ernest Viney, a twenty-two-year-old “Officer Regular Forces” was recorded at the household of his parents at 80 London Street, Chertsey; but also with the 2nd Battalion, Leicestershire Regiment at Fort Saint George, Madras, India.

Captain Viney’s military career is briefly summarised in his entry in Bond Of Sacrifice: Officers Died In The Great War 1914-1916 [1]:

CAPTAIN PHILIP ERNEST VINEY, 1st BATTN, LEICESTERSHIRE REGIMENT, was the second son of Dr. and Mrs. Viney, Cintra, Swanage. He was born on the 23rd April, 1888, and educated at Summerfields, Oxford, and at Aldenham School, Elstree, joining the Leicestershire Regiment from the R.M.C., Sandhurst, in 1908. He became Lieutenant in May, 1910. On the 5th October, 1911, he was seconded for employment with the West African Frontier Force, and in 1914 was A.D.C. to Sir Hugh Clifford. On the outbreak of the war he rejoined the 1st Battalion Leicestershire Regiment as Captain, to which rank he had been promoted in August, and was sent to the front in September, 1914. His Battalion formed part of the 16th Brigade, VIth Division, which took part in the advance to the Aisne, the battle at that river, and the subsequent fighting. He was mortally wounded by a high-explosive shell on the afternoon of the 14th December while in the trenches. He was removed to the Field Hospital, Bailleul, and died on the evening of the 17th, deeply regretted by his brother officers and the men who served under him, to whom he had endeared himself by his cheerful unselfishness and thought for others. Captain Viney was a member of the Junior Army and Navy Club, and was unmarried.

Viney’s entry in De Ruvigny’s Roll of Honour is shorter, but contains more detail on his pre-war military career [2]:

VINEY, PHILIP ERNEST, Capt., 1st Battn. Leicestershire Regt., 2nd s. of Josiah Ernest Viney, of Cintra, Swanage, formerly of Harcourts, Chertsey, M.D., L.R.C.P. Lond., M.R.C.S. Eng.; b. 23 April, 1888; received his commission as 2nd Lieut. In the Leicesters, 8 Feb. 1908, and was promoted Lieut. 16 May, 1910, and Capt. 24 Aug. 1914. He served with the 1st Battn. At Shorncliffe, and later with the 2nd Battn. At Belgaum, and 5 Oct. 1911, was seconded for service with the Gold Coast Regt., and did good work in West Africa. He was A.D.C. to Sir Hugh Clifford, but on the outbreak of war came home and rejoined his regt., and died in the field hospital at Bailleul, 17 Dec. 1914, of wounds received in action; unm.

In 1914, the 1st Battalion, Leicestershire Regiment were part of the 16th Infantry Brigade in the 6th Division [3]. At the time of the outbreak of war, the 16th Brigade were based in Ireland (Fermoy, Co. Cork). The 1st Leicesters commenced mobilisation on the 4th August 1914, embarking at Queenstown (Cobh) on the 15th August for Holyhead [4]. From there, they moved by rail to Cambridge. The battalion then encamped at Coldham Common, absorbing reinforcements and carrying out training, before moving to Grantchester on the 27th August. On the 7th September, the battalion marched to Royston, where they would entrain for Southampton. On the 8th September, they would embark on H.M.T. Braemar Castle for France. They disembarked at St Nazaire on the 10th September 1914 (Captain Viney is not listed in the War Diary’s Roll of Officers that embarked for France, so it is likely that he joined them later on).

Thomas Owen Marden’s Short History of the 6th Division explains that the Division moved from St Nazaire to the area east of Paris [5]:

From St. Nazaire a long train journey, which the novelty of the experience robbed of its tediousness, took the Division a short distance east of Paris, where it concentrated in billets in the area Coulommiers – Morteerf – Marles – Chaume by the 12th September.

Shortly afterwards, the 6th Division took part in the Battle of the Aisne, the 16th Brigade remaining in that sector after the rest of the Division had moved north to Hazebrouck as part of the “race-to-the-sea” [6]

The 16th Infantry Brigade (Brig.-Gen. E. C. Ingouville-Williams) relieved the 7th and 9th Infantry Brigades to the north-east of Vailly on the 21st/22nd September, and remained in trenches until 12th October, sometime after the rest of the Division had gone north.

In mid-October, the 16th Brigade would move north to join the rest of the 6th Division in the area between Armentières and Lille [7]:

The 16th Infantry Brigade now rejoined the Division from the Aisne, and on the 18th October a reconnaissance in force was ordered, which was brilliantly carried out. The [1st Bn.] Buffs and Y. and L. [the 2nd Bn., York and Lancaster Regiment] on the right captured Radinghem without much opposition, and advanced across a small plateau, 300 yards in width, towards the woods in which stands the Chateau de Flandres. They here came under a heavy cross-fire of machine-guns and shrapnel, and were counter-attacked and driven back. The situation, however, was saved by Major Bayley’s company of the Y. and L., which bad worked round on the left and threatened the flank of the counter-attack, which thereon withdrew.

By the end of October, however, the 6th Division had lost Radinghem and the opposing lines had become largely static. Indeed, the broad lines of the trenches in this sector would remain in situ until the Spring of 1918. Marden explains what this meant for the 6th Division at the end of 1914 [8]:

Active fighting now died away on this front, but its place was taken by constant shelling and the deadly sniping which claimed so many victims at this time. The weather during November and December was truly appalling. All trenches were knee-deep and more in mud and water, and it is on record that the B.G.C., 19th Infantry Brigade, had his boots sucked off by the mud and went round trenches without them. Parapets would not stand and were so flimsy that many men were shot through them. But the weather eventually improved, material for revetment began to appear, and by the commencement of 1915 it was possible to move in the trenches in comparative safety.

The War Diary of the 16th Infantry Brigade (WO 95/1605/1) contains some general observations on the month of December 1914, including the tactical situation, the weather, and a few VIP visitors [9]:

1. From the tactical point of view there has been no change of any importance during the month, & and the only move made by the Brigade was the extension of its line eastwards up to the Railway at RUE du BOIS.
There appears to have been no change in the German dispositions in front of the Brigade, & the enemy’s efforts have been concentrated in improving the conditions of their trenches & in strengthening their wire entanglements.
2. The health and spirits of the men have remained excellent.
3. The heavy rains at end of month have done much damage to the trenches; more especially the communication trenches. Most of the fire trenches are still serviceable but bits of them have to be evacuated, owing to flooding.
4. Of what may be called the ‘social’ events of the month, the outstanding one of importance was the visit to the district of H.M. the King. During the month several distinguished visitors have come to see the Brigade trenches: these included the Rgt Hon Winston Churchill, Gen Kenna [Brigadier-General Paul Aloysius Kenna, VC, DSO], Gen Pilcher [Major-General Thomas Pilcher, later the commander of 17th Division], & 2 Generals from the New Army.

The Brigade Diary narrative for the 13th and 14th December reported that:

13. In compliance with instructions received from the Div the enemy’s barbed wire & trenches were bombarded for a short time, & heavy [illegible] took place at intervals. This was in connection with operations being carried on to the North.
14th. Same procedure as yesterday. Leicesters claim to have killed 3 Germans. These were seen running across the open, possibly as result of their trenches being flooded.

The King’s visit was also mentioned in the War Diary of the 1st Leicesters (WO 95/1611/2), as they had been inspected at Bac St Maur on the 2nd December. The diary shows that things on their front were generally quiet, recording the incident in which Captain Viney was mortally wounded [10]:

9. [Dec]. Wed. Changed billets and relieved BUFFS [1st Bn, the Buffs] in Bde Reserve at GRISPOT, 1 Coy to CULVERT FM at night, 1 Coy [illegible] support.
10. [Dec]. Quiet all day, same dispositions at night.
11. [Dec]. Quiet all day. Relieved W. YORKS [1st Bn, the West Yorkshire Regiment, part of 18th Brigade] on line RUE DE BOIS – GD FLAMANDERIE [i.e. Grand Flamenderie Ferme] at 7 pm. Left trenches flooded.
12. Dec. Quiet all day.
13. Dec [ditto]
14. Dec. D Coy Trenches bombarded at 3 pm. Capt Viney wounded & died, one man killed, one wounded.

According to a map in the Brigade War Diary, the line held by the 1st Leicesters in late 1914 ran due south from Rue de Bois, running parallel to the road leading towards Le Touquet. Much of this area is today a business park adjacent the A25 autoroute south of La Chapelle-d’Armentières.

Bailleul: The grave marker of Captain P. E. Viney in Bailleul Communal Cemetery (Nord)

Bailleul: The grave marker of Captain P. E. Viney in Bailleul Communal Cemetery (Nord); via Flickr: https://www.flickr.com/photos/13706945@N00/29438697170

Captain Viney is buried in Bailleul Communal Cemetery. In Swanage, he is also commemorated on the town’s war memorial as well as his personal memorial in the parish church.

References:

[1] Bond Of Sacrifice: Officers Died In The Great War 1914-1916; via Findmypast.

[2] De Ruvigny’s Roll of Honour; via Findmypast.

[3] The Long, Long Trail, 6th Division: https://www.longlongtrail.co.uk/army/order-of-battle-of-divisions/6th-division/

[4] WO 95/1611/2, 1st Battalion, Leicestershire Regiment War Diary, The National Archives, Kew.

[5] Thomas Owen Marden, A short history of the 6th Division Aug. 1914- March 1919 (London: Hugh Rees, 1920), p. 2; source: Internet Archive (via McMaster University): https://archive.org/details/hist6thdivision00marduoft/page/n13

[6] Ibid., p. 5: https://archive.org/details/hist6thdivision00marduoft/page/n15

[7] Ibid., p. 7: https://archive.org/details/hist6thdivision00marduoft/page/n17

[8] Ibid., p. 10: https://archive.org/details/hist6thdivision00marduoft/page/n21

[9] WO 95/1605/1, 16th Infantry Brigade War Diary, August – December 1914, The National Archives, Kew.

[10] WO 95/1611/2, 1st Battalion, Leicestershire Regiment War Diary, The National Archives, Kew.

Swanage: The name of Philip E. Viney on the town war memorial (Dorset)

Swanage: The name of Philip E. Viney on the town’s war memorial (Dorset); via Flickr: https://www.flickr.com/photos/13706945@N00/20569236624

Posted by: michaeldaybath | November 21, 2019

W. R. Lethaby’s “Memorials of the Fallen”

Title page of: The Hibbert Journal, Vol. XVII. Source: Internet Archive.

Title page of: The Hibbert Journal, Vol. XVII. Source: Internet Archive.

This is the text of an article on war memorials by the architect William Richard Lethaby (1857-1931) that was first published in The Hibbert Journal in 1919. It has been transcribed from the digital version made available by the Internet Archive from a copy in the University of Toronto Library (Call number: AAA-7174). I think that it makes for very interesting reading just over a century later.

I like the quiet way that Lethaby drops into his list the ideas of constructing a tunnel under the Irish Sea and the “re-building of the greater part of London.” While his call for more festivals, folk-schools, and eisteddfods may now seem rather niche, on some other topics Lethaby really does seem to be rather ahead of his time:

“How best to live with the least consumption is an aim which might safely be put before all people when a time comes for considering possible ideals in civilisation.”

From: The Hibbert Journal, Vol. XVII, No. 4, 1919, pp. 621-625; Internet Archive: https://archive.org/details/hibbertjournal17londuoft/page/620

MEMORIALS OF THE FALLEN: SERVICE OR SACRIFICE?

PROFESSOR W. R. LETHABY.

THE other day I was asked some questions on the cost of stained glass, as it was proposed to put a stained-glass window as a memorial in a village Wesleyan chapel. Another memorial has been mentioned to me: “the form decided on is the replica of some old village cross”; and yet another was to be a “runic cross.” The spirit of the inquiries was entirely wholesome and sweet, but it raised (as it will in the minds of crotchety people, “who never agree with what they don’t propose themselves”) a whole flight of preliminary questions and doubts as to ultimate possibilities. There are thousands of other cases where like questions are being asked without our being ready with considered replies. As usual it will be muddle. Again the generous people are untaught; again they are to sacrifice before an idol, or a whole row of idols.

Is it necessary, is it what the fallen themselves would have wished, that four and a half years of war and destruction shall be followed by a great outpouring of unproductive, and indeed futile, labour? Must a sort of murder be followed by a sort of suicide?

The problem as a whole in its great mass needs thinking over and out, and it would be well if the intelligent people of the universities, churches, and councils would consider it and take the responsibility of giving some teaching. Have the universities no national functions? It seems that millions of pounds are again to be wasted, and at such a time, in doing what we at most can least well do. Sometimes, indeed and alas! it may be spent in further vulgarising our ancient churches. Meanwhile Englishmen and heroes have too few houses to live in, arid too little vital and reproductive work to do. Why should it be unmonumental to provide some of these? Billiard-marking and diamond-cutting will not be enough to employ all who come back. Would it not be possible to direct some of the memorial streams to irrigating truly productive work? The best of all memorials would be those which helped speedily to organise the drifting masses of men who are returning to promises, and the unproductive monuments will not do that.

There is a feeling in the air that we ought to offer pure sacrifice for the fallen, and that there is some meanness in making memorials serve a useful purpose — that we must advertise our regret and compassion in lavish oblations of marble, brass, and glass. Then there are artists and firms all ready to provide the expected right things; but we must remember that these are the priests who live by the sacrifices, “thrusting their forks into the cauldron.” It is in the nature of things that artists should be chiefly interested in their own matters, and we can hardly expect a general theory from them unless they were called together in consultation, when they would be quite equal to giving disinterested advice. What we most need is some such calling together for discussion. If we could hold a meeting of the fallen and put some suggestions before them, is it the brass and glass that they would choose? We might readily find out with a high degree of probability by holding a meeting of the maimed and injured and asking them what their fallen comrades would have liked — this or that?

This idea of a stone sacrifice is very largely a modern development. Of course there have “always” been monumental memorials, but they were generally direct records, a writing on a wall, or they were tombs. Now, tombs in antiquity were not simply monuments to the dead; they were eternal houses for those who were in some ghostly way living another kind of life. They were not mere memory memorials.

More self-conscious memorial monuments and pompous tombs came in with the Hellenistic decline. The great “Mausoleum” of the semi-oriental satrap was soon followed by huge trophy monuments, triumphal arches, and sculptured memorial pillars. All these are heathen, imperial, and part of the apparatus of hypnotism by pomp.

On the other hand, great and serious works of service have generally been associated with the thought of memorial purpose. It was known that only life can ensure further life: only living grain can fructify.

Pericles rebuilt the sacred high city of Athens as a memorial of the Persian War. Alexander founded Alexandria as a memorial to himself. S. Sophia, Constantinople, was in some degree a memorial of the putting down of the Nika riots. So our own wise Alfred re-founded London after withstanding the Danes. Most of the great works of men have been memorials, and all the greatest memorials have been aids to life. The earliest churches were martyr memorials.

In the Middle Ages the favourite memorial was abbey founding, and abbeys were experiments in community life. At the Renaissance time colleges, schools, almshouses were built. “Almshouses “: the very words are memorially beautiful if we had not starved the meaning, so thin, bony and grim cold as charity. Of modern-time works Waterloo Bridge is very far the finest memorial we have; indeed, it is in a different category from “memorials proper,” and is in its way perfect. Again, the Albert Hall is as much better than the Albert Memorial as it is more serviceable. Trafalgar Square is at least superior to the Nelson Column. Only reality can give the true monumental note.

If we think again of our need and purpose, there is an enormous volume of noble constructive work which is necessary to the life of the people, works from those of a national scale down to those suitable for our villages.

The nation might consider some such schemes as the following:-

  1. Town and village re-building and re-enlivening. A general effort after health, joy, and beauty; a policy of weal in place of “wealth,” festivals, folk-schools, eisteddfods, stadiums.
  2. The establishment of a dozen new universities of experimental types, recognising crafts, art, and all kinds of research, production, making, and doing.
  3. National old-age hospitals in place of the feared and hateful workhouse infirmaries.
  4. Country redemption and general tidying up, burying old tins, burning old paper, and tearing down insulting advertisements.
  5. Making the railway system rational, efficient, and orderly: our stations and station-yards must be nearly the worst in the world.
  6. An Irish Channel tunnel and finely constructed railway to a port on the Atlantic. A really worthy gateway to the West, a British Appian Way.
  7. The setting up of a Ministry for Civilisation, which would recognise the need for national story, music, drama, and art, and give some attention to our wretched coins, stamps, public heraldry, and “brilliant ceremonies.”
  8. The re-building of the greater part of London.
  9. The embanking and guiding our over-flooding rivers, and planting the wasteful hedges with fruit trees.
  10. The organising of summer camps attached to all large towns, where some of the experience gained during the war might be maintained.

Every county might experiment in building a new town. Every town might throw out a garden suburb. Every village might build at least one stout and neat little house which might be let to someone who has suffered. It would be perfectly easy to put a worthy commemorative inscription and list of names on such a building. Organised labour could make use of the memorial motive in founding a town for craft teaching and industrial research, also for experiments in well living in small houses. The ideal is certainly the house which could be worked without slavery and without the greasy waste and hidden squalor of rich houses. How best to live with the least consumption is an aim which might safely be put before all people when a time comes for considering possible ideals in civilisation. Here indeed would be a fair field for the play of our competitive energies. We need a practice of economic experiment and research, health laboratories, group living, community hospitality, better cooking, and some human amusements which don’t pay dividends. The material appliances of our civilisation are altogether inadequate. We badly need Wisdom in her works as well as in her words. We have to think of civilisation as a whole, as an ambition, as experiment. If we could establish a wisdom council on this one object of making worthy memorials the precedent might widen, and it might at last be remembered that even Government must recognise that it has to be more than an “administration.” Some day when we have learnt not to slay ideals with our “sense of humour” we may find it desirable to have a Minister for Civilisation.

The ever-accelerating momentum of modern life — or existence has passed into eccentric orbits, and we seem to prefer to patch wreckage rather than to make a plain way. A special effort is necessary to find the bare data for rational production. It is hardly possible to get it understood’ that a “work of art” is not a design thrown off by a genius, but it is a piece of honest work consecrated to a noble purpose. At least a work of art implies workmanship. Labour of course must-be cast into appropriate forms, but the craftsmen saw to that before “design” became the tastes and whims of middlemen. We have to wake to the understanding that nobody really cares for “art” sterilities, and we are not even able to do them speciously well. After the mayor’s speech at the unveiling function we turn our backs on our monuments, and never speak of them again; except of some which we make into whetstones to sharpen our wits, or rather our tongues.

Those strange peoples the ancients made memorials simply and directly, building their hearts into them. We have heart, too, but not frankness; we seek manner, not speech; and we spend our strength in preliminary anxieties, so that the works themselves are born tired.

The very names we call the “styles” confess all. Designs in Greek, Roman, Byzantine, Gothic, Elizabethan, and Georgian styles are only waxworks in a chamber of horrors.

Ornamental design is dealing with signs and symbols, the saying of something in another mode of language. Our hope in some abstract beauty which shall say nothing, being without natural affection, meaning, feeling, heart or head, is altogether vain. These designs in the “grand manner” are pompous nullities, which only advertise that dulling of the spirit we call education. In seeking the beautiful nothing we seek a ghost which is not there. May we not sometime learn from our failures, and so make these, too, of worth? Must hope be always the bud of disappointment? A designer takes infinite pains to be quite safe and non-committal, and then committees sit on the “design” till it has been finally made dull arid dead. Nothing living can pass through the torture of anxious committees. In a work of art courage is needed and an untired mind in the worker. Every fine work is the embodied enthusiasm of maker-poets we cannot take fire from the cold ashes of committee compromises or the reflected flames of stylists.

We are not ready to produce works of art consciously poetic wherefore again let us do things obviously useful for life’s sake. Above all things the returned soldiers, or their widows and mothers when they return no more, need houses. Would not a pleasant, tidy little house in every village bearing on a panel, MEMORIAL COTTAGE, and other words and names, be the most touching, significant, and beautiful of all possible monuments?

W. R. LETHABY.

HARTLEY WINTNEY, HANTS.

Posted by: michaeldaybath | September 26, 2019

Arnhem and Oosterbeek, 75 years on

Arnhem: John Frostbrug and Eusebiuskerk (Gelderland)

Arnhem: John Frostbrug and Eusebiuskerk (Gelderland)

Seventy-five years ago today, on the 26th September 1944, Operation Market Garden came to an effective end with the evacuation of the remnants of the British 1st Airborne Division across the Neder Rijn (Lower Rhine) from the village of Oosterbeek. The operation had commenced with high hopes on the 17th September, with three Allied airborne divisions landing in the Netherlands in an attempt to capture river crossings (Operation Market), which were then intended to be consolidated by the rapid arrival of ground forces from the British XXX Corps (Operation Garden). The night before before the withdrawal of the 1st Airborne on the 25th/26th September, the 4th Battalion of the Dorsetshire Regiment made an assault crossing of the Neder Rijn to the west of Oosterbeek.

The first part of this post will provide a short summary of a personal visit to Arnhem and Oosterbeek undertaken on the 20th September 2019, which happened to coincide with the 75th Anniversary of Market Garden. This will be followed by a short account of the operation, focusing on the crossing of the Neder Rijn by the 4th Dorsets on the night of the 24th/25th September 1944.

Arnhem:

I was staying at Leiden, so I left the hotel at 09:00 and took the next train from Leiden Centraal to Utrecht Centraal, from where I changed onto a Nijmegen service. I arrived at Arnhem Centraal at around 11:30. Almost as soon as I had arrived, there was a flypast of several C-130 aircraft, which I think would at some points during the weekend were doing parachute drops.

Arnhem: US Marine Corps C-130 (Gelderland)

Arnhem: US Marine Corps C-130 (Gelderland)

The city of Arnhem itself was in the midst of its annual Airborne commemorations, with plenty of special events planned to mark the 75th anniversary. All of the streets in the centre of the city were decorated with maroon and pale blue Pegasus airborne forces flags and many shops had incorporated historical photographs of the damaged city into their window displays. On heading into the city centre, I eventually ended up at the Eusebiuskerk. On venturing inside, I found that visitors could pay to visit the tower, with elevator access to a video presentation on the battle as well as the carillon and some viewing platforms.

The second floor had a video presentation following the experiences of a firefighter who in 1944 had acted as a lookout in the Eusebiuskerk tower. It told the story of the arrival of the 1st Airborne Division on Sunday, 17th September, and its bitter aftermath, including the departure of civilian refugees after the failure of the Allied operation and the rebuilding that followed the end of the war. The war took its toll on the Eusebiuskerk, leading eventually to the collapse of the church tower.

Arnhem: View from the tower of the Eusebiuskerk (Gelderland)

Arnhem: View from the tower of the Eusebiuskerk (Gelderland)

The elevator had a mind of its own, so it took a little while to get to the next stage of the visit, which was the sixth floor. This brought visitors out at the level of the carillon bells, with staircases leading down to the booth containing the carilloneur’s clavier. Cantilevered out from the east and west side of the tower, however, were two glass viewing galleries.

Arnhem: The John Frostbrug and the Nederrijn, from the tower of the Eusebiuskerk (Gelderland)

Arnhem: The John Frostbrug and the Nederrijn, from the tower of the Eusebiuskerk (Gelderland)

Being careful not to look down too suddenly, I ventured out on these to take in the views of Arnhem and the Neder Rijn valley. On the east side was the Sint-Walburgiskerk and the replacement for the well-known “bridge too far” over the Neder Rijn (the John Frostbrug); on the west could be seen the river working its way down towards Oosterbeek and beyond. The bridge had a large screen attached, as preparations were underway for an evening multimedia event known as “Bridge to Liberation.” At this point in my visit, there was a slight disappointment, as an Eusebiuskerk representative came to inform all visitors that the church would be closing shortly, requesting that we return to the second floor gallery or  exit. The elevator was still behaving oddly, so this process took a rather long time. The end result was, however, that I (and several others) never actually got to the viewing gallery on the seventh floor.

Arnhem: John Frostbrug (Gelderland)

Arnhem: John Frostbrug (Gelderland)

As soon as I left the church, there was yet another flypast of the C-130s. I walked past the  Sint-Walburgiskerk to the memorial on Airborne Plein, and then up to the Rijn Bridge itself. The footpath on the east side was open, so I walked across and along the Neder Rijn a few hundred yards to the east. I then retraced my steps back over the bridge and prepared to explore the north bank of the river in the city.

Arnhem: The John Frostbrug and a temporary stage set up for the "Bridge to Liberation" event (Gelderland)

Arnhem: The John Frostbrug and a temporary stage set up for the “Bridge to Liberation” event (Gelderland)

There was another memorial in the form of a 25 pdr field gun just to the north of the road running parallel to the Neder Rijn. On the other side, a stage (for the “Bridge to Liberation” event) had been set up on the river itself, and a sound check was in progress as I passed by (a woman was singing a cover version of Cyndi Lauper’s “True Colours”). Eventually leaving the riverside, I headed back to Arnhem Centraal Station to find a No. 51 bus that would be able to take me to Oosterbeek.

Oosterbeek:

I got off the bus at the stop nearest the Oude Kerk in Oosterbeek, which is on Benedendorpsweg. As with Arnhem, Oosterbeek was also very busy with visitors (and almost every building had a Pegasus flag).

Oosterbeek: Memorial marking the withdrawal of 1st Airborne Division on the 25th/26th September 1944 (Gelderland)

Oosterbeek: Memorial marking the withdrawal of 1st Airborne Division on the 25th/26th September 1944 (Gelderland)

I had been to the Oude Kerk before, on a damp, grey day in late November 2013, when the church was not open. This time, a pathway marked by white tapes led down to a memorial next to the Neder Rijn. Before visiting the church, I therefore took a quick walk down this part of the “White Ribbon Mile” [1]. Adjacent the river was a memorial marking the evacuation of 1st Airborne on the night of the 25th/26th September 1944 (Operation Berlin). During this operation, troops were ferried at night across the river in small boats operated by sapper field companies of the Royal Engineers and Royal Canadian Engineers. From the beach near the memorial on a sunny afternoon, the southern bank of the river did not seem that far away, but in September 1944 the river would have represented a significant obstacle.

Oosterbeek: Oude Kerk (Gelderland)

Oosterbeek: Oude Kerk (Gelderland)

Leaving the river bank, I walked back to the church and had a quick look inside before heading eastwards to my next riverside destination, the Heavadorp-Driel ferry. The line of the river has changed since September 1944, but the ferry marks the area where the 4th Dorsets made their crossing om the 24th/25th September. To the north of the ferry is the high-ground of the Westerbouwing, which was defended by the Germans as the Dorsets made their crossing. Waiting in the car park by the ferry were a large number of Polish soldiers. While I was there, a coach came to take them on to their next rendezvous.

Driel: The Heveadorp - Driel ferry crossing with the Westerbouwing on the horizon (Gelderland)

Driel: The Heveadorp – Driel ferry crossing with the Westerbouwing on the horizon (Gelderland), June 2011

In retrospect, I wish that, after visiting the ferry, I had walked up to the restaurant on the Westerbouwing, which has memorials to the 4th and 5th Dorsets and to the 1st Battalion, Border Regiment (in 1944, part of 1st Airborne Division) — as well as splendid views across the Nederrijn valley towards Driel and beyond.  However, I had previously visited the restaurant in June 2011, and was determined to press on in the hope that I would have time to visit Arnhem Oosterbeek War Cemetery before it got dark.

Oosterbeek: Arnhem Oosterbeek War Cemetery (Gelderland)

Oosterbeek: Arnhem Oosterbeek War Cemetery (Gelderland)

I therefore followed a footpath (Kerkpad) back to the Oude Kerk and then walked up the hill into the main part of Oosterbeek, which was by this time very much in party-mode. I made a quick diversion to the Hartenstein (now the Airborne Museum) before walking up Stationsweg to Arnhem Oosterbeek War Cemetery. Seating had already been laid out in the cemetery for the flower-laying ceremony on the Sunday (and perhaps other anniversary events) and many of the grave markers had been decorated with flags and photographic portraits. This was especially true for the grave markers of the Polish armed forces.

Oosterbeek: Polish Forces grave marker in Arnhem Oosterbeek War Cemetery (Gelderland)

Oosterbeek: Polish Forces grave marker in Arnhem Oosterbeek War Cemetery (Gelderland)

The cemetery contains the graves of thirty-one members of the Dorsetshire Regiment, all dating from late 1944. Only four of them served with the 4th Battalion, more of whom are commemorated on the Groesbeek Memorial or are buried elsewhere in the Netherlands. A larger number (nineteen) had served with the 5th Battalion, which was one of the first 43rd (Wessex) Division units to arrive at Driel. The remaining eight Dorsetshire graves commemorated those who had served in the 1st Battalion, who were part of 231 Infantry Brigade in the the 50th (Northumbrian) Division.

Oosterbeek: Grave marker of Cpl. Arth Schofield, 4th Dorsets, died 24th September 1944, Arnhem Oosterbeek War Cemetery (Gelderland)

Oosterbeek: Grave marker of Cpl. Arthur Schofield, 4th Dorsets, died 24th September 1944, Arnhem Oosterbeek War Cemetery (Gelderland)

With the 75th anniversary in mind, I looked for grave markers commemorating soldiers that had died on the 20th September 1944. There were many. For example, in Plot 6, I found the grave marker of Major Charles Neville Bruce Dawson, M.C. of the Royal Berkshire Regiment (Service No. 69165), who had been attached to the 4th Parachute Brigade HQ. Major Dawson was killed south-east of Wolfheze on the 20th September 1944, aged 27 [2].

Oosterbeek: Grave marker of Major C. N. B. Dawson, M.C., Arnhem Oosterbeek War Cemetery (Gelderland)

Oosterbeek: Grave marker of Major C. N. B. Dawson, M.C., Arnhem Oosterbeek War Cemetery (Gelderland)

After visiting the Cross of Sacrifice and signing the cemetery visitors’ book, I spent some time wandering amongst the (mainly) XXX Corps grave markers in Plots 7 to 14, before returning to Oosterbeek station and (via Ede-Wageningen and Utrecht Centraal) my hotel in Leiden.

Operation Market Garden:

Operation Market Garden commenced on Sunday 17th September 1944 with the landing of three Allied airborne divisions in the eastern Netherlands. Their role was to capture river crossings that were intended to be consolidated by the rapid arrival of ground forces from the British XXX Corps. In the most southerly sector, the US 101st Airborne Division quickly captured most of the bridges that had been assigned to them. To their north, the US 82nd Airborne Division captured the bridge at Heumen, but did not capture the key bridge over the Waal at Nijmegen until the 20th September. The British 1st Airborne Division landed successfully in their drop zones between Ede and Oosterbeek on the 17th and 18th September, but over subsequent days were unable to secure the key bridge over the Neder Rijn at Arnhem (the, so called, ‘bridge too far’). While the airborne divisions attempted to capture the river crossings, XXX Corps was supposed to advance rapidly through them towards (and over) the Rhine. For a variety of reasons, however, the lead units very soon fell behind schedule and the opportunity to capture the bridge over the Neder Rijn at Arnhem was soon lost.

On the 20th September, the same day that XXX Corps were finally able to cross the Waal at Nijmegen, a small force of British paratroops that had been holding the north side of the Arnhem bridge were finally pushed out. From that point on, the 1st Airborne were restricted to a shrinking pocket of land around the village of Oosterbeek, which was known to the British as the “Perimeter.” Even at that point, the remains of the 1st Airborne attempted to hold on, hoping that they could hold a bridgehead on the north bank of the Rhine until XXX Corps could arrive in strength.

Part of the 1st Polish Independent Parachute Brigade arrived at Driel (south of the Neder Rijn) on the 20th September. Some parts of that brigade were able to cross the river on the nights of the 22nd/23rd and 23rd/24th September, and these were used to reinforce the 1st Airborne’s Perimeter. However, the continued delays to the movement of XXX Corps further south – largely due to the dependence of the Market Garden plan on a single route of advance and supply – the position of the 1st Airborne on the north bank of the Neder Rijn had become untenable by the 24th September.

The 4th Dorsets crossing of the Neder Rijn:

At some point on the 24th September 1944, it was decided that what remained of the 1st Airborne Division needed to be withdrawn from the north bank of the river. In the meantime, however, units of XXX Corps were finally beginning to approach the southern bank of the Neder Rijn. On the 24th September, the 4th Battalion, Dorsetshire Regiment (part of 130th Brigade in the 43rd (Wessex) Division) and the Polish 1st Parachute Battalion were ordered to make a night crossing of the Neder Rijn. This may have originally formed part of a plan to reinforce (or extend) the 1st Airborne’s Perimeter, but by the time the crossing was put into operation it had undeniably become part of a withdrawal plan.

Oosterbeek: Driel - Heveadorp ferry (Gelderland)

Oosterbeek: Driel – Heveadorp ferry (Gelderland)

The commander of the Polish Parachute Brigade, Major-General Stanisław Sosabowski, objected to the planned operation, noting that the proposed crossing point near the route of the Heavadorp – Driel ferry was overlooked by German positions on the Westerbouwing. His objections were overruled, however, and preparations began for the night crossing. Anthony Beevor’s book on Arnhem notes that the presence of the German positions on the Westerbouwing meant that the proposed river crossing had effectively become an opposed assault [3].

Oosterbeek: Driel church from the Westerbouwing (Gelderland)

Oosterbeek: Driel church from the Westerbouwing (Gelderland), June 2011

In the circumstances, the commanding officer of the 4th Dorsets, Lieutenant-Colonel Gerald Tilly, did not view the prospect of crossing the Neder Rijn with particular enthusiasm. Beevor has recorded some of Tilly’s misgivings [4]:

He felt that his battalion was being ‘sent to its certain death’ for no good reason, so he left his second-in-command and adjutant behind. Tilly took Major James Grafton, one of his company commanders, aside afterwards. ‘Jimmy, I must tell you something because someone other than me has to know the real purpose of the crossing. We’re not going over to reinforce the bridgehead. We’re going over to try and hold it while the airborne is withdrawn. I’m afraid we’re being chucked away to get the airborne out.’

The 4th Dorsets moved up to Driel, arriving at around 21:30. There was still time for much else to go wrong, not least the late arrival of an inadequate number of boats for the crossing. Some trucks with rubber dinghies drove directly into German-held territory at Elst, and were captured, while other vehicles became bogged-down in the mud. The Dorsets did not get their (limited) number of boats until 01:00 on the 25th, and there were even fewer vessels available for the Polish paratroopers. The battalion history describes the start of the operation [5]:

At 0100 hrs on the 25th the forward companies moved down to the bank under a heavy artillery barrage; the first flight of boats left for the opposite bank and was immediately engaged by withering fire from the enemy. The crossing continued until 0215 hrs, when it had to be stopped owing to enemy pressure, though later three D.U.K.W.’d managed to get across with supplies.

Major Whittle of ‘B’ Company later provided an account of the crossing [6]:

The enemy opened up with counter-fire, and at least two of the ten boats in my company group were holed badly before reaching the bank. We were launching the first boat when they opened up with M.M.G. fire from the opposite bank, the boat sank, and we had several casualties. We discovered that this fire was on fixed lines, and by moving a few yards the remainder of the boats were launched successfully.

There was a strong current, and my two leading boats were swept rapidly towards the West where the factory, about 400 yards down stream, was ablaze, and we should have been beautifully silhouetted. By using spades as well as the quite inadequate paddles we eventually landed about 100 yards East of the factory and got ashore without much trouble.

During the Dorsets’ crossing, the boats became separated and the battalion landed at various points of the northern shore, where the German defenders were dug in on the Westerbouwing heights above.

While an estimated 297 men and 17 officers of the 4th Dorsets crossed the Nether Rijn [7], they were unable to regroup in strength or to contribute that much to the defence of the Perimeter (which was further to their east). An article by Spencer Lane in Britain at War magazine explains why [8]:

Most of the Dorsets never regrouped in any organized fashion and were forced to fight in small, disorganised groups, no larger than a platoon, and often only twos or threes. Nor were they thoroughly integrated into the paratroopers’ defensive lines; although some made it into the paratroopers’ perimeter, many were in isolated positions, behind German lines or in a no-man’s-land near the river. Most were out of contact with any friendly units.

That included Colonel Tilly’s small party, who fought until they ran out of ammunition and then surrendered.

Many others were taken prisoner that night. Tim Saunders’s “Battlefield Europe” book on The Island records the experiences of of Private Mathews, a signaller from ‘C’ Company [9]:

We started to cross the river but a mortar shell hit the first boat, two comrades were wounded and had to be evacuated. We tried again later in a second boat, halfway over the officer i/c shouted “Turn back.” He was wounded and the boat riddled with shrapnel and bullet holes. We then transferred to another boat for the third time. The major was wounded but refused to be left behind. After many minutes of horror, toil and sweat, reached the other side. “Duce”, the company runner as I started to make our way to the RV [rendezvous] through dense woods in absolute darkness. We suddenly stopped, looking down the barrels of German rifles. I quickly turned the tuning dials off frequency on the radio set. We were blindfolded and marched away to a house. I was terrified. After being interrogated and asked many questions, all our personal belongings were taken away. We were thrown into a cellar and left for several hours frozen stiff. The Jerries gave us some water and tiny pieces of bully beef.

The experiences of Private Aubrey Steirn, from the same company, were just as bad [10]:

At first light, we decided to move further into the woods in an attempt to gain contact with other members of the battalion. I was in the lead when a machine gun opened up on me from a very short distance. I was knocked over and remember, in what must have been seconds of unconsciousness, my past floating by and thinking I was too young to die. Obviously I was, because I came to in one piece, apart from a facial wound and a badly bruised shoulder where a burst of fire had “clipped” me and left metal fragments in my uniform. In the meantime, the Germans had been dealt with, and we moved on and encountered more fragments of the unit, including the CO. We occupied German trenches in the area and continued to operate until completely surrounded.

Oosterbeek: The Nederrijn (Gelderland)

Oosterbeek: The Nederrijn, near one of the embarkation points for Operation Berlin (Gelderland)

In his account of the 4th Dorsets’ crossing of the Neder Rijn, Beevor commented that, “like most of Operation Market Garden, almost everything went wrong, usually due to incompetence compounded by bad luck” [11]. General Sosabowski’s concerns had been fully justified, although it did not stop him being relieved of his command later in 1944, partly on the advice of Montgomery.

The following night, the remains of the 1st Airborne (and all others in the Perimeter, including a few of the Dorsets) were withdrawn across the Neder Rijn as part of Operation Berlin. Compared with much else that happened as part of Market Garden, this particular operation went reasonably well. It has been estimated that around 1,741 men of 1st Airborne, 160 Polish paratroopers, 75 Dorsets, and 422 glider pilots were evacuated over that night [12], and a few more would escape on subsequent nights. Despite that, around 200 of the Dorsets had been captured by the Germans. Those that died are commemorated on the Groesbeek Memorial or now rest in various Dutch cemeteries, including a handful buried in Arnhem Oosterbeek War Cemetery.

Operation Market Garden ended in failure, with the Allies still on the south side of the Rhine. John Buckley has described the Market Garden plan as “poorly conceived, ill considered and deeply flawed,” arguing that it stood little chance of success from even before it had begun [13]. Success depended upon all of key operational objectives being achieved within a very tight timetable — which even at the time should have seemed unlikely to happen. Buckley has concluded [14]:

Such was the small chance of resounding success in MARKET GARDEN when it began on 17 September, that any analysis should not look for reasons for failure as they were all too apparent, but more for why it came as relatively close as it did to succeeding.

References:

[1] White Ribbon Mile: https://whiteribbonmile.wordpress.com/

[2] Major Charles Neville Bruce Dawson:
http://www.pegasusarchive.org/arnhem/bruce_dawson.htm

[3] Anthony Beevor, Arnhem: the battle for the bridges, 1944 (London: Penguin, 2019), p. 308.

[4] Ibid., p. 317.

[5] G. J. B. Watkins, From Normandy to the Weser: the war history of the Fourth Battalion the Dorset Regiment, June, 1944 – May, 1945 (Dorchester: Henry Ling, 1956; reprint), p. 33.

[6] Ibid.

[7] Ibid.

[8] Spencer Lane, “Against the flow: the Dorsetshire Regiment at Oosterbeek,” Britain at War Magazine, 24th April 2017:
https://britainatwar.keypublishing.com/2017/04/24/against-the-flow-the-dorsetshire-regiment-at-oosterbeek/

[9] Tim Saunders, The Island: Nijmegen to Arnhem, September 1944 (Barnsley: Leo Cooper, 2002), p. 88

[10] Ibid.

[11] Beevor, op cit., p 317.

[12] Ibid., p. 332.

[13] John Buckley, Monty’s men: the British Army and the liberation of Europe (New Haven, Conn.: Yale University Press, 2013), p. 208.

[14] Ibid., p. 231.

Posted by: michaeldaybath | August 10, 2019

Private Thomas Leonard Ward, 11th Battalion, Australian Infantry

Ditcheat: War Memorial and the Church of St Mary Magdalene (Somerset)

Ditcheat: War Memorial and the Church of St Mary Magdalene (Somerset)

1859 Private Thomas Leonard Ward of the 11th Battalion, Australian Infantry died of wounds at Alexandria (Egypt) on the 10th August 1915, aged 25. Before emigrating to Western Australia, Private Ward was a bellringer at Ditcheat (Somerset) and a member of the Bath and Wells Diocesan Association of Change Ringers (BWDACR). He is the only Somerset bellringer known to be a casualty of the Gallipoli Campaign of 1915.

Private T. L. Ward, 11th Battalion. From: Western Mail (Perth), 10th September 1915, p 4.

Private T. L. Ward, 11th Battalion. From: Western Mail (Perth), 10th September 1915, p 4. Source: National Library of Australia.

Private Ward’s service records have been digitised and have been made available by the National Archives of Australia [1]. Cathy Sedgwick has also put together a comprehensive account of his life, based on genealogical records and other sources [2]. The short account published here is based on both of these, supplemented by other records made available from Findmypast [3].

Thomas Leonard Ward was born at London (St Pancras) on the 28th March 1890, although his birth wasn’t registered until the second quarter of the year. He was the son of Henry Walter Ward and Mary Anne Elizabeth Ward (née Bartlett). Cathy Sedgwick has noted that Thomas was baptised at St. Stephen’s Church, Canonbury Road, Islington on the 25th May 1890. The one-year-old Thomas L. Ward featured in the 1891 Census, when he was living with his parents at St Pancras (13, Murray Street). At the time, Thomas’s father, Henry W. Ward, was twenty-four years old (he had been born at Islington) and was working as an optician. His mother, Mary A. Ward, was twenty-three years old (and had been born at Ditcheat). They had married at Edmonton, Middlesex (registration district) in the fourth quarter of 1888. A younger sister, Mary Estelle Ward, arrived in the first quarter of 1894 (she was born at Camden Town).

At some point after the 1891 Census, Thomas’s father died, possibly the Henry Walter Ward that died at London (Pancras) in the second quarter of 1897, aged 29. Henry’s widow and her young family afterwards moved back to Somerset.

At the time of the 1901 Census, the family were living at the Post Office at Ditcheat, part of the household of Thomas’s grandmother, Mary Bartlett — who was a sixty-five years old widow, working as a sub-postmistress, draper, and grocer. Her widowed daughter, Mary Anne Elizabeth Ward, was twenty-three years old and described as assisting in the business. Thomas L Ward was eleven years old, his sister Mary E. Ward was seven. By the time of the 1911 Census, not that much had changed. All four had become ten-years older, but the most substantive changes were that Mary Bartlett had progressed to being a postmistress (as well as a draper and grocer), while the twenty-one-year-old Thomas Leonard Ward was working as a Postman.

At some point after the census, Thomas Leonard Ward must have emigrated to Australia. Looking at records of arrivals in the National Archives of Australia [4], the most likley candidate would the “Thomas Ward” that arrived at Fremantle, Western Australia from London on the “Australind” on the 4th November, 1911. Another possibility might be the “Thomas Ward” that arrived at Fremantle from London on the “Armadale” on the 1st July 1912 (although at the age of 29, this Thomas seems too old).

From his service records, we know that Thomas Leonard Ward joined the Australian Imperial Force at Narrogin, Western Australia on the 20th January 1915, aged 25. His attestation form records that, prior to his enlistment, Private Ward had been working as a farmer (this is borne out by his entry in De Ruvigny’s Roll of Honour, available from Cathy Sedgwick [2]). 1859 Private Thomas Leonard Ward was posted to the Depot Company on the 23rd January 1915 and then transferred to the 4th Reinforcements of the 11th Battalion, Australian Infantry on the 16th February 1915. He embarked for the Mediterranean from Fremantle, Western Australia on HMAT “Argyllshire” (A8) on the 19th April 1915. The landings at Anzac Cove would commenced a few days later, when HMAT “Argyllshire” was still on its way to the Mediterranean. Private Ward was taken on the strength of the 11th Battalion at Gallipoli on the 4th June 1915.

The 11th Battalion, Australian Infantry:

By the time of the Gallipoli campaign, the 11th Battalion, Australian Infantry was part of the 3rd Brigade in the 1st Australian Division. The battalion had been formed in Western Australia in August 1914, and the original battalion sailed from Fremantle at the end of October, arriving in Egypt in December. After a short spell at Lemnos, the 11th landed at Anzac Cove on the 25th April 1915. From Private Ward’s service records, we know that he was taken on the strength of the battalion (D Company) from the 4th Reinforcements on the 4th June, when the 11th were based at Anzac Cove. The War Diary of the 11th Battalion does not record Private Ward’s arrival, although entries later in the month do report on other arrivals from the 4th and 5th Reinforcements [5].

Towards the end of July 1915, the 11th Battalion returned to the line at a position named Tasmanian Post. The battalion was to take part in an attack on Ottoman positions, preliminary to the Battle of Lone Pine, which would commence on the 6th August.

Map of 11th Battalion, Australian Infantry attack near Tasmanian Post, 31st July 1915

Map of 11th Battalion, Australian Infantry attack near Tasmanian Post, 31st July 1915; from Bean, Official History of Australia in the War, Vol. II, p. 476.

Private Ward’s service records indicate that he was wounded (“bullet wound in back”) on the 1st August 1915. It is highly-likely, therefore that he was wounded in this action near Tasmanian Post. The War Diary of the 11th Battalion provides a broad outline of the attack [6] — although far more detail is available in the Australian Official History (see the Appendix).

27-7-15. The Bn. moved from Reserve Lines and relieved the 12th Bn, whose lines trenches we occupied at TASMANIAN POST. During the 2 weeks we were in Reserve we had to supply a large number of fatigue parties at all hours of the day and night. On some days as many as 450 men were thus employed so that the men got very little rest.

31-7-15. We received orders to storm and capture a line of Turkish trenches immediately in front of TASMANIAN POST. A party of officers and 200 men were detailed under Capt. R. L. LEANE to carry out the operation.
At moonrise, the Engineer Coy exploded 3 mines which had been prepared in communicating tunnels towards the Turkish trenches, immediately the storming party climbed over the Parapets and charged to the enemy trenches. These they occupied, bayonetting such Turks as did not run away at the approach of our troops.
The first line of the storming party was followed by the Working Party close at their heels and on getting into the trench they immediately got to work and made it defensible.
The storming party was divided into four Columns of 50 each commanded by the following officers – Capt. W. H. ROCKLIFF, 2nd Lt PUCKLE, C. E. M., 2nd Lt T. W. FRANKLYN and Capt. S.H. JACKSON.
A reserve of one officer and 50 men was placed on either flank, under Lt. DARNELL, A. H. and 2nd Lt POTTER, G. – When the trenches had been occupied it was found that a small portion was still in the hands of the enemy which divided our troops and prevented communications being established – An attempt to dislodge from a flank to dislodge the enemy having failed, 2nd Lt POTTER with 25 men was instructed to make another charge on this portion of the trench [?]. This was carried out with great dash and the whole length of enemy trench secured to us.
The whole operation was carried out with great coolness and dash and was led in a brilliant manner by Capt. LEANE.
Communications were soon opened up by the craters created by the explosion of the mines and further tools, supplies, &c, were taken forward to the trench.
The Garrison under very fire continued throughout the night the work of improving the trench and by daylight it was fairly well protected.
Our Casualties during the operation were Killed – 2nd Lt PUCKLE, C. E. M., Other Ranks 35, Wounded – Capt. R. L. LEANE, Capt. S. H. JACKSON, 2nd Lt POTTER, G., Other Ranks 70. – It was estimated that the enemy’s casualties were 60 killed, the wounded being carried away.

On the 1st August 1915, Private Ward was admitted to 1st Australian Casualty Clearing Station with an bullet wound in the back. He was the same day transferred to the hospital ship, HMHS “Rewa,” disembarking at Alexandria and being admitted to the 19th General Hospital in Alexandria on the 7th August. He died of wounds received in action on the 10th August, the cause of death being a gun-shot wound in the back. Private Thomas Leonard Ward was buried the same day by the Rev. Page in Alexandria (Chatby) Military and War Memorial Cemetery, Egypt (Grave Ref: J. 129.).

Back in Western Australia, the wounding of Private Ward was reported in the Roll of Honour published in the Western Mail (Perth) of the 10th September 1915 [7].

Ditcheat: War Memorial plaque (Somerset)

Ditcheat: War Memorial plaque (Somerset)

In Australia, Private Ward is commemorated on the Narrogin War Memorial in Western Australia and the Australian War Memorial in Canberra. In Somerset, Private Ward is commemorated on the war memorial at Ditcheat and the Bath and Wells Diocesan Association memorial in Bath Abbey.

Family background:

Thomas’s mother, Mary Ann Elizabeth Bartlett, was born at Ditcheat in the first quarter of 1868, the daughter of William Bartlett and Mary Bartlett (née Gardiner). She was baptised at Ditcheat on the 17th May 1868. Thomas’s father, Henry Walter Ward, was born at Islington in the 4th quarter of 1866, the son of Eliza Ward (née Whitmore), who was a widow by the time of the 1881 Census. Henry Walter Ward married Mary Ann Elizabeth Bartlett at Edmonton, Middlesex (registration district) in the fourth quarter of 1888. As previously related, Henry Walter Ward probably died at London (Pancras) in the second quarter of 1897, after which his widow and children returned to Somerset.

Thomas Ward’s grandmother, Mary Bartlett, was born Mary Gardiner on the 17th May 1834 at Hurcot, near Somerton (Somerset), the daughter of Henry and Elizabeth Gardiner. She was baptised at an independent church at Somerton on the 19th June 1834. She featured in the 1841 and 1851 Census as resident with her family at Hurcott, the eldest of several children. Mary Gardiner then married William Bartlett at St Cuthbert’s Church, Wells on the 2nd April 1860, when she was aged 24. William Bartlett was a grocer who had been born at Compton Dundon in around 1836, the son of Richard Bartlett (a farmer) and Elizabeth (Eliza) Bartlett. He was baptised at Compton Dundon on the 31st January 1836. According to their grave marker in Ditcheat churchyard, William Bartlett died on the 18th April 1899, aged 63, while Mary Bartlett died on the 5th September 1923, aged 88.

References:

[1] National Archives of Australia, Army Personnel Records WW1 (NAA: B2455, WARD THOMAS LEONARD, barcode #8347391):
http://www.naa.gov.au/collection/a-z/researching-war-service.aspx

[2] Cathy Sedgwick, WW1 Australian Servicemen  /  Women Commemorated in the UK: https://ww1australianscommemorateduk.weebly.com/ditcheat.html

[3] Findmypast: https://www.findmypast.co.uk/

[4] National Archvies of Australia, Passenger arrivals index, 1898-1972 (NAA: K269, 4 NOV 1911 AUSTRALIND, barcode #9878991):
http://www.naa.gov.au/collection/family-history/passenger-arrivals-lists-1897-to-1966/index.aspx

[5] AWM4 23/28/3, 11th Infantry Battalion War Diary, June 1915, Australian War Memorial, Canberra:
https://www.awm.gov.au/collection/C1341899

[6] AWM4 23/28/4, 11th Infantry Battalion War Diary, July 1915, Australian War Memorial, Canberra:
https://www.awm.gov.au/collection/C1341908

[7] The Roll of Honour: West Australians, Western Mail (Perth, WA), 10th September 1915; via National Library of Australia:
https://trove.nla.gov.au/newspaper/article/37431520/3492416

Appendix: An extract from the Australian Official History:

Charles Bean’s Official History of Australia in the War of 1914-1918 contained a very detailed account of the 11th Battalion’s action near Tasmanian Post on the 31st July and 1st August 1915.

THE staffs of the New Army brigades were about to reach Anzac; the accompanying portion of their artillery had already landed; the torpedo-boat destroyers had just entered upon the final week’s programme in their nightly bombardments, when General Birdwood was asked by Sir Ian Hamilton to make some further pretence of an intention to break out southwards from Anzac. It chanced that, a week previously, Brigadier-General MacLagan, commanding in the sector southernmost but one, had asked leave to drive the Turks out of an inconvenient position in which they had newly established themselves in front of Tasmania Post. This suggestion was now seized upon by Birdwood as offering an opportunity for a suitable demonstration.

[…]

As a matter of fact the completion of this trench [opposite Tasmania Post] was one of the measures taken by the 16th Turkish Division, when warned on July 27th to prepare for the coming British offensive, of which news had arrived from Germany. Such was the position when, on July 29th, Hamilton’s desire for a further demonstration on the southern flank was made known to the commander of the 1st Division, to whom Birdwood suggested that the new Turkish works opposite Tasmania Post might be attacked that night.

As, however, the capture of the post and not a mere raid was intended, MacLagan asked for two further days in which to have the tunnelling completed. The attack was accordingly fixed for moonrise on the night of July 31st, and was to be delivered by the 11th Battalion, which had then relieved the 12th in Tasmania Post. The operation was carefully planned. A portion of Snipers’ Ridge, where there were known to be at least two machine-guns and a trench-mortar bearing on the position, was to be bombarded during the afternoon by the newly-landed howitzers of the 13th (British) Division, with forty rounds of high-explosive shell. During the actual fight other enemy machine-guns in the northern bastion of Snipers’ Ridge were to be smothered with shrapnel, while the whole semicircle of surrounding positions would be kept as far as possible under shrapnel from the artillery and intense rifle-fire from the Australian trenches on that flank. At the hour of the assault mines were to be fired by the 3rd Field Company in each of the four tunnels, one under either end of the enemy’s trench and the others at even distances between. The assault was then immediately to be made by four parties under the command of Captain Leane — the same who on May 4th had led the raid upon Gaba Tepe. The signal for the attack was to be the lighting of a red flare on the parapet of the old firing line.

Early in the night of July 31st there was a violent outbreak of firing on the left of Anzac. It died down and left an almost unbroken quiet. As the moon began to rise, a single red light appeared on the black hillside behind Tasmania Post. Twenty seconds later, close in front of the post, a shower of red sparks, caused by the explosion of one of the mines, was projected twenty feet into the air, followed almost immediately by a second flash near by. Several rifles were fired from the position attacked, and the sparkle of distant rife-fire quickly ran along the surrounding ridges from Echelon Trenches to the Pine.

When the red light appeared, Captain Leane, whose four parties were lining the parapet of Tasmania Post, each opposite its allotted mine, had given the signal for the firing of the mines and for the attack. But there followed only two explosions, one at either end of the enemy’s trench. It was impossible to judge whether the other mines had altogether failed or whether their explosion was merely delayed, in which case there would be extreme danger for the centre parties. But there was only one wise course to pursue: Leane instantly led out the attack. As it reached the trench, the southern of the two central mines, which — like the northern — was a few yards short of the trench, exploded, burying one or more Turks and at least one Australian, who was already in the trench.

With the débris still raining from the air upon some of them, the parties reached the Turkish trench. The bombers, as they approached it, flung percussion bombs both into it and down the steep slope beyond. The trench proved to have a parapet of sandbags with large sand-bricks on its nearer side, behind which, jabbering and scrambling, and staring up in an amazed manner, was a line of Turks. The Australians stood firing down at it until spaces were cleared and they were able to jump in, the Turks rushing to the rear through the communication trenches. The central portion of the fire-trench was easily captured, and Leane thereupon turned his attention first to his left flank and then to his right.

The left party, under Captain Jackson, which had to traverse about sixty yards of No-Man’s Land, had found that the northern part of the trench “petered out” into the head of a washaway, which served the enemy as a communication trench. Beyond was the Wheatfield, in which were only some unfinished excavations. Some of the Western Australians dropped into the end of the trench; but Jackson and ten men found themselves in the cornfield north of the washaway. His men chased a few Turks down this gutter and, after killing several, returned. As one of the enemy’s machine-guns was playing in this direction, the open end of the trench was forthwith blocked with sandbags, while Jackson and his ten followers dug rifle-pits in the Wheatfield north of the washaway. His working party had not reached him, but Lance-Corporal L. B. Taylor, twice going to the captured trench, brought thence a dozen men. Tools and sandbags were also thrown from the trench into the washaway, whence Jackson’s men fetched them. The head of the washaway was then filled and protected with a breastwork, this labour continuing during the night.

The mine in front of Lieutenant Franklyn’s party, which started south of Jackson’s, failed to explode, but the enemy, on being attacked, ran off through a short communication trench into the Valley of Despair. Leane at once ordered Sergeant Louch to block this exit with sandbags. Then, seeing that the left was safe, he turned to ascertain the situation on his right.

As he proceeded southward, he observed that several men who were endeavouring to cut fire-steps in the wall of the trench fell shot from the rear. In order to solve this puzzle he sent his “observer,” Lance-Corporal F. Smith, to get touch with the party on that flank. Smith presently reported that a strong party of the enemy intervened.

The right central party, under Lieutenant Puckle had been unable to clear its sector of the trench. The mine on its front was that which exploded late, burying one or more of its men. Most of them, however, leapt into the trench some distance north of it, the Turks at the same time recoiling southward. Some of these withdrew into a Y-shaped washaway on the valley-side, and others into a trench-bay which projected sharply towards the Australian line. Puckle endeavoured to seize the opening to the washaway and thus cut off the enemy in the bay, but he and several of his men were killed. A barricade was therefore hurriedly raised across the trench, the enemy remaining in the bay south of it, from which he fired continually towards Tasmania Post.

The southernmost party of the 11th was under Captain Rockliff. Of its fortune Leane knew nothing, except that, by the sound, it was still fighting. As a matter of fact it had been engaged from the first in a severe struggle. As it reached the trench, the enemy at that end had been hurrying away down three short saps into the Valley of Despair. Rockliff’s men, who had reached the trench without a casualty, instantly began to tear down the sandbags of the Turkish parapet, and to throw them, together with the sand-bricks and any other available material, across the mouth of the communication saps, in order to block the exits. In the southernmost sap a number of the enemy appeared to wait in anticipation of further explosions, and the barricades were only a foot or two in height when these Turks began to creep forward again and throw bombs.

Rockliff’s four bombers had carried between them thirty-two percussion bombs, but many of these had been used, and the remainder were now soon thrown. A box of jam-tin grenades was to have been brought across, but its bearer could not be found. The supply was thus exhausted. A machine-gun under Sergeant Hallahan, which had accompanied the party, was set up on the edge of the trench, but was at once put out of action. When calls for ammunition were sent along the trench, no reply came back. On the contrary, amid the din of bombs, rifles, and shells were heard shouts: “There are Turks on the left!” But so critical was the position that Rockliff could pay little attention to this cry. From the open communication trench the enemy was bombing with impunity, and, though the Australians were throwing back some of the Turkish grenades, this situation could not have lasted long. Just then Rockliff, looking out from the back of the trench, saw lying in the open what appeared to be a box of ammunition. It was fetched in by one of the men, and was found to contain the missing jam-tin bombs. Clumsy though they were, their effect was decisive. The Australians threw one after another, the dust and smoke becoming so thick that there was some anxiety lest the enemy might creep round under cover of it and attack the trench from the rear. But the Turks had been driven far along their trench. The work of barricading the exits was resumed, Rockliff preventing his men from firing, as there were no visible, targets.

It soon became clear that the party was not connected with the one on its left. Corporal McNamara, in charge of the working party for Rockliff’s sector, had entered the trench alone farther north and found Turks in it immediately north of him. He had then turned southwards to join his own party, but found his way blocked by what he at first believed to be a fall of earth from the nearest mine. Clambering out of the trench and round this obstacle, he came on his men in a continuation of the trench five yards away. He set them to clear the trench and then discovered that it had never been fully dug through, but merely spitlocked. He reported this to Rockliff, who looking northwards, could see the flashes of the enemy’s rifles, firing over the rear of the trench, and occasionally the Turkish uniforms lit up by the flashes; farther north the Australian rifles fired in the opposite direction. Corporal McOmish, creeping out to within three yards of the portion held by the Turks, confirmed their presence there.

Sketch of Leane's position, from C. E. W. Bean, Official History of Australia in the War, p. 480.

Sketch of Leane’s position, from C. E. W. Bean, Official History of Australia in the War, p. 480.

Messengers from both Rockliff and Leane independently brought news of this discovery to the 11th Battalion headquarters. But in the meantime Leane made an immediate effort to oust the Turks. Their position was clearly marked by the flashes of their rifles and the burst of an occasional bomb. Upon Leane’s instruction, therefore, Lieutenant Franklyn and a dozen men attempted to charge over the open in rear of the trench towards these flashes. The position, however, was confused, since some of Rockliff’s men, apprehensive of attack from the rear, were intermittently firing in that direction. As the Turks were also opening with rifles and bombs, Franklyn’s party was driven back.

Shortly afterwards, however, the commander of the 11th, acting on Rockliff’s report, ordered Lieutenant Potter with a reserve platoon from Tasmania Post to charge the section held by the enemy. The trenches of the post were at this moment blocked with the passage of wounded men to the rear, which caused a difficulty in launching all the men simultaneously, and Potter himself was wounded as the attack started. But both he and Sergeant M. Ringwood, an old South African soldier, led small parties straight for the enemy, a burning immediately behind the Turks, serving as a guiding mark. They were met by heavy fire, eight of the fifteen with Ringwood being hit before the trench was reached. It was not captured, although several Australians were killed in it. A further batch of Potter’s men dashed forward soon after, losing heavily, but some reaching Leane’s position. Eventually a supply of grenades reached Leane and, as the Turks refused to surrender, they were attacked with these and shot down in the trench or when attempting to leave it. The outlet to the Y-shaped washaway was then hurriedly barricaded with their corpses and with sandbags pulled from the parapet, and the trench thus finally secured.

Meanwhile the four mine-tunnels were being opened for communication, Lieutenant Croker of the engineers having reconnoitred the craters and repeatedly crossed the open with his men, who with parties of infantry were opening the passages from both ends. The air in the tunnels being pure, three of them had within an hour been sufficiently cleared to allow sandbags and other material to be handed through the holes in the craters. But the regular passage of men was not possible till early morning, and during the night they traversed the open.

By 1.30 the gap between Rockliff and the main trench had been cut through by a shallow trench, which by 3.20 was “passable and defensible.” Along the rest of the position, by dint of heavy labour, the Turkish parapet was before daylight transferred to the eastern side, overlooking the valley, and in some places had been doubled in thickness; traverses had been made against enfilade, with well-recessed fire-bays between; in each bay fire-steps had been cut, loop-holes made, and the trench deepened. By the small hours three of the tunnels were open for communication. The northern flank was now protected by several low sandbag breastworks or sangars, standing isolated above the trampled yellow corn.

Both during the attack and afterwards the coveting fire of the Anzac artillery hampered the Turkish machine-guns, and the counter-attacks of the Turkish infantry, when once Rockliff had driven them back on the right, were feeble. One or two weak efforts were made to bomb up the southern communication trench, but were easily defeated by the throwing of a few jam-tin bombs. On the northern flank, shortly after midnight, signs of enemy movement in the Wheatfield were quickly suppressed by the fire of the 9th and 11th and of a machine-gun emplaced at one of the sapheads. Later, near the centre of the position, the observers perceived about twenty of the enemy clinging to the hillside close below them, but these were quickly dispersed with a few jam-tin and Lotbinière grenades.

Had this sharp action occurred three years later in an Australian sector in France, the regimental quartermaster would have had his settled part in it, and, whatever the conditions of weather or fighting, the troops would have been served with a hot drink, if not a hot meal, before daylight. But the importance of the commissariat in a fight was not yet realised. Water for the attacking troops had, it is true, been specially stored in Tasmania Post; but it does not appear to have been conveyed to them, probably in consequence of the difficulty of passing through the congested communication tunnels. For the same reason the dead of both sides had been left in the bottom of the trench, where they lay trampled on by the workers. The men were worn out with strain, absence of sleep, and heavy labour; when at dawn the Olive Grove batteries opened strongly upon the post with high-explosive, they were subjected to a severe trial of their nerve. Again and again the parapet was blown down. Part of the garrison was accordingly withdrawn into the tunnels, and most of the Wheatfield party was brought into the trench. Leane and many others were wounded. But at 5.30, when the bombardment ceased, no attack followed.

In the evening a company of the 12th relieved the 11th in the captured position (henceforth known as “Leane’s Trench”), and garrisoned it during that and the succeeding night. The fight, which had been a trying one, cost the 11th Battalion 36 killed and 73 wounded. On the Turkish side the loss was greater. The attack had cleared the enemy from a position from which he might subsequently have harassed the flank of the troops attacking Lone Pine. Its value as a demonstration must be judged in the light of later events.

From: C. E. W. Bean, The story of ANZAC from 4 May, 1915, to the evacuation of the Gallipoli Peninsula, 11th ed. (The Official History of Australia in the War of 1914-1918, Vol. II; Sydney, NSW: Angus and Robertson, 1941), Chapter XVII, pp. 475-484:
https://www.awm.gov.au/collection/C1416621

« Newer Posts - Older Posts »

Categories